


How to implement page navigation in flutter? In Android we use Intents to Navigate differernt pages
Similarly Flutter also has paginavigation.
To implement this page navigation in Flutter we need to use two classes Navigator and Route.
The Navigator is responsible for the stack structure processing of the page and the route processing of the Route complex page
The Navigator used the stack structure to manage pages.
When a page needs to be added, the stack method is used, when we need to exit a page use the pop-out method
Push and pop will handle all stack elements
Let’s Start Code
Create Two Pages
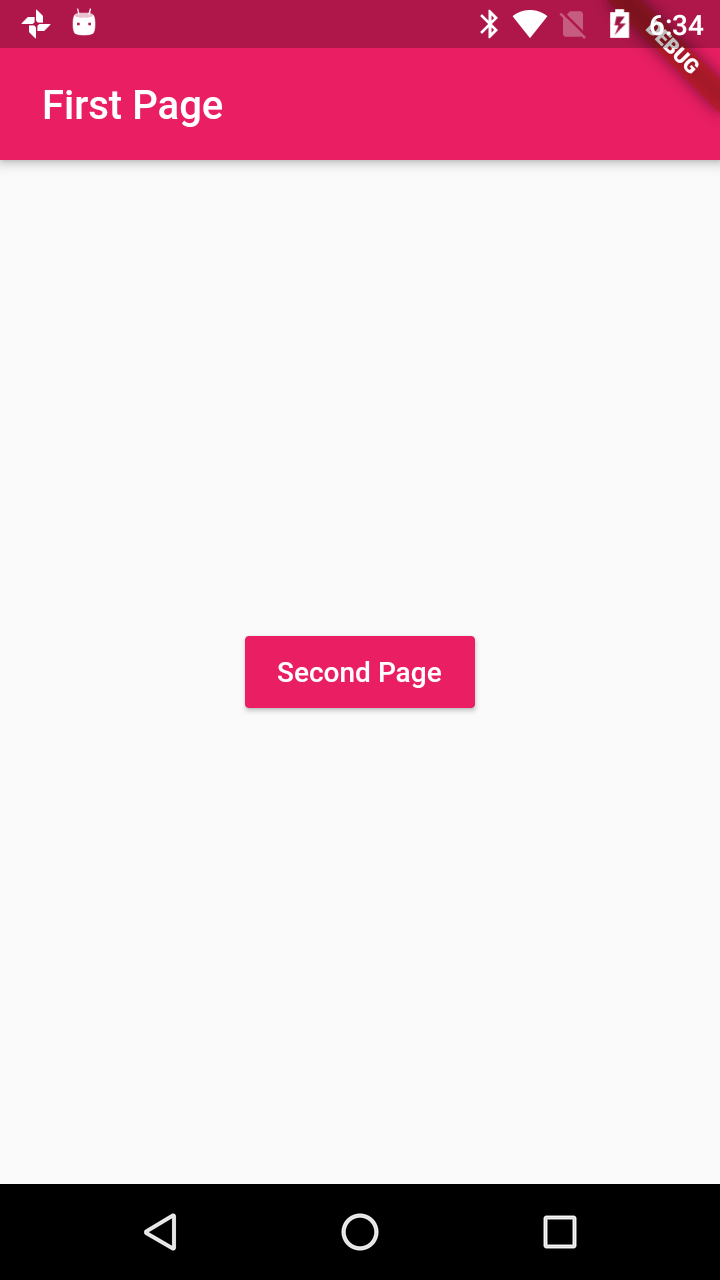
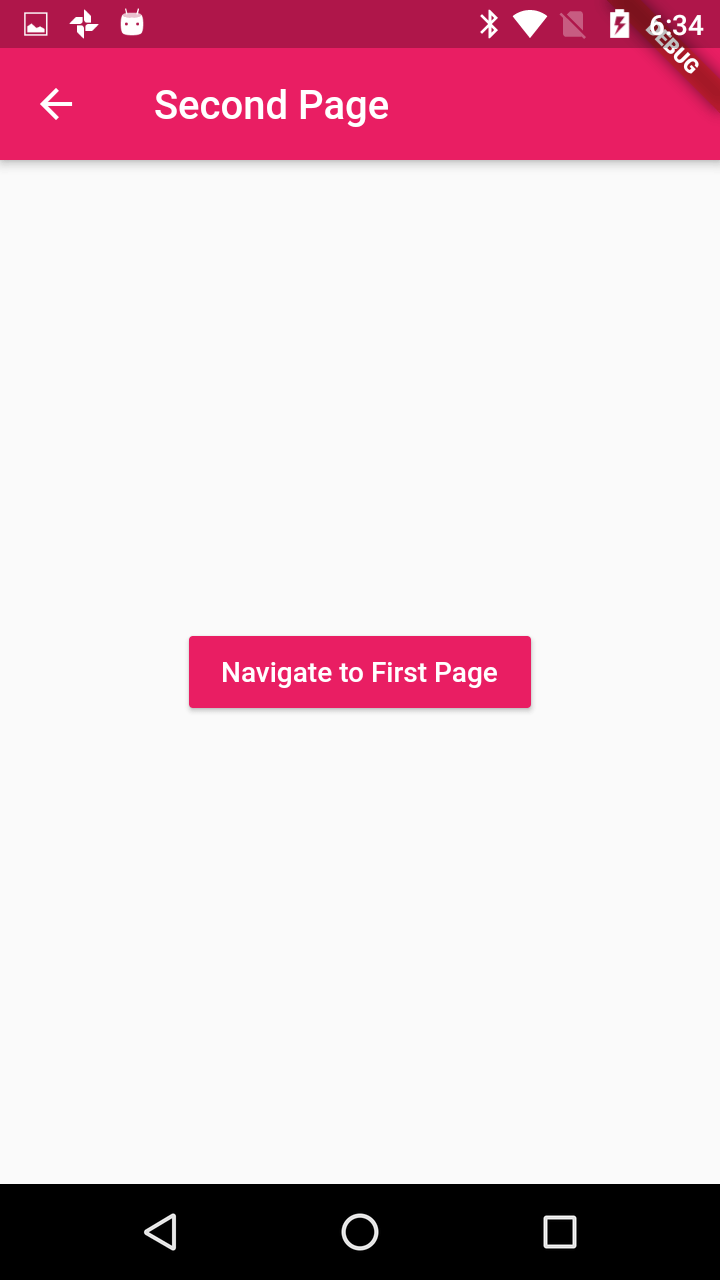
First, we will create two pages, each of which contains a button. Clicking the button on the first page will jump to the second page, and clicking the button on the second page will return to the first page
|
class FirstPage extends StatelessWidget{ @override Widget build(BuildContext context) { // TODO: implement build return Scaffold( appBar: AppBar(title: Text(" First Page"), backgroundColor: Colors.pink,), body: Center( child: RaisedButton( onPressed: (){
}, child: Text("Second Page", style: TextStyle(color: Colors.white),), color: Colors.pink, ), ), ); }
}
class SeconPage extends StatelessWidget{ @override Widget build(BuildContext context) { // TODO: implement build return Scaffold( appBar: AppBar(title: Text(" Second Page"), backgroundColor: Colors.pink,), body: Center( child: RaisedButton( onPressed: (){
}, child: Text("Navigate to First Page", style: TextStyle(color: Colors.white),), color: Colors.pink, ), ), ); }
} |
Now let’s jump to second page
In order to jump to the second page, we will use the Navigator.push method. This push method will add one Route to the routing heap managed by Navigator.
But the Push method requires one Route, but Route where does it come from? We can create our own Route, or use it MaterialPageRoute. MaterialPageRoute Conveniently, it will jump to a new page using platform-specific animations.
In the FirstScreen Widget build method, update the onPressedcallback
|
Return to the first
|
onPressed: () { Navigator.pop(context); }, |
Complete code
|
class NavigationDemo extends StatelessWidget{ @override Widget build(BuildContext context) { // TODO: implement build return FirstPage(); }
}
class FirstPage extends StatelessWidget{ @override Widget build(BuildContext context) { // TODO: implement build return Scaffold( appBar: AppBar(title: Text(" First Page"), backgroundColor: Colors.pink,), body: Center( child: RaisedButton( onPressed: () { Navigator.push( context, MaterialPageRoute(builder: (context) => SeconPage()), ); }, child: Text("Second Page", style: TextStyle(color: Colors.white),), color: Colors.pink, ), ), ); }
}
class SeconPage extends StatelessWidget{ @override Widget build(BuildContext context) { // TODO: implement build return Scaffold( appBar: AppBar(title: Text(" Second Page"), backgroundColor: Colors.pink,), body: Center( child: RaisedButton( onPressed: () { Navigator.pop(context); }, child: Text("Navigate to First Page", style: TextStyle(color: Colors.white),), color: Colors.pink, ), ), ); }
} |
Routing table (Named Routes)
Flutter also provided Navigation with NamedRoutes
The simple way is to define all routes in the runApp, so that centralized management is possible, which is also a very recommended approach
A MaterialApp is the easiest way to set it up, and the MaterialApp's home becomes the route at the bottom of the navigator stack. To push a new route on the stack, you can create a MaterialPageRoute instance with builder capabilities
|
class NamedRoutes extends StatelessWidget{ @override Widget build(BuildContext context) { // TODO: implement build return MaterialApp( home: HomePage(), routes: <String,WidgetBuilder>{ '/f':(BuildContext ctx)=> FisrtPage(), '/s':(BuildContext ctx)=> SecondPage(), '/t':(BuildContext ctx)=> ThirdPage(), }, ); }
}
class HomePage extends StatelessWidget{ @override Widget build(BuildContext context) { // TODO: implement build return Scaffold( appBar: AppBar(title: Text("HomePage"),backgroundColor: Colors.pink,), body: Center( child: Column( mainAxisSize: MainAxisSize.min, children: <Widget>[ RaisedButton( color: Colors.pink, onPressed: (){ Navigator.pushNamed(context, "/f"); },child: Text("FirstPage",style: TextStyle(color: Colors.white)),),
RaisedButton(
color: Colors.pink, onPressed: (){ Navigator.pushNamed(context, "/s"); },child: Text("SecondPage",style: TextStyle(color: Colors.white)),),
RaisedButton( color: Colors.pink, onPressed: (){ Navigator.pushNamed(context, "/t"); },child: Text("ThirdPage",style: TextStyle(color: Colors.white),),), ], ), ), ); }
}
class FisrtPage extends StatelessWidget{ @override Widget build(BuildContext context) { // TODO: implement build return Scaffold( appBar: AppBar(title: Text("FirstPage"),backgroundColor: Colors.pink,), body: Center( child: Column( children: <Widget>[ RaisedButton(onPressed: (){Navigator.pop(context,"From First page");},child: Text("FirstPage"),) ], ), ), ); }
}
class SecondPage extends StatelessWidget{ @override Widget build(BuildContext context) { // TODO: implement build return Scaffold( appBar: AppBar(title: Text("SecondPage"),backgroundColor: Colors.pink,), body: Center( child: Column( children: <Widget>[ RaisedButton(onPressed: (){Navigator.pop(context);},child: Text("SecondPage"),) ], ), ), ); }
}
class ThirdPage extends StatelessWidget{ @override Widget build(BuildContext context) { // TODO: implement build return Scaffold( appBar: AppBar(title: Text("ThirdPage"),backgroundColor: Colors.pink,), body: Center( child: Column( children: <Widget>[ RaisedButton(onPressed: (){Navigator.pop(context);},child: Text("ThirdPage"),) ], ), ), ); }
} |
To get the result from called page by
|
onPressed: (){ Navigator.pushNamed(context, "/f").then((value){ print(value); }); } |
After pop the screen the then() method will execute and print the result
Navigation switch animation
The default navigation switch animation is a pop-up process from bottom to top on Android, and a pan-to-left process from iOS
In order to unify, you can customize a route, including the color and behavior of the modal barrier of the route, and the animation conversion of other aspects of the route
You can find the example of Navigation Screen animation at Flutter Screen navigation with Animation
|
Article Contributed By :
|
|

|
|
|
984 Views |
|