How to create and modify a Table in Google Docs
Your content can be made more professional and organized using tables in Google Docs. Learn to create /modify tables with tutorials on rrtutors.com.
In this article, you will learn how to make a table in Google Docs and how to change its properties using "Table Properties". You will learn how to add and remove rows, add and remove columns, and change colors to customize your table.
How to create a table in Google Docs
It is pretty easy to create a table in Google Docs with the following steps:
Step 1: Create a new Google Docs document or open an existing one
 |
Step 2: Put your cursor where you would like your table to appear on your paper.
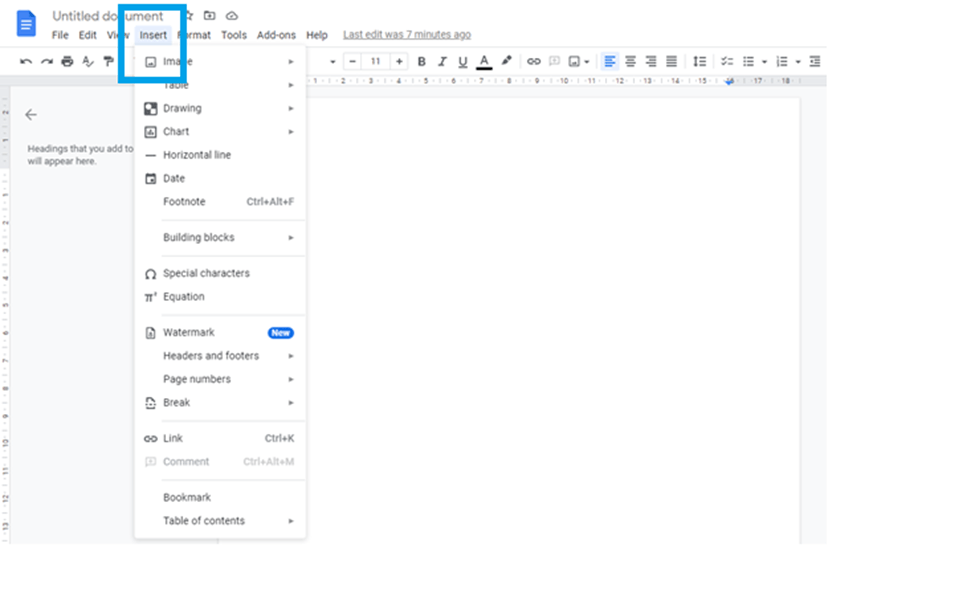
Step 3: Click on "Insert" in the Google Docs menu.
 |
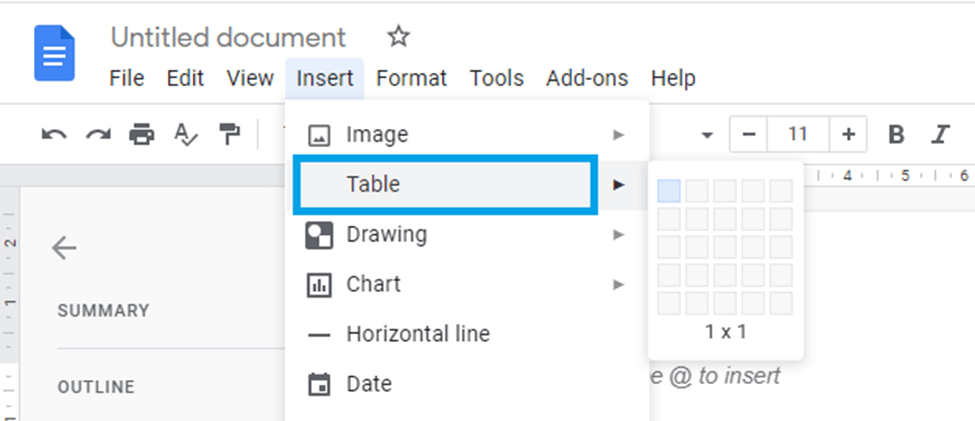
Step 4: Select "Table" from the "Insert" submenu
 |
Step 5: With your mouse, choose the number of columns and rows your table should have.
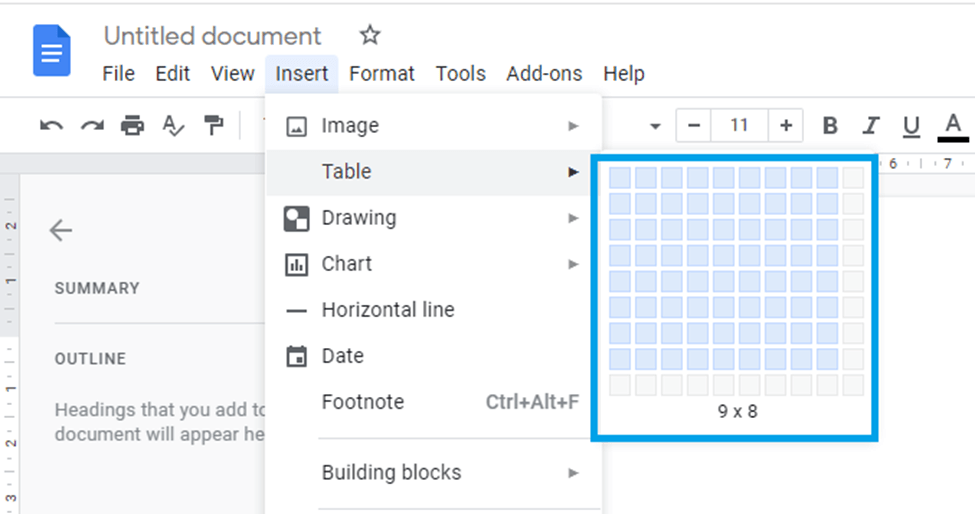 |
That's it. You'll now see the table in your document.
 |
Various Table properties in Google Docs
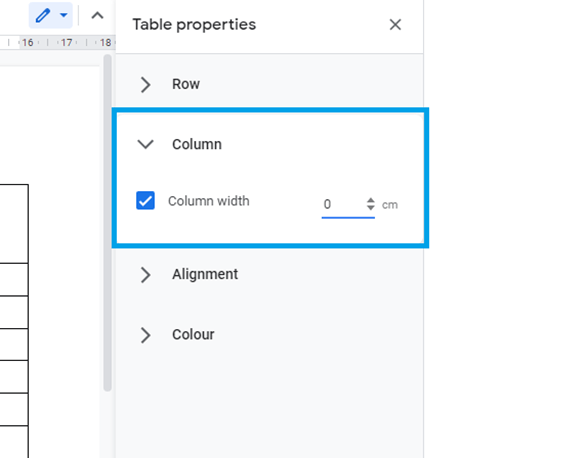
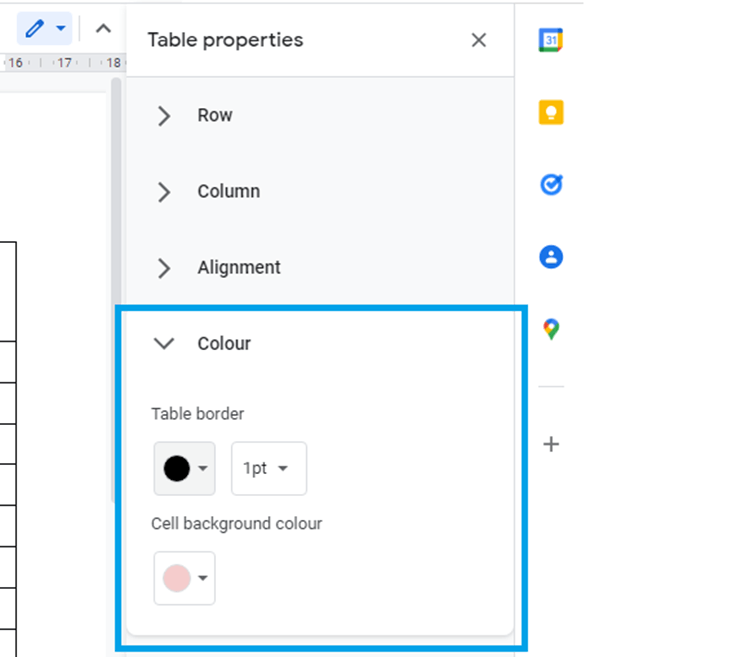
The preceding steps have shown us how we can insert a table into our document. Now we are going to learn how we can customize the appearance of our table using the “Table properties”. With “Table properties”, we can customize the table rows, columns, alignment and colour.
Follow the steps below to customize your table using the "Table Properties."
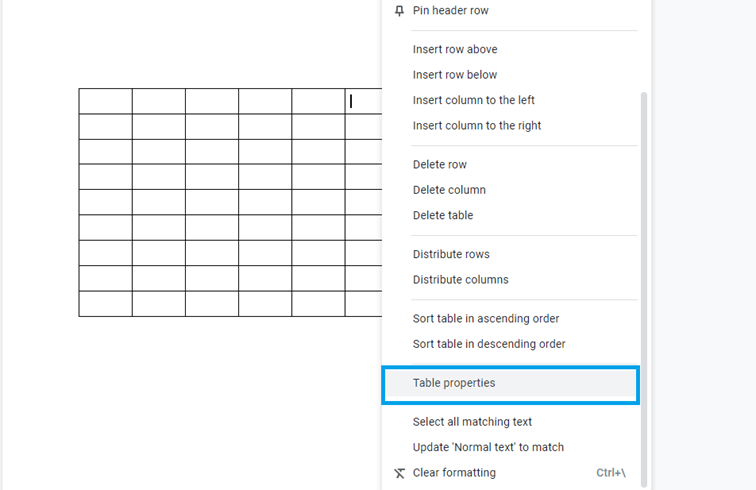
Step 1: Right-click on the table to view the customization options
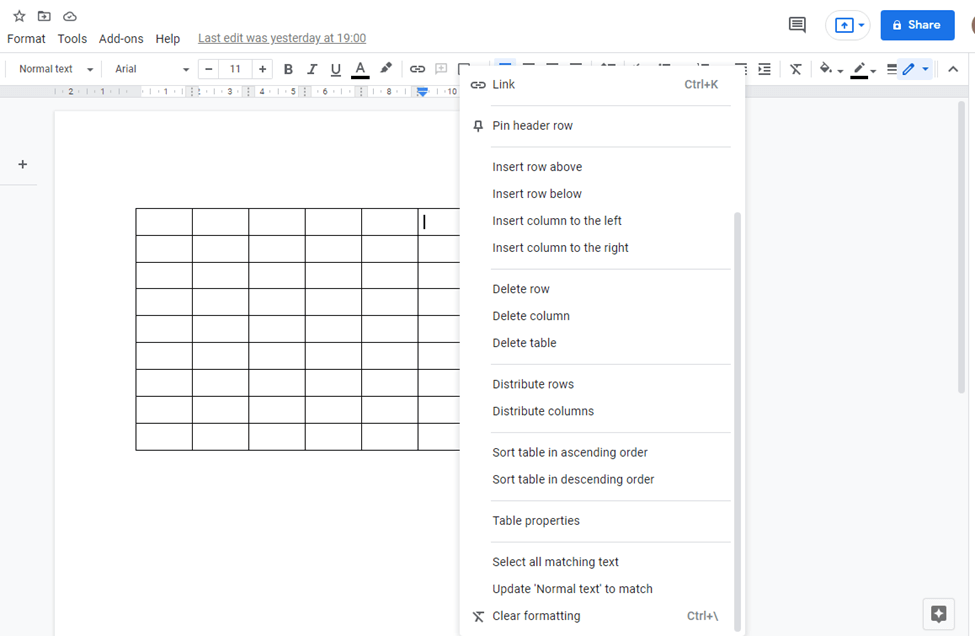 |
Step 2: Select "Table properties" now.
 |
Step 3: Update Rows
 |
Step 4: Update columns
 |
Step 4: Customize table alignment
 |
Step 5: Modify colour
 |
Conclusion
This article has taught us how to create and modify tables in Google Docs using "Table properties." If you wish to delete your table, simply click on it and press "backspace" or "delete" on your keyboar