5 Easy steps to setup Retrofit in Android App with Kotlin
In this chapter we are going to learn what is Retrofit and how to implement Retrofit Rest Client in Android application. As of now(2023 Jan) current version of Retrofit is "2.9.0". Retrofit is a network library which is developed by Square and it is a type-safe Rest client for Android. It is easy to use, such as calling or asynchronous processing, and is faster than other libraries such as Volley, so it has become a popular library.
To make retrofit more connectivity in the application we will use OkHttp together
OkHttp is a client which will helps us to use use Http easy way
|
Features of Retrofit
- Compare to other Network libraries, Retrofit is very fast.
- Retrofit enables direct communication with the web service.
- Retrofit will supports dynamic URLs.
- Retrofit supports both synchronous and asynchronous network requests.
- Retrofit supports converters.
- Using Retrofit we can cancel requests.
- Using Retrofit we can do Get, POST requests and multi part uploads.
CLASSES USED IN RETROFIT
POJO(Model) Class: A model class contains the objects to be obtained from the JSON file.
Retrofit Instance: This is a Java class. It is used to send requests to an API.
Interface Class: This is a Java class. It is used to define endpoints.
5 steps to implement retrofit android example
Add the retrofit dependency in gradle file
- Creating POJO Class
- Create Retrofit Instance
- Write Retrofit Interface to make the Network request methods
- Call the REST API Service
- Fetch Response and update on the UI
1. Add Retrofit dependencies inside gradle file
|
implementation 'com.squareup.retrofit2:retrofit:2.9.0' |
Add Internet permission to Manifest file.
Because of http communication, additional internet permission is required
<uses-permission android:name="android.permission.INTERNET"/> |
2. Create POJO (Model class)
Before create the Model classes we need to check the response of API.
Here we are using BookCategory api (from rrtutors)which will return books category.
This will return the response
|
{"categorylist":[{"id":"1","name":"Programming Books"},{"id":"2","name":"Entertainment Books"},{"id":"3","name":"Sports Books"},{"id":"4","name":"Business Books"},{"id":"5","name":"Love & Romance"},{"id":"6","name":"Fun Books"},{"id":"7","name":"Love & Romantic"},{"id":"8","name":"History"},{"id":"9","name":"Quotes Books"},{"id":"10","name":"Devotional Books"},{"id":"12","name":"Horror Books"},{"id":"13","name":"Academic"},{"id":"14","name":"Science Fiction"}],"success":1} |
So we need two model classes based on the response. We can create Model classes easily by using "https://json2kt.com/" tool which will convert json data to model classes.
Our Model classes will be like below
Categorylist.kt
|
import com.google.gson.annotations.SerializedName
@SerializedName("id" ) var id : String? = null, ) |
BookCategory.kt
|
import com.google.gson.annotations.SerializedName
@SerializedName("categorylist" ) var categorylist : ArrayList<Categorylist> = arrayListOf(), ) |
@SerializedName is used to map the POJO object into JSON response properties.
3. Create Retrofit Instance
We need to create the Retrofit instance to send the network requests. we need to use the Retrofit Builder class and specify the base URL for the service
To create Retrofit instance we will use Retrofit Builder class. For this we will pass the Base URl of the Rest API, add GsonConverterFactory along with OkHttpClient instance.
|
class AppClientManager private constructor() { |
4. Write Retrofit Interface to make the Network request methods
Now its time to write our network method calls. To do this we need to create an Interface and create methods for the network api methods.
APiService.kt
|
interface ApiService { |
here our rest api is get method, so we used @GET annotation for the method. We can use other methods like @POST, @PUT, @DELETE, @PATCH, or @HEAD
The endpoints are defined inside the interface using retrofit annotations to encode details about the parameters and request method. T return value is always a parameterized Call<T>.
Because the POJO classes are wrapped into a typed Retrofit Call class.
Method Parameters :
@Body — Sends Java objects as the request body.
@Url — use dynamic URLs.
@Query — We can simply add a method parameter with @Query() and a query parameter name, describing the type.
To URL encode a query using the form:
@Query(value = “auth_token”,encoded = true) String auth_token
5. Fetch Response and update on the UI
|
val apiInterface = AppClientManager.client.create(ApiService::class.java); override fun onFailure(call: Call<BookCategory>, t: Throwable) { |
If we get the response from the API, it will trigger inside onResposne() callback and we can handle the resposne data.
If the API get any errors then it will trigger inside onFailure() callback and we can show respected error message to the user.
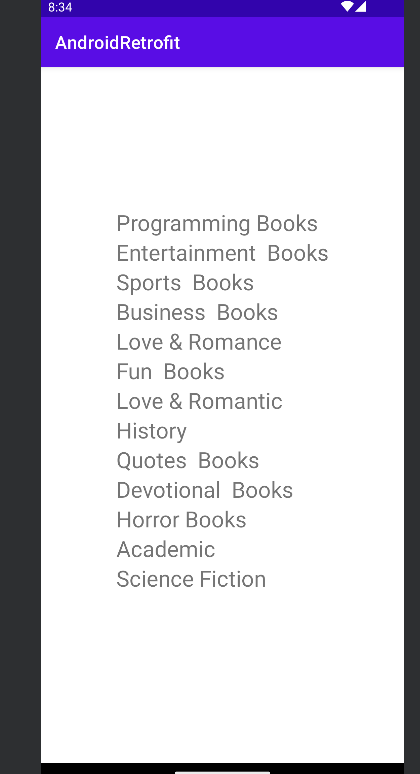
In this sample after fetching the Books Category we just display them on the UI using TextView widget. We can display list of categories inside Recyclerview, but here we are just focused on How to Implement Retrofit in Android application. We will cover Load data to Recyclerview in the coming chapters.
onResponse callback we append response to the TextView.
|
val k = 0 |
Now run the application on Physical device/emulator, you can fetch the data from API and display on the UI.
 |
Complete code For Android Retrofit Example with Kotlin code
Complete code for Retrofit in Android
MainActivity.kt
package com.example.androidretrofit

import android.annotation.SuppressLint
import androidx.appcompat.app.AppCompatActivity
import android.os.Bundle
import android.util.Log
import android.widget.TextView
import com.example.functionahal.network.ApiService
import com.example.functionahal.network.AppClientManager
import retrofit2.Call
import retrofit2.Callback
import retrofit2.Response

class MainActivity : AppCompatActivity() {
    lateinit var txt_response:TextView
    override fun onCreate(savedInstanceState: Bundle?) {
        super.onCreate(savedInstanceState)
        setContentView(R.layout.activity_main)
        txt_response=findViewById(R.id.txt_response)
        txt_response.setText("")
        val apiInterface = AppClientManager.client.create(ApiService::class.java);
        apiInterface.getBookCategories().enqueue(object : javax.security.auth.callback.Callback, Callback<BookCategory> {
            @SuppressLint("SuspiciousIndentation")
            override fun onResponse(call: Call<BookCategory>, response: Response<BookCategory>) {
                Log.v("response","Success response ${response.body()!!.categorylist}")

                val k = 0
                for (k in 0 until response!!.body()!!.categorylist.size)
                txt_response.append("${response!!.body()!!.categorylist[k].name}\n")
            }

            override fun onFailure(call: Call<BookCategory>, t: Throwable) {
                Log.v("response","Error response ${t.message}")
            }
        })
    }
}
|
activity_main.xml
<?xml version="1.0" encoding="utf-8"?>
<androidx.constraintlayout.widget.ConstraintLayout xmlns:android="http://schemas.android.com/apk/res/android"
    xmlns:app="http://schemas.android.com/apk/res-auto"
    xmlns:tools="http://schemas.android.com/tools"
    android:layout_width="match_parent"
    android:layout_height="match_parent"
    tools:context=".MainActivity">

    <TextView
        android:id="@+id/txt_response"
        android:layout_width="wrap_content"
        android:layout_height="wrap_content"
        android:text="Hello World!"
        app:layout_constraintBottom_toBottomOf="parent"
        app:layout_constraintEnd_toEndOf="parent"
        app:layout_constraintStart_toStartOf="parent"
        android:textSize="25sp"
        android:lineSpacingExtra="4dp"
        app:layout_constraintTop_toTopOf="parent" />

</androidx.constraintlayout.widget.ConstraintLayout>
|
build.gradle file
plugins {
    id 'com.android.application'
    id 'org.jetbrains.kotlin.android'
}

android {
    namespace 'com.example.androidretrofit'
    compileSdk 33

    defaultConfig {
        applicationId "com.example.androidretrofit"
        minSdk 24
        targetSdk 33
        versionCode 1
        versionName "1.0"

        testInstrumentationRunner "androidx.test.runner.AndroidJUnitRunner"
    }

    buildTypes {
        release {
            minifyEnabled false
            proguardFiles getDefaultProguardFile('proguard-android-optimize.txt'), 'proguard-rules.pro'
        }
    }
    compileOptions {
        sourceCompatibility JavaVersion.VERSION_1_8
        targetCompatibility JavaVersion.VERSION_1_8
    }
    kotlinOptions {
        jvmTarget = '1.8'
    }
}

dependencies {

    implementation 'androidx.core:core-ktx:1.8.0'
    implementation 'androidx.appcompat:appcompat:1.4.1'
    implementation 'com.google.android.material:material:1.5.0'
    implementation 'androidx.constraintlayout:constraintlayout:2.1.3'
    testImplementation 'junit:junit:4.13.2'
    androidTestImplementation 'androidx.test.ext:junit:1.1.3'
    androidTestImplementation 'androidx.test.espresso:espresso-core:3.4.0'
    implementation 'com.squareup.retrofit2:retrofit:2.9.0'
    implementation 'com.squareup.retrofit2:converter-gson:2.9.0'
    implementation 'com.squareup.okhttp3:okhttp:5.0.0-alpha.11'
}
|
Conclusion: In this android chapter we covered what is Retrofit and how to implement Retrofit in android application with using kotlin code.