Create a Dialog using GetX in Flutter
Display Dialog within the current screen. Create Dialog box using GetX. Master dialog creation in Flutter with guides on rrtutors.com. Start coding today!
GetX is an extra-light and powerful solution for Flutter. It combines high-performance state management, intelligent dependency injection, and route management quickly and practically.
So, we will see how you can use GetX to create a dialog in Flutter Let's start
Step 1: Create a new Flutter Application.
Step 2: Add a line like this to your package's pubspec.yaml
|
Step 3: Once installed replace your MaterialApp with GetMaterialApp for example
|
GetMaterialApp( debugShowCheckedModeBanner: false, theme: ThemeData( primarySwatch: Colors.teal, ), home: HomePage(), ); |
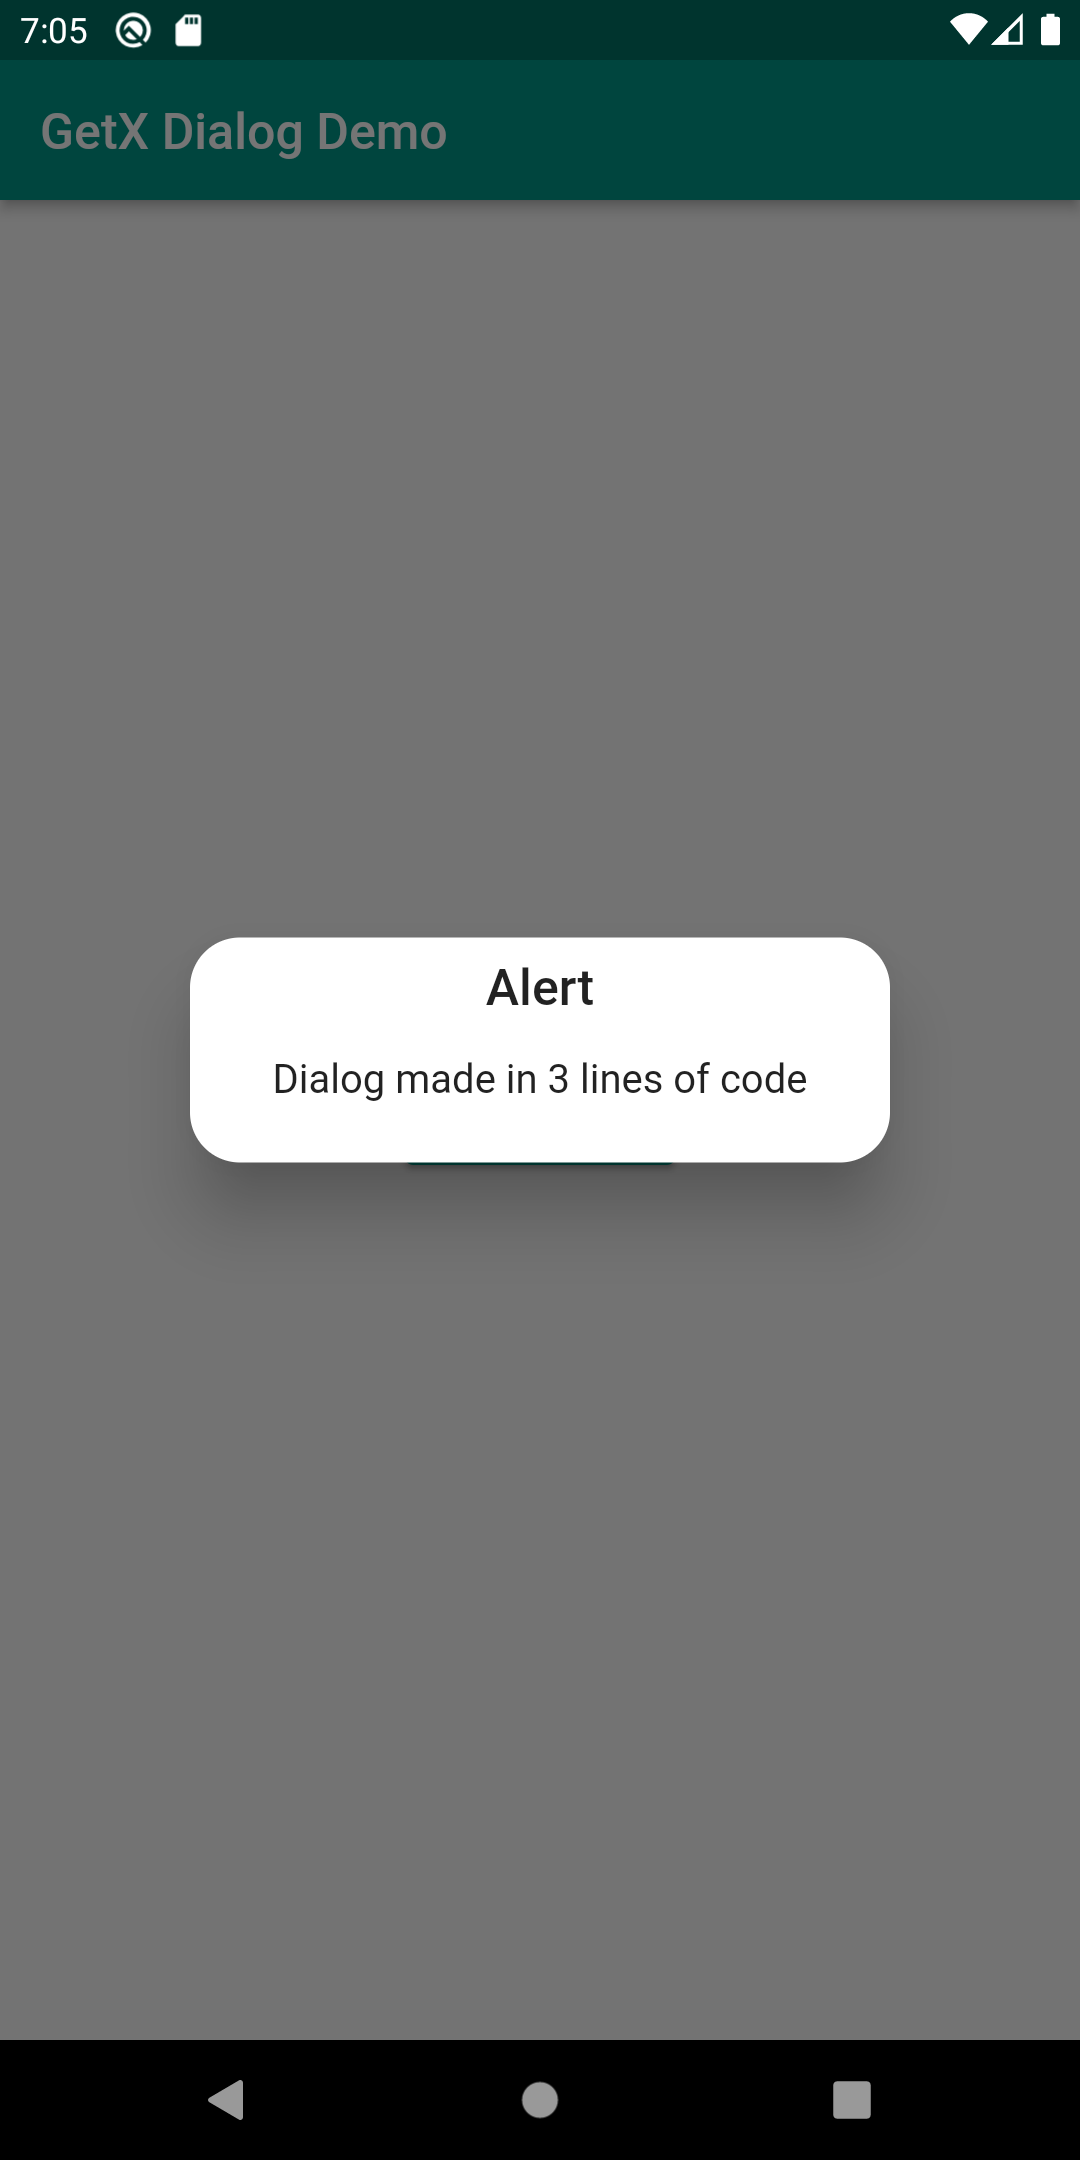
then you can create a button when pressed will open the dialog in Flutter, as early we have to write a lot of code to create a dialog with GetX Library you can simply use Get.defaultDialog() to open the Dialog.
for example:
|
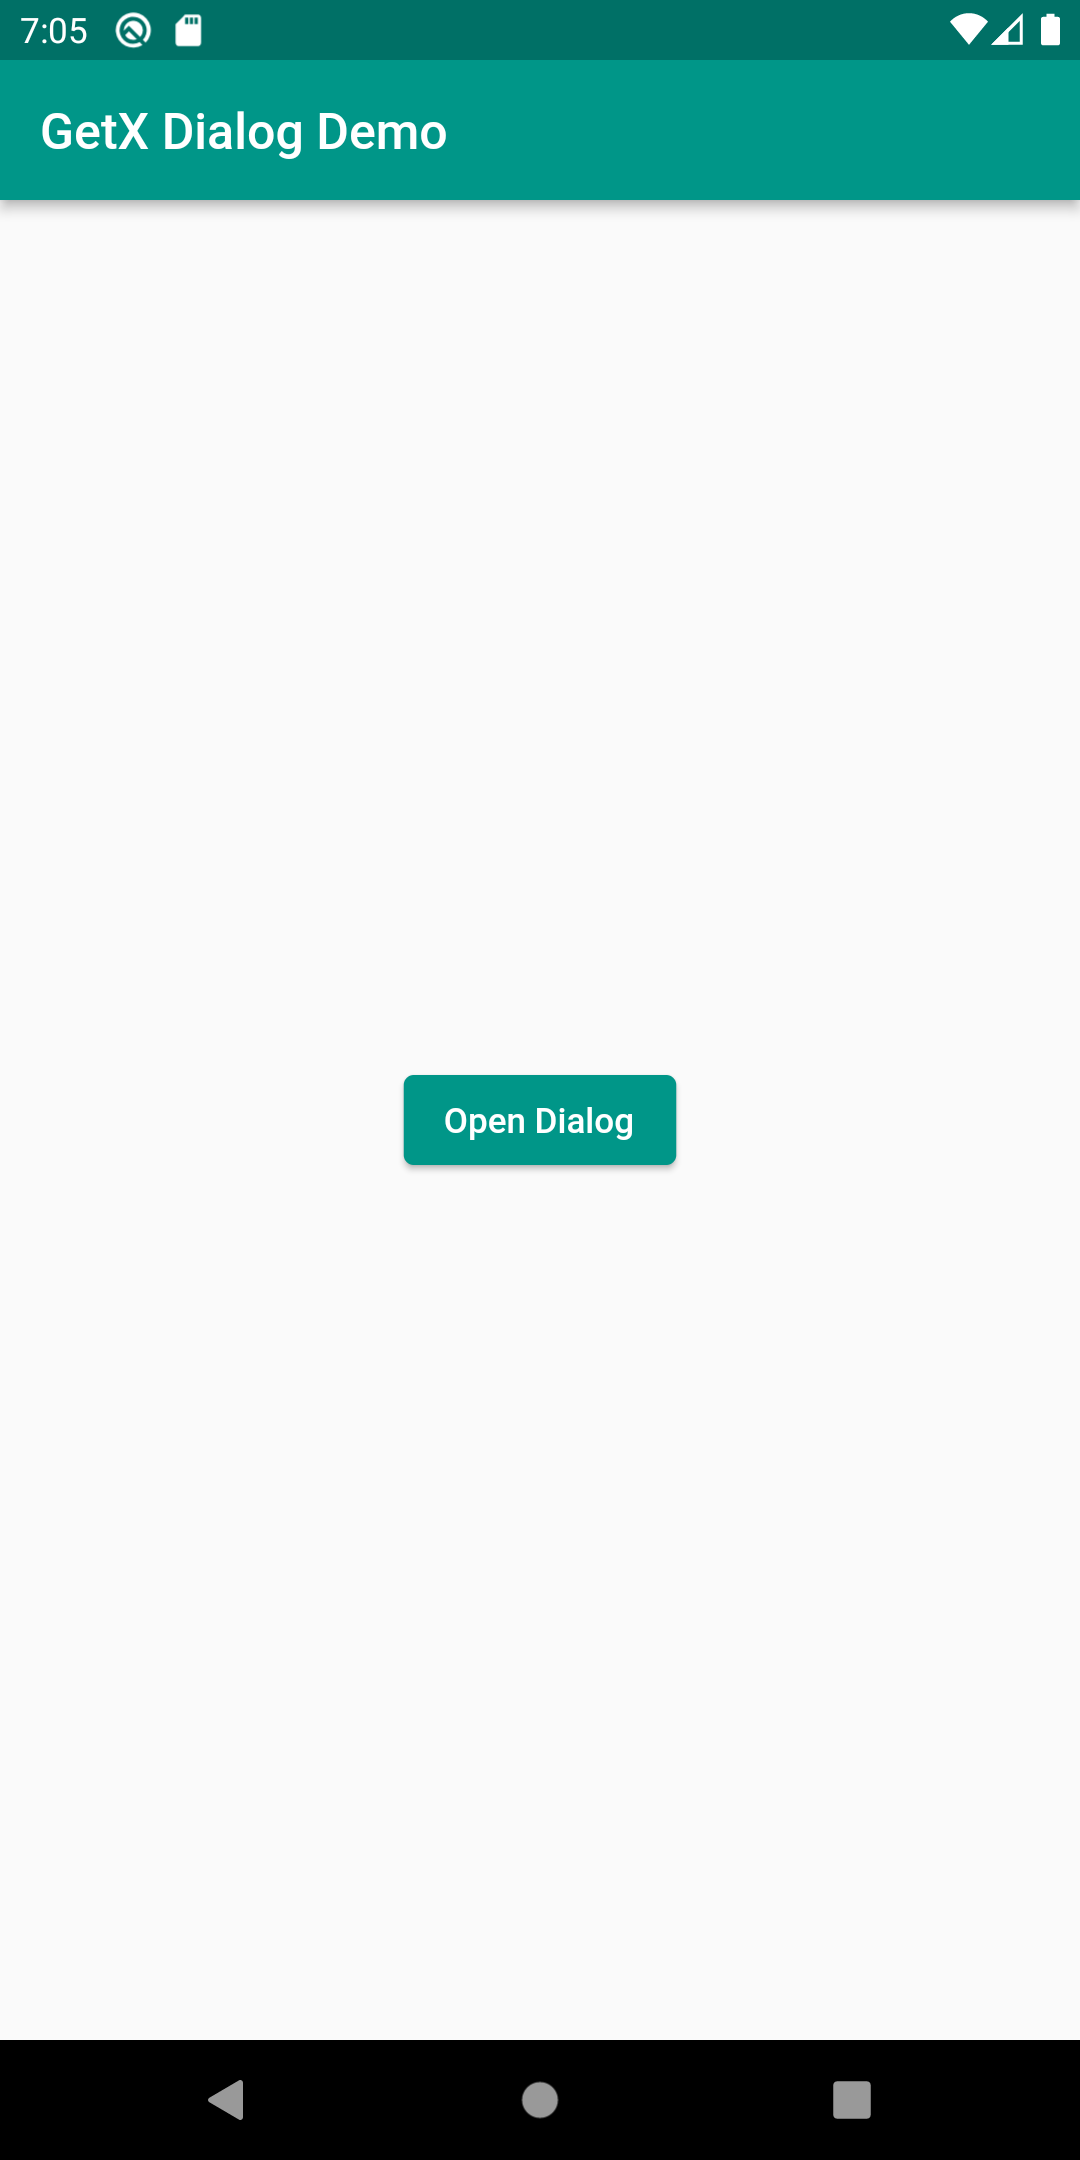
ElevatedButton( onPressed: () { Get.defaultDialog(); }, child: const Text('Open Dialog'), ), |
Result:
 |
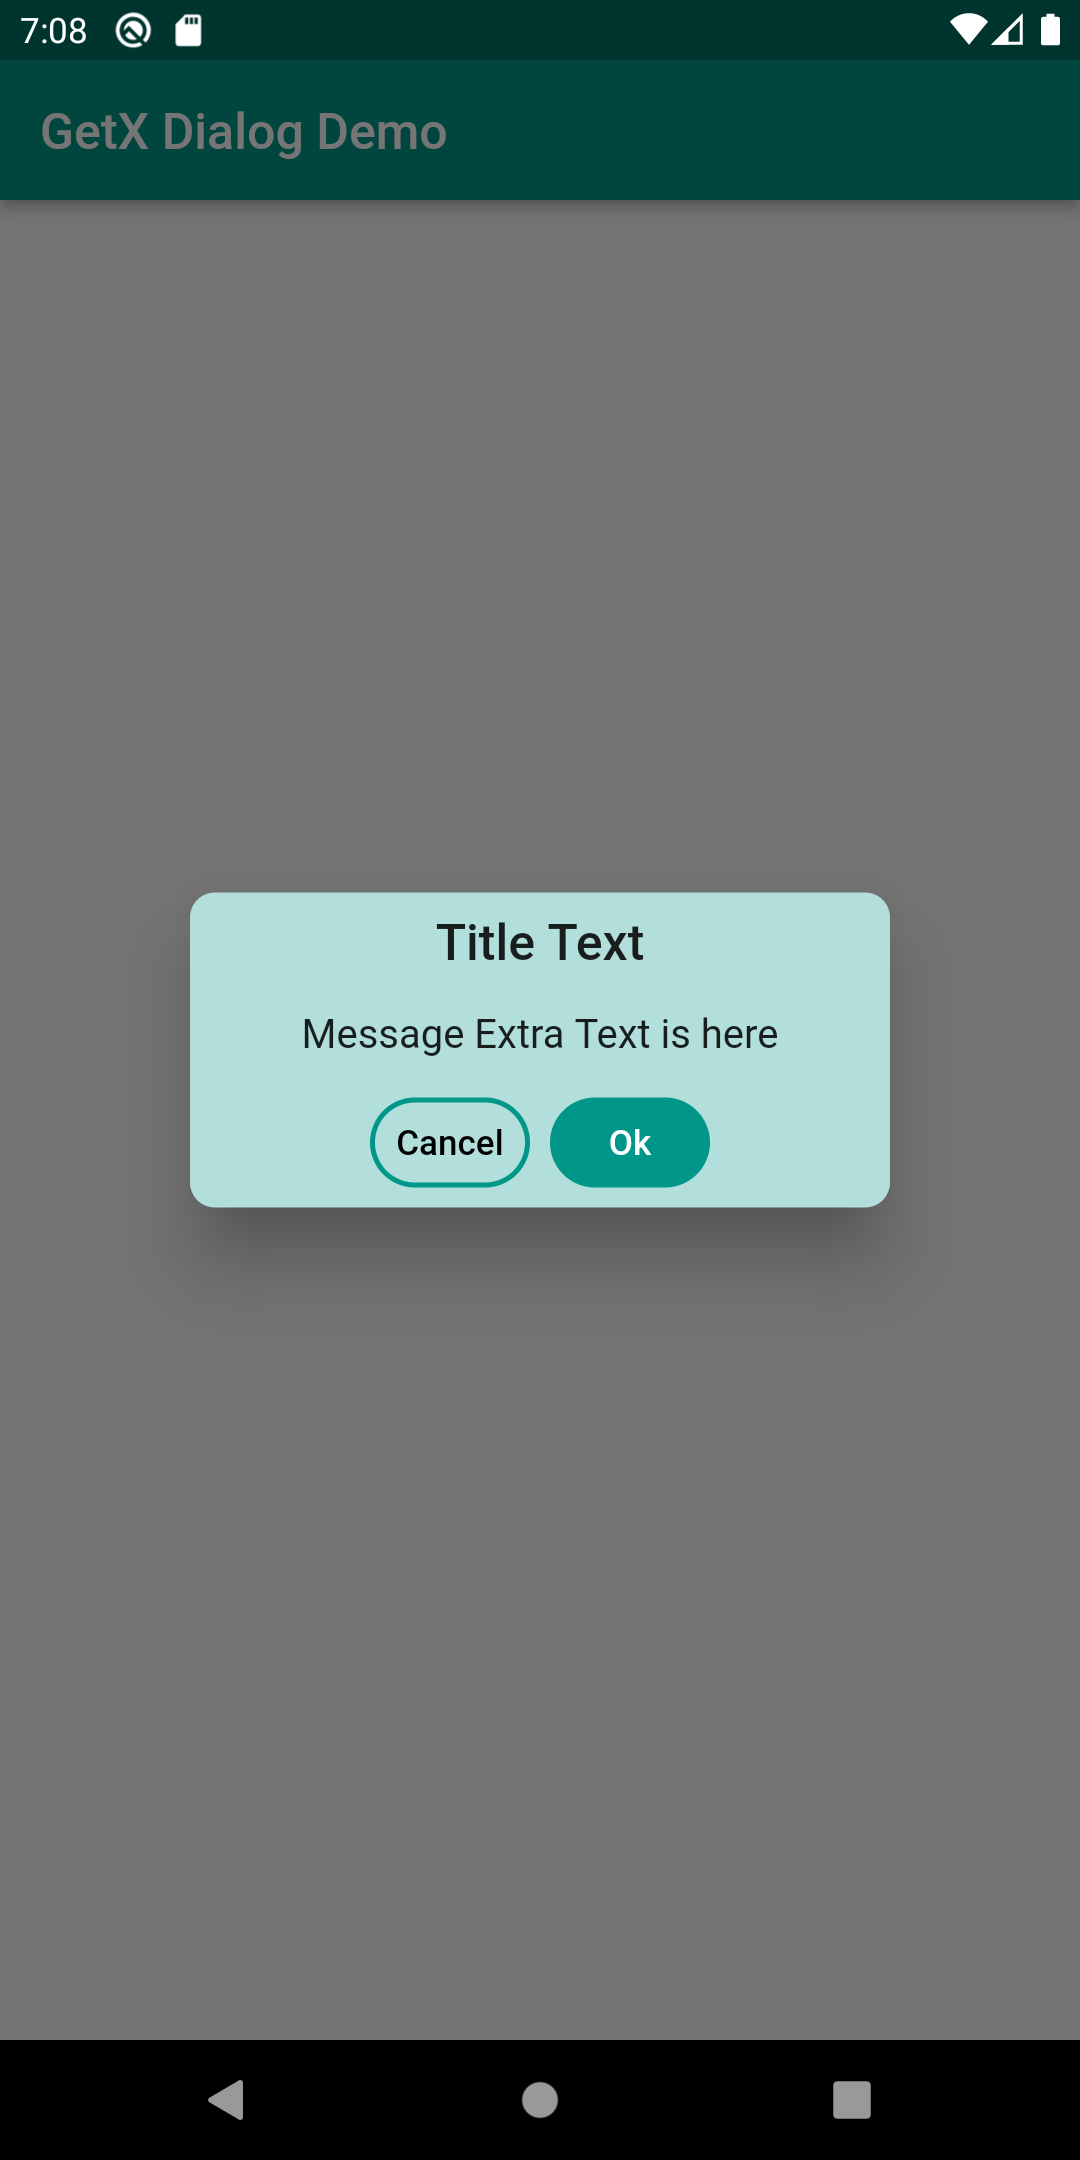
Step 4: Now you saw how easy it is to get a dialog with very few lines using GetX in Flutter. You can also customize it with different options given by GetX.
for example:
|
Get.defaultDialog( title: 'Title Text', middleText: 'Message Extra Text is here', textCancel: 'Cancel', textConfirm: 'Ok', confirmTextColor: Colors.white, cancelTextColor: Colors.black, radius: 10, backgroundColor: Colors.teal.shade100); |
Complete example code for Create Dialog using GetX
|
import 'package:flutter/foundation.dart'; import 'package:flutter/material.dart'; import 'package:get/get.dart';
void main() { runApp(MyApp()); }
class MyApp extends StatelessWidget { @override Widget build(BuildContext context) { return GetMaterialApp( debugShowCheckedModeBanner: false, theme: ThemeData( primarySwatch: Colors.teal, ), darkTheme: ThemeData( primarySwatch: Colors.teal, brightness: Brightness.dark, ), home: HomePage(), ); } }
class HomePage extends StatefulWidget { const HomePage({Key? key}) : super(key: key);
@override State createState() => _HomePageState(); }
class _HomePageState extends State { @override Widget build(BuildContext context) { return Scaffold( appBar: AppBar( title: const Text('GetX Dialog Demo'), ), body: Center( child: ElevatedButton( onPressed: () { Get.defaultDialog( title: 'Title Text', middleText: 'Message Extra Text is here', textCancel: 'Cancel', textConfirm: 'Ok', confirmTextColor: Colors.white, cancelTextColor: Colors.black, radius: 10, backgroundColor: Colors.teal.shade100); }, child: const Text('Open Dialog'), ), ), ); } }
|
Output:
 |
 |
Conclusion: In this way, you can create a beautiful customized dialog box with very few lines of code using GetX in Flutter.