Flutter Circular Animated CountDown Timer Example
Animated Circular Timer design in Flutter with smooth transitions, countdown functionality, and customizable time tracking. Check it out!| RRTutors
A timer that counts upwards from zero for measuring elapsed time is often called a stopwatch, so in today's tutorial, we will see how you can create circular animated timer in Flutter.
Let's start
Step 1: Create a new Flutter Application
Step 2: Add a line like this to your package's pubspec.yaml
|
Step 3: Once installed we will get access to a widget called CircularCountDownTimer and its has different parameters such as
- Duration: Countdown duration in Seconds.
- controller: Controls the Countdown Timer.
- ringColor: Ring Color for Countdown Widget.
- backgroundColor: Background Color for Countdown Widget.
- strokeWidth: Border Thickness of the Countdown Ring.
- autoStart: Handles the timer start.
- onComplete: This Callback will execute when the Countdown Ends.
Now to use the timer, first declare a controller for countdowncontroller as
|
CountDownController _controller = CountDownController(); |
after declaring a controller simple use a widget called CircularCountDownTimer where you want to show your timer.
then for controlling your timer use
- controller.start: to start the timer
- controller.pause: to pause the timer
- controller.resume: to resume the timer if paused
- controller.pause: to pause the timer
There is an onComplete Function in timer you can use this to call a function for example an alert dialog which will pop when the timer is completed.
for example:
|
onComplete: () { print('Completed'); const AlertDialog( title: Text('Completed'), ); }, |
Complete source code to create circular animated countdown timer in flutter
|
import 'package:circular_countdown_timer/circular_countdown_timer.dart'; import 'package:flutter/material.dart';
void main() => runApp(MyApp());
class MyApp extends StatelessWidget { @override Widget build(BuildContext context) { return MaterialApp( debugShowCheckedModeBanner: false, home: DemoApp(), theme: ThemeData.dark(), ); } }
class DemoApp extends StatefulWidget { @override _DemoAppState createState() => _DemoAppState(); }
class _DemoAppState extends State { CountDownController _controller = CountDownController(); bool _isPause = false;
@override Widget build(BuildContext context) { return Scaffold( appBar: AppBar( title: const Text('Timer'), centerTitle: true, ), body: Center( child: CircularCountDownTimer( width: MediaQuery.of(context).size.width / 2, height: MediaQuery.of(context).size.height / 2, duration: 14, fillColor: Colors.amber, ringColor: Colors.white, controller: _controller, backgroundColor: Colors.white54, strokeWidth: 10.0, strokeCap: StrokeCap.round, isTimerTextShown: true, isReverse: false, onComplete: () { print('Completed'); }, textStyle: const TextStyle(fontSize: 50.0, color: Colors.black), ), ), floatingActionButton: FloatingActionButton.extended( onPressed: () { setState(() { if (_isPause) { _isPause = false; _controller.resume(); } else { _isPause = true; _controller.pause(); } }); }, icon: Icon(_isPause ? Icons.play_arrow : Icons.pause), label: Text(_isPause ? 'Resume' : 'Pause'), ), ); } } |
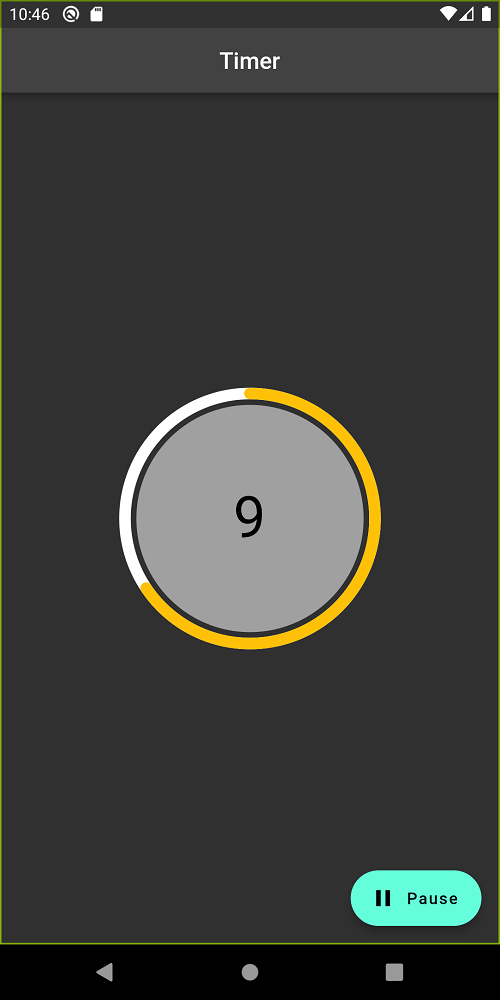
Output:
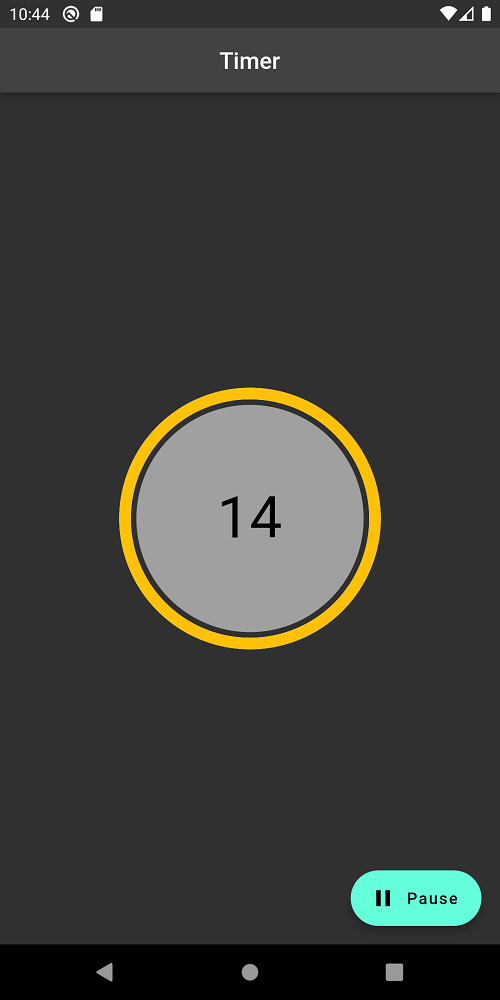 |
 |
Conclusion: In this way, we have learned how you can create an animated circular timer in Flutter.