Switch Between Two or More Images in Android with Kotlin
Check if a string or number is a palindrome with a simple Java program. Learn how to implement and test it in this concise tutorial at rrtutors.com.
In this example tutorial, we'll look at how to add an ImageSwitcher, and switch images using buttons in Android Studio using the Kotlin programming language.
What is ImageSwitcher?
Android ImageSwitcher is a user interface widget that provides a smooth transition effect when switching between images to display in the view.
Implementation:
To begin, Create a new project in android studio , enter the name & select location and change language to Kotlin.Then press the Finish button.
Open the activity_image_switcher.xml file and add the Relative Layout.
| <RelativeLayout xmlns:android="http://schemas.android.com/apk/res/android" xmlns:tools="http://schemas.android.com/tools" android:layout_width="match_parent" android:layout_height="match_parent" tools:context=".ImageSwitcherActivity"></RelativeLayout> |
In activity_image_switcher.xml, insert an ImageSwitcher view inside a RelativeLayout.
| <ImageSwitcher android:layout_width="300dp" android:layout_height="400dp" android:id="@+id/imageSwitcher" android:layout_centerHorizontal="true" android:layout_marginTop="50dp" /> |
Add id to ImageSwitcher view using the id attribute.
| android:id="@+id/imageSwitcher" |
Open browser and download some images, then copy it from the folder and paste it inside
| app > res > drawable |
and we will use these images in Kotlin code file.
Now add two buttons in xml file below ImageSwitcher Widget named left or right.
|
<Button <Button |
Now, let's put our ImageSwitcher or Buttons to use inside Activity. Any view, from layout to activity, can be used by using its unique id: "id" property with findViewById() method.
| val imgSwitcher = findViewById(R.id.imageSwitcher) val right = findViewById(R.id.rightBtn) val left = findViewById(R.id.leftBtn) |
R.id.imageSwitcher is the id of the button defined in the activity main.xml file.
We will create an array of images which contains the resource of the images used for the ImageView and a index variable.
|
private val images = intArrayOf(R.drawable.android,R.drawable.android1, R.drawable.android2) |
Set ImageView to display the image by using imageSwitcher.setFactory
| imgSwitcher?.setFactory({ val imgView = ImageView(applicationContext) imgView.scaleType = ImageView.ScaleType.CENTER_CROP imgView }) |
To set the image on imageSwitcher we will use the setImageResource Method
|
imgSwitcher?.setImageResource(images[index]) |
By implementing onClickListener, we can now add an event listener to the left and right button instance.
|
left.setOnClickListener { right.setOnClickListener { if(index+1 < images.size){ |
we are using array of images[index] and using if-else condition it will not repeat the images.
Now run the application in emulator or real device, you will see the output shown below.
OUTPUT:
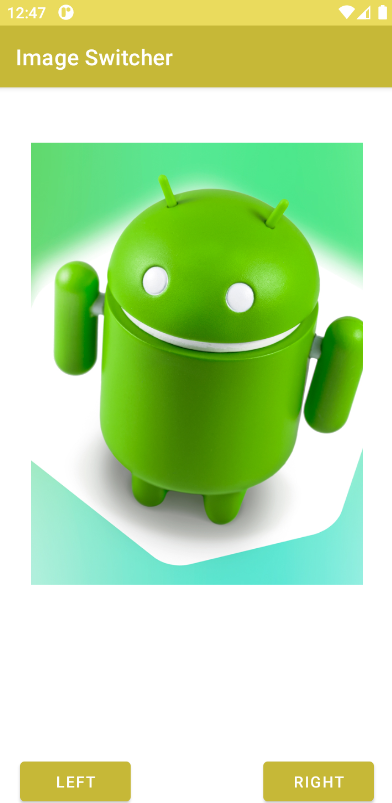 |
Fig. When Index is 0.
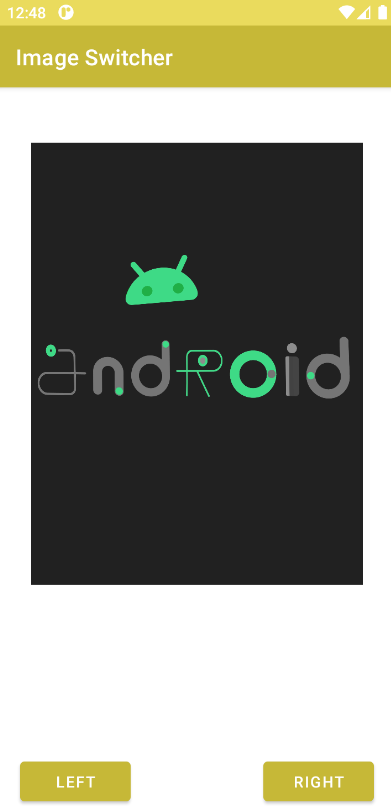 |
Fig. When Index is 1.
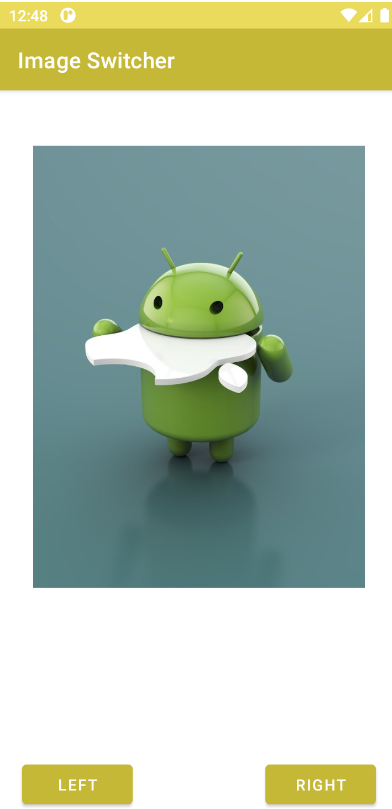 |
Fig. When Index is 2.
Complete source code for Android ImageSwitcher example:
activity_image_switcher.xml file
|
<?xml version="1.0" encoding="utf-8"?> <ImageSwitcher <Button <Button </RelativeLayout> |
ImageSwitcherActivity.kt
import androidx.appcompat.app.AppCompatActivity
import android.os.Bundle
import android.widget.Button
import android.widget.ImageSwitcher
import android.widget.ImageView

class ImageSwitcherActivity : AppCompatActivity() {
    private val images = intArrayOf(R.drawable.android,
        R.drawable.android1, R.drawable.android2)
    private var index = 0

    override fun onCreate(savedInstanceState: Bundle?) {
        super.onCreate(savedInstanceState)
        setContentView(R.layout.activity_image_switcher)

        val imgSwitcher = findViewById     (R.id.imageSwitcher)
        val right = findViewById(R.id.rightBtn)
        val left = findViewById(R.id.leftBtn)


        imgSwitcher?.setFactory({
            val imgView = ImageView(applicationContext)
            imgView.scaleType = ImageView.ScaleType.CENTER_CROP
            imgView
        })

        imgSwitcher?.setImageResource(images[index])

        left.setOnClickListener {
            if(index+2  >= images.size){
                index = index - 1
                imgSwitcher?.setImageResource(images[index])
            }
        }
        right.setOnClickListener {

            if(index+1 < images.size){
                index = index + 1
                imgSwitcher?.setImageResource(images[index])
            }
        }
    }
}
|
Conclusion: We've gone over how to add an ImageSwitcher and switch images using click on BUtton to Android with Kotlin code.