Create Responsive Dynamic Blog with PHP MySQL - RRutors
Create a login and registration system with PHP MySQL, including MySQL database creation and user session management in this detailed tutorial at rrtutors.com
In most modern web systems, authenticating users is a standard function. The majority of websites require you to create an account and log in using your username or email address and a password before you can access the main page. If the information is incorrect, the authentication attempt will fail, while when the information is correct, the login will be successful.
Since the development of most web applications requires you to build a user registration and login, most programming gurus regard "user registration and login" as the birthplace of brilliant coding. Furthermore, it is a common topic in interviews for software engineering positions, so not knowing how to handle it might mean not getting hired. Let's see how easy it is to set up a basic user registration and login system with PHP and MySQL.
Prerequisites
Here are the prerequisites to create a PHP MySQL Registration/login system
-
Knowledge of HTML5, CSS3, PHP, SQL, Bootstrap5, and MySQL
-
Have the XAMP server installed on your PC
-
A Text editor (Sublime Text) to write the codes
Navigation
In this blog, we are going to cover the following topics:
-
How to Creating Registration and Login System with PHP and MySQL
-
How to Create Admin Login with PHP
-
How do I create a verification email link?
-
How do I check PHP checking for Unique Username?
-
How to create Admin Panel
How to Creating Registration and Login System with PHP and MySQL
In this part of this blog, we are going to create a user registration and Login system with PHP MySQL. Here are the following seven steps to create MySQL PHP registration and login system.
-
Step 1: Create a Database and a Database table to store and retrieve user details
-
Step 2: Create the User Registration and Login Forms
-
Step 3: Create a Database Connection
-
Step 4: Register the User into the Database and Create a user session
-
Step 5: Login User
-
Step 6: Create a Welcome Page
-
Step 7: Log out of the System
Step 1: Create a Database and a Database table to store and retrieve user details
The first thing you need to do is log into phpMyAdmin using your favorite browser. After successfully logging in, go to the SQL tab and execute the following SQL query to create a database named LoginRegister.
CREATE DATABASE LoginRegister;
 |
The new database will be added to your phpMyAdmin database list. Now, choose the database that you have just created and go to the SQL tab to create the database tables into which we will input data.
 |
On the SQL tab section, paste the following SQL code and click on the "Go" button to create the database table.
|
CREATE TABLE users ( id INT NOT NULL PRIMARY KEY AUTO_INCREMENT, username VARCHAR(50) NOT NULL UNIQUE, email VARCHAR(50) NOT NULL UNIQUE, password VARCHAR(255) NOT NULL, created_at DATETIME DEFAULT CURRENT_TIMESTAMP ); |
 |
Once you click on the “Go” button, the database table named users Will be created.
 |
Our table has been successfully created, and we can now proceed to create the signup and login pages for our users.
Step 2: Create the User Registration and Login Forms
In this section, we are going to create the user interface where the users will sign up and log in. Let's create the user registration and login forms. We are going to use HTML5 to create the forms and CSS and Bootstrap framework to make our pages beautiful and responsive.
Now we will create our user registration and login forms in the htdocs folder in XAMP. Create a new folder Login_Registration in C:/xampp/htdocs, where we will save our files.
 |
In this folder, create the following four files:
-
Login.php, which will contain the login page code
-
Register.php, which will contain the register page in code
-
welcome.php, which will contain the welcome page code
-
Connection.php, which will contain the database connection code
-
Style.css, which contains the CSS code to make the user interface beautiful
Our Login_Registration files will look like this:
 |
Now, if you access the Index of/Login_Registration at http://localhost/Login_Registration/ on your computer browser, you will see all four files we have created.
 |
User Registration
Let's first of all create the user registration page. Open your Register.php and paste the code below:
|
<!DOCTYPE html> <html> <head> <title>User Registration Page</title> </head> <body> <div class="header"> <h2>User Registration Page</h2> </div> <form method="post" action="register.php"> <div class="input-group"> <label>Enter Username</label> <input type="text" name="username"> </div> <div class="input-group"> <label>Enter Email Address</label> <input type="email" name="email"> </div> <div class="input-group"> <label>Enter Password</label> <input type="password" name="pass_1"> </div> <div class="input-group"> <label>Confirm password</label> <input type="password" name="pass_2"> </div> <div class="input-group"> <button type="submit" class="btn" name="submit">Register</button> </div> <p> Already have an Account? <a href="login.php">Log in here</a> </p> </form> </body> </html> |
If you open Register.php on your browser, the following unstyled user input forms will be displayed.
 |
Looking at the user registration page now, it is unappealing, and users will not be drawn to it. We can, however, make them attractive using CSS3 and Bootstrap5.
Now, let's include CSS3 and Bootstrap5 into our code. First of all, we are going to link our page to bootstrap and add the bootstrap classes to our HTML code. To link our page with Bootstrap5, add the following link in the head section of your HTML code:
|
<link href="https://cdn.jsdelivr.net/npm/bootstrap@5.2.0/dist/css/bootstrap.min.css" rel="stylesheet" integrity="sha384-gH2yIJqKdNHPEq0n4Mqa/HGKIhSkIHeL5AyhkYV8i59U5AR6csBvApHHNl/vI1Bx" crossorigin="anonymous"> |
Now below the Bootstrap link, add the link below to connect your registration page with the CSS page.
|
<link rel="stylesheet" type="text/css" href="Style.css"> |
We have linked our registration page with the CSS page. Now open your Style.css file and paste the code below.
|
body { font-size: 100%; background: #F8F8FF; } form{ width: 70%; margin: 30px auto; padding: 20px; border: 1px solid #B0C4DE; background: white; border-radius:10px 10px; } .btn { font-size: 15px; color: white; font-weight: bold; } .link{ text-transform: none; } |
Our updated Register.php code looks like this:
|
<!DOCTYPE html> <html> <head> <title>Register User here</title> <link href="https://cdn.jsdelivr.net/npm/bootstrap@5.2.0/dist/css/bootstrap.min.css" rel="stylesheet" integrity="sha384-gH2yIJqKdNHPEq0n4Mqa/HGKIhSkIHeL5AyhkYV8i59U5AR6csBvApHHNl/vI1Bx" crossorigin="anonymous"> <link rel="stylesheet" type="text/css" href="Style.css"> </head> <body> <form method="post" action="user_regisdtration.php"> <h2 class="text-primary">User Registration Page</h2> <!--username input field --> <div class="mb-3"> <label class="form-label">Enter Username</label> <input type="text" name="username" class="form-control"> </div> <!--email input field --> <div class="mb-3"> <label class="form-label">Enter Email Address</label> <input type="email" name="email" class="form-control"> </div> <!--Password input field --> <div class="mb-3"> <label class="form-label">Enter Password</label> <input type="Password" name="pass_1" class="form-control"> </div> <!--Confirm Password input field --> <div class="mb-3"> <label class="form-label">Confirm Password</label> <input type="Password" name="pass_2" class="form-control"> </div> <div class="mb-3"> <button type="submit" name="register_submit" class="btn btn-primary">Submit</button> </div> <p> Already have an Account? <a href="login.php">Log in here</a> </p> </form> </body> </html> |
Now, if you run the code, the following styled page will be displayed on your browser.
 |
Our Register.php is complete. Let's now create the user Login form.
User Login Page
Now let’s create a user login page where the user will enter the registered username and the correct password to log in.
We will create the forms using HTML, and then we link our page with Bootstrap and CSS files to style it and make it beautiful. Open the Login.php and paste the following HTML code:
|
<!DOCTYPE html> <html> <head> <title>Login User Page</title> <link href="https://cdn.jsdelivr.net/npm/bootstrap@5.2.0/dist/css/bootstrap.min.css" rel="stylesheet" integrity="sha384-gH2yIJqKdNHPEq0n4Mqa/HGKIhSkIHeL5AyhkYV8i59U5AR6csBvApHHNl/vI1Bx" crossorigin="anonymous"> <link rel="stylesheet" type="text/css" href="Style.css"> </head> <body> <form method="post" action="userlogin.php"> <h2 class="text-primary">User Login Page</h2> <!--username input field --> <div class="mb-3"> <label class="form-label">Enter Username</label> <input type="text" name="username" class="form-control"> </div> <!--Password input field --> <div class="mb-3"> <label class="form-label">Confirm Password</label> <input type="Password" name="password" class="form-control"> </div> <div class="mb-3"> <button type="submit" name="login" class="btn btn-primary">Login</button> </div> <p> Not Yet Registered? <a href="user_regisdtration.php" class="link">Register here</a> </p> </form> </body> </html> |
Now, if you run the code, the following styled page will be displayed on your browser.
 |
Our register and login pages are now complete; we now need to connect our user registration and login pages to the database.
Step 3: Create a Database Connection
In this step, we are going to write a code that will link our register.php and Login.php forms to the database where we are going to store and retrieve the user information. Now, we need to add the database connection code.
Open the Connection.php and paste the code below:
|
<?php // connect to the database $db = mysqli_connect('localhost', 'root', '', ' loginregister'); This code will create the connection to the database. Now we need to include our Login.php and register.php with the connection.php. To do so, we are going to include the following code on top of your html code
<?php include('Connection.php') ?> |
The beginning of your Login.php and register.php code will look like this:
 |
Step 4: Register the User into the Database and Create a user session
Although the user registration page on our website looks stunning, it cannot register the user to the database. If you click on the "register" button, nothing happens. In this section of the blog, we'll craft some code to accept user input from the registration form, verify it for veracity, and then insert it into a database. We are going to write this code in Connection.php. We will also modify our register.php to ensure that the forms are submitted, and errors are displayed on our register.php
Let’s first modify our register.php. Open the register.php and replace it with the code below:
|
<?php include('Connection.php') ?> <!DOCTYPE html> <html> <head> <meta charset="UTF-8" /> <meta name="viewport" content="width=device-width, initial-scale=1.0" /> <title>Register User here</title> <link href="https://cdn.jsdelivr.net/npm/bootstrap@5.2.0/dist/css/bootstrap.min.css" rel="stylesheet" integrity="sha384-gH2yIJqKdNHPEq0n4Mqa/HGKIhSkIHeL5AyhkYV8i59U5AR6csBvApHHNl/vI1Bx" crossorigin="anonymous"> <link rel="stylesheet" href="https://cdn.jsdelivr.net/npm/bootstrap-icons@1.3.0/font/bootstrap-icons.css" /> <link rel="stylesheet" type="text/css" href="Style.css"> </head> <body> <form method="post" action="Register.php"> <?php if (count($form_validation_errors) > 0) : ?> <div class="alert alert-danger" role="alert" > <?php foreach ($form_validation_errors as $display_error) : ?> <p><?php echo $display_error ?></p> <?php endforeach ?> </div> <?php endif ?> <h2 class="text-primary">User Registration Page</h2> <!--username input field --> <div class="mb-3"> <label class="form-label">Enter Username</label> <input type="text" name="username" class="form-control" value="<?php echo $username; ?>"> </div> <!--email input field --> <div class="mb-3"> <label class="form-label">Enter Email Address</label> <input type="email" name="email" class="form-control" value="<?php echo $email; ?>"> </div> <!--Password input field --> <div class="mb-3"> <label class="form-label">Enter Password</label> <input type="Password" name="pass_1" class="form-control" id="password" value="<?php echo $password_1 ?>"> </div> <!--Confirm Password input field --> <div class="mb-3"> <label class="form-label">Confirm Password</label> <input type="Password" name="pass_2" class="form-control" id="password2" value="<?php echo $password_2 ?>"> </div> <div class="mb-3"> <button type="submit" name="register" class="btn btn-primary">Register</button> </div> <p> Already have an Account? <a href="login.php">Log in here</a> </p> </form> </body> </html> |
Now open the Connection.php and paste the code below
|
<?php session_start(); // create a database connection $link = mysqli_connect('localhost', 'root', '', 'loginregister'); // When you click the register button to register the user if (isset($_POST['register'])) { // get all the data submitted from the forms $username = $_POST['username']; $email = $_POST['email']; $password_1 = $_POST['pass_1']; $password_2 = $_POST['pass_2']; //an Array to return form validation mistakes $form_validation_errors = array(); //Verify the forms to ensure that there are no forms submitted empty if (empty($username) OR empty($email) OR empty($password_1) OR empty($password_2) ) { array_push($form_validation_errors, "You cannot submit empty fields"); } // Verify whether the two passwords you have entered the match if ($password_1 != $password_2) { array_push($form_validation_errors, "Please enter matching passwords"); } $user_check = mysqli_fetch_assoc(mysqli_query($link, "SELECT * FROM users WHERE username='$username' OR email='$email' LIMIT 1")); //If you find the user has already registered if ($user_check) { if ($user_check['username'] === $username) { array_push($form_validation_errors, "You have already registered, Please Log in"); } if ($user_check['email'] === $email) { array_push($form_validation_errors, "You have already registered, Please Log in"); } } // Finally, register the user if there are no errors in the form if (count($form_validation_errors) == 0) { $password = md5($password_1);//encrypt the password before saving in the database
$query = "INSERT INTO users (username, email, password) VALUES('$username', '$email', '$password')"; mysqli_query($link, $query); $_SESSION['username'] = $username; $_SESSION['success'] = "You are now logged in"; header('location: welcome.php'); } } ?> |
In Connection.php, we have written the code to receive the data submitted and verify the data. If you submit empty fields or either of the username, email, or password fields is empty, then the system will display the error, "You cannot submit empty fields.”
 |
When you submit different passwords, then the system will display the error "Please enter matching passwords.”
 |
Finally, when you try to register twice, the system will display the error “You cannot register twice. Please log in.”
 |
If you have entered all the details correctly, then your details will be inserted successfully into the database table.
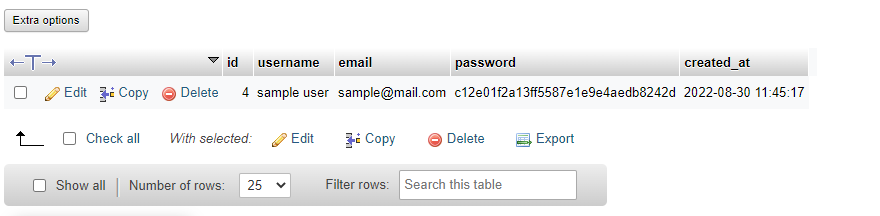 |
User registration and form validation are Done. Let's proceed to the user Login section.
Step 5: Login User
The user login works by fetching the data inserted by the user during the user registration and comparing it with the data entered by the user during the login. If the data matches, then the user is authenticated successfully; else, authentication fails.
To log in to the user, we are going to add the user login code in connection.php and make some changes on the Login.php page to display errors.
Here we go.
First of all, Open the Login.php and update the following code:
|
<?php include('Connection.php') ?> <!DOCTYPE html> <html> <head> <title>Login User</title> <link href="https://cdn.jsdelivr.net/npm/bootstrap@5.2.0/dist/css/bootstrap.min.css" rel="stylesheet" integrity="sha384-gH2yIJqKdNHPEq0n4Mqa/HGKIhSkIHeL5AyhkYV8i59U5AR6csBvApHHNl/vI1Bx" crossorigin="anonymous"> <link rel="stylesheet" type="text/css" href="Style.css"> </head> <body> <form method="post" action="Login.php"> <?php if (count($login_form_validation_errors) > 0) : ?> <div class="alert alert-danger" role="alert" > <?php foreach ($login_form_validation_errors as $display_error) : ?> <p><?php echo $display_error ?></p> <?php endforeach ?> </div> <?php endif ?> <h2 class="text-primary">User Login Page</h2> <!--username input field --> <div class="mb-3"> <label class="form-label">Enter Username</label> <input type="text" name="username" class="form-control"> </div> <!--Password input field --> <div class="mb-3"> <label class="form-label">Enter Password</label> <input type="Password" name="password" class="form-control"> </div> <div class="mb-3"> <button type="submit" name="login" class="btn btn-primary">Login</button> </div> <p> Do Not Have an Account? <a href="register.php" class="link">Register here</a> </p> </form> </body> </html> |
Now Open the Connection.php and paste the following code under the user registration code.
|
// When the user Logs in if (isset($_POST['login'])) { // get the data submitted from the forms $username = $_POST['username']; $password = $_POST['password']; //an Array to return form validation mistakes $form_validation_errors = array(); //Verify the forms to ensure that there are no forms submitted empty if (empty($username) OR empty($password) ) { array_push($form_validation_errors, "You cannot submit empty fields"); } if (count($form_validation_errors) == 0) { //encrypt the password for security reasons $password = md5($password); $results = mysqli_query($link, "SELECT * FROM users WHERE username='$username' AND password='$password'"); if (mysqli_num_rows($results) == 1) { $_SESSION['username'] = $username; $_SESSION['success'] = "Authentication Success!!"; header('location: welcome.php'); }else { array_push($form_validation_errors, "Authentication failed !! Please Enter the Username or Password"); } } } |
This code will receive the data from the user, validate the data and finally retrieve the user information from the database and perform authentication. If authentication is successful, the user is redirected to the welcome.php, and if it fails, the authentication error message “Authentication failed !! Please Enter the Username or Password” is displayed on the Login.php
 |
Our Login functionality now works as expected; let's move to Welcome Page.
Step 6: Create a Welcome Page
This is the home page where you will be redirected after you successfully log in. On this page, we are going to display the user details, a login success message, and a Logout button. Here we go!
Open the welcome.php and paste the code below:
|
<?php session_start();
if (!isset($_SESSION['username'])) { $_SESSION['msg'] = "You must log in first"; header('location: login.php'); } ?> <!DOCTYPE html> <html> <head> <title>HomePage</title> <link href="https://cdn.jsdelivr.net/npm/bootstrap@5.2.0/dist/css/bootstrap.min.css" rel="stylesheet" integrity="sha384-gH2yIJqKdNHPEq0n4Mqa/HGKIhSkIHeL5AyhkYV8i59U5AR6csBvApHHNl/vI1Bx" crossorigin="anonymous"> <link rel="stylesheet" type="text/css" href="Style.css"> </head> <body> <div class="welcome" style="width: 70%; margin: 30px auto; padding: 20px; border: 1px solid #B0C4DE; background: white; border-radius:10px 10px;"> <h2 class="text-primary">Welcome Page</h2> <!—Authentication success message --> <?php if (isset($_SESSION['success'])) : ?> <div class="error success" > <div class="alert alert-success" role="alert" > <h3> <?php echo $_SESSION['success']; unset($_SESSION['success']); ?> </h3> </div> </div> <?php endif ?> <?php if (isset($_SESSION['username'])) : ?> <p>Welcome <strong><?php echo $_SESSION['username']; ?></strong></p> <p> <a href="Login.php?logout='1'" class="btn btn-danger" style="font-weight:bold;">logout</a> </p> <?php endif ?> </div> </body> </html> |
On your Welcome.php, the successful authentication message is displayed on your screen, the name of the user, and the logout button. Let's log the user out
Step 7: Log out of the System
So far, our system works as planned; however, it does not log out the user once he or she clicks on the "Logout" button; instead, it takes the user to Login.php without destroying the session. To log out implies destroying the user session. Now, update your Welcome.php code with the code below:
|
<?php session_start(); if (!isset($_SESSION['username'])) { $_SESSION['msg'] = "You must log in first"; header('location: Login.php'); } //if the user decides to logout if (isset($_GET['logout'])) { session_destroy(); unset($_SESSION['username']); header("location: login.php"); } ?> <!DOCTYPE html> <html> <head> <title>HomePage</title> <link href="https://cdn.jsdelivr.net/npm/bootstrap@5.2.0/dist/css/bootstrap.min.css" rel="stylesheet" integrity="sha384-gH2yIJqKdNHPEq0n4Mqa/HGKIhSkIHeL5AyhkYV8i59U5AR6csBvApHHNl/vI1Bx" crossorigin="anonymous"> <link rel="stylesheet" type="text/css" href="Style.css"> </head> <body> <div class="welcome" style="width: 70%; margin: 30px auto; padding: 20px; border: 1px solid #B0C4DE; background: white; border-radius:10px 10px;"> <h2 class="text-primary">Welcome Page</h2> <!-- notification message --> <?php if (isset($_SESSION['success'])) : ?> <div class="error success" > <div class="alert alert-success" role="alert" > <h3> <?php echo $_SESSION['success']; unset($_SESSION['success']); ?> </h3> </div> </div> <?php endif ?> <?php if (isset($_SESSION['username'])) : ?> <p>Welcome <strong><?php echo $_SESSION['username']; ?></strong></p> <p> <a href="Login.php?logout='1'" class="btn btn-danger" style="font-weight:bold;">logout</a> </p> <?php endif ?> </div> </body> </html> |
Now, if you click on the Logout button, you are successfully Logged out, and you can either register or log in again.
PHP Reset Password
It is natural for humans to forget or get confused, and in this scenario, they may lose vital information such as login passwords or usernames. As a good user interface design practice, you should not compel users to create new accounts and lose crucial information. Instead, as a developer, you should enable them to recover their lost passwords.
In this section of this blog, we are going to help the system users reset their forgotten passwords using their registered email. We are going to add the "Forgot your password?" link to the login page, which will redirect the users to the password reset page. On this page, the user will be prompted to enter the email address where the link will be sent to their inbox. We are going to use the email address to ensure privacy since passwords are very critical and insecure systems and are vulnerable to possible data breaches.
To reset the password, we are going to go through the following simple actions:
-
Action 1: Add the "Forgot Password" link on the Login page
-
Action 2: Create a password reset page with an email entry form where users can enter the email to reset the password. On this page, we will have to ensure that the users are the ones who registered earlier; hence they will have to prove by entering the email they provided. Failing to provide the user registered email, then the user will not be able to reset the password. To reset the password, the users will have to remember the registered email.
-
Action 3: Finally, we will create the token entry password page, where the user will enter the password reset token from the link sent by email and then store it in the session variable.
To create the PHP reset password, we are going to go through the following simple steps. Here we go:
Step 1: First of all, we need to create a database where we can store user tokens and emails. To do so, login into your PhpMyAdmin and browse to the SQL section, then run the SQL code below to create the table with the three fields: user id, email, and token.
|
CREATE TABLE `passwords` ( `id` int(11) NOT NULL, `email` varchar(200) NOT NULL, `sent_token` varchar(200) NOT NULL, ) ENGINE=InnoDB DEFAULT CHARSET=utf8mb4; |
The table created will look like this
 |
Our database table looks great.
Step 2: Now, let's modify the user login page and add the "Forgot Password?" Link. To do so, open your Login.php and add the code below just below the Login button.
|
<p> <b> Forgot Password? <a href="reset.php" class="link" style="text-decoration: none;">Click here to Reset</a> </b> </p> |
 |
If you now launch the Login.php on your browser, the following page will be displayed.
 |
Step 3: Now, open the Login_Registration directory in C:\xampp\htdocs, create a new file, and name it reset.php. It is in this file that we will create the user email entry form. Open the reset.php and paste the code below.
|
<?php include('Connection.php') ?> <!DOCTYPE html> <html> <head> <title>The Password Reset Page</title> <link href="https://cdn.jsdelivr.net/npm/bootstrap@5.2.0/dist/css/bootstrap.min.css" rel="stylesheet" integrity="sha384-gH2yIJqKdNHPEq0n4Mqa/HGKIhSkIHeL5AyhkYV8i59U5AR6csBvApHHNl/vI1Bx" crossorigin="anonymous"> <link rel="stylesheet" type="text/css" href="Style.css"> </head> <body>
<form class="login-form" action="reset.php" method="post"> <h2 class="form-title">Reset password Page</h2> <?php include('errors.php'); ?> <div class="form-group"> <label>Please Enter Your email address</label> <input type="email" name="email" class="form-control" value="<?php echo $email; ?>"> </div> <br> <div class="form-group"> <button type="submit" name="reset-password" class="btn btn-success">Submit</button> </div> </form> </body> </html> |
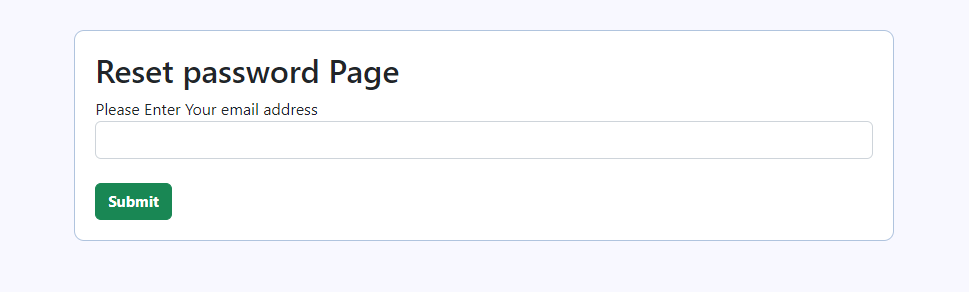 |
The interface of our password reset page looks fine; however, nothing happens if you enter the email and submit it. So let's make it work.
Step 4: In this step, we will ensure that you can submit your email address, but first, we must verify the email address. Firstly, we will restrict you from submitting an empty form, and secondly, we will prevent you from submitting an email that has not been registered. To do so, add the following code to the Connection.php below the user login.
|
// Reset Password if (isset($_POST['reset'])) { //Receive the email submitted from the form. $email = $_POST['email']; // We need to ensure that the user email exists $results = mysqli_query($link, "SELECT email FROM users WHERE email='$email'"); //verify whether the email is empty if (empty($email)) { //in case the email is empty, display this error array_push($password_reset_error, "Please enter an Email Address !!"); }else if(mysqli_num_rows($results) <= 0) { //if you do not find the email in the database, then display this error array_push($password_reset_error, "Your Email does not exist in our database !!"); } // we've got to generate the tokens, bro $token = bin2hex(random_bytes(50)); //if the form is not empty and the email is also registered, then let's store the token and email in our new database table. if (count($password_reset_error) == 0) { $results = mysqli_query($link, "INSERT INTO passwords(email, sent_token) VALUES ('$email', '$token')"); // Then, we need to send the token link to the user's email $to = $email; $subject = "Password Reset Request"; $information = "Hi there, Please click here <a href=\"reset_password.php?token=" . $token. "\">link</a> to enter a new password"; $information = wordwrap($information,70); $mail_headers = "From: sample@mail.com"; mail($to, $subject, $information, $mail_headers); header('location: reset_password.php?email=' . $email); } } |
Now let's open the reset.php on the web browser and verify whether everything works. First of all, if we submit an empty form, the error "Please enter an Email Address !!" will be displayed.
 |
If we submit an unregistered email address, then the error "Your Email does not exist in our database !!" will be displayed.
 |
Finally, suppose we submit the registered email address. In that case, the random token and the email will be inserted into the database, and the email token will be sent in the email inserted. However, since we are working with a XAMP server localhost, we cannot send the email since the mail() function cannot send emails from localhost. This can be done using a hosted server on the internet.
 |
That works well, as expected. So let's proceed to the password resetting page.
Step 5: Now, Open a new file and name it reset_password.php. On this page, we are going to notify the user that the email token has been sent to the user's email and that the user checked the email. In your reset_password.php, paste the following code:
|
<?php include('Connection.php') ?> <!DOCTYPE html> <html> <head> <title>Reset Your Password </title> <link href="https://cdn.jsdelivr.net/npm/bootstrap@5.2.0/dist/css/bootstrap.min.css" rel="stylesheet" integrity="sha384-gH2yIJqKdNHPEq0n4Mqa/HGKIhSkIHeL5AyhkYV8i59U5AR6csBvApHHNl/vI1Bx" crossorigin="anonymous"> <link rel="stylesheet" type="text/css" href="Style.css"> </head> <body> <form class="login-form" action="login.php" method="post" style="text-align: center;"> <p> <b>Here we Go:</b> Am Email have been sent to your email Account: <b><?php echo $_GET['email'] ?></b> </p> <p>Please check your email account and click to log in.</p> </form> </body> </html> |
The following page will be displayed if you open the reset_password.php file on your browser.
 |
How to Create Admin Login (Admin Pannel) with PHP
Web application admins play a huge role in managing the users and the user actions in web applications. Web admins usually possess extra permissions, functionalities, and privileges compared to the common users of the system, and therefore, a separate web dashboard is needed. When the admins log in, they should access the admin homepage, while on the other hand, the common users should not be able to access this page. In this part of this blog, we are going to create a web admin dashboard where the admin can log in and access the web admin page. To do so, we are going to add the PHP script to allow the admin to log in and redirect them to their dashboards.
First of all, let's make some changes to our database and add a new field, "user." This field will determine whether a user is an admin or a normal user.
 |
Adding this field will impact the user registration; therefore, you will need to modify the user registration code in Connection.php for inserting the user information into the database to ensure that when the user registers, the user's status will be "normal."
|
$query = "INSERT INTO users (username, email, user,password) VALUES('$username', '$email','normal','$password')"; |
Now we need to adjust the login code in Connection.php. First, we need to write a code to check whether the user is an admin or a normal user. If the user is a normal user, the code will redirect them to welcome.php, and if the user is an admin, the user will redirect them to admin.php. Now update your login code with the code below:
 |
The entire user login code will be:
|
// When the user Logs in if (isset($_POST['login'])) { // get the data submitted from the forms $username = $_POST['username']; $password = $_POST['password']; //an Array to return form validation mistakes $login_form_validation_errors = array(); //Verify the forms to ensure that there are no forms submitted empty if (empty($username) OR empty($password) ) { array_push($login_form_validation_errors, "You cannot submit empty fields"); } if (count($login_form_validation_errors) == 0) { //encrypt the password for security reasons $password = md5($password); $results = mysqli_query($link, "SELECT * FROM users WHERE username='$username' AND password='$password'"); if (mysqli_num_rows($results) == 1) { // if the user is not an admin, login redirect to the user's homepage $logged_in_user = mysqli_fetch_assoc($results); if ($logged_in_user['user'] == 'normal') { $_SESSION['username'] = $username; $_SESSION['success'] = "Authentication Success!!"; header('location: welcome.php');
}else { //if the user is an admin, then redirect to the admin homepage $_SESSION['admin'] = $logged_in_user; $_SESSION['success'] = "Admin Authentication Success !!"; header('location: admin.php'); }} else { array_push($login_form_validation_errors, "Authentication failed !! Please Enter Correct Username or Password"); } } } |
Now create the admin.php, which will be the admin homepage (admin panel). Now open the admin.php and paste the code below:
|
<?php session_start(); if (!isset($_SESSION['username'])) { $_SESSION['msg'] = "You must log in first"; header('location: Login.php'); } //if the user decides to logout if (isset($_GET['logout'])) { session_destroy(); unset($_SESSION['username']); header("location: login.php"); } ?> <!DOCTYPE html> <html> <head> <title>Admin Panel </title> <link href="https://cdn.jsdelivr.net/npm/bootstrap@5.2.0/dist/css/bootstrap.min.css" rel="stylesheet" integrity="sha384-gH2yIJqKdNHPEq0n4Mqa/HGKIhSkIHeL5AyhkYV8i59U5AR6csBvApHHNl/vI1Bx" crossorigin="anonymous"> <link rel="stylesheet" type="text/css" href="Style.css"> </head> <body> <div class="welcome" style="width: 70%; margin: 30px auto; padding: 20px; border: 1px solid #B0C4DE; background: white; border-radius:10px 10px;"> <h2 class="text-primary">Admin Panel</h2> <!-- notification message --> <?php if (isset($_SESSION['success'])) : ?> <div class="error success" > <div class="alert alert-success" role="alert" > <h3> <?php echo $_SESSION['success']; unset($_SESSION['success']); ?> </h3> </div> </div> <?php endif ?> <?php if (isset($_SESSION['username'])) : ?> <p>Welcome <strong><?php echo $_SESSION['username']; ?></strong></p> <p> <a href="Login.php?logout='1'" class="btn btn-danger" style="font-weight:bold;">logout</a> </p> <?php endif ?> </div> </body> </html> |
If you open this code on the browser, the following Admin panel will be displayed.
 |
You can log out and destroy the user session from this admin panel.
How do I create a verification email link in PHP?
Security and user privacy are two of the most crucial aspects of modern websites. During registration, the user gives personal information, which is a common target for hackers. Email verification is one method of guaranteeing data security.
This blog section will teach you how to make a verification email link. First, we will edit the user registration code in Connection.php so that when a user registers, the user verification code is delivered to the user's email address, and the user clicks on the email to verify it.
First, log into phpMyAdmin and add a new field called "verify." This is the field where we will keep track of the email verification status. This is how the database will look:
 |
Open the Connection.php and update the user registration code with the code below:
|
// 1. USER REGISTRATION CODE // When you click register button to register the user if (isset($_POST['register'])) { // get all the data submitted from the forms $username = $_POST['username']; $email = $_POST['email']; $password_1 = $_POST['pass_1']; $password_2 = $_POST['pass_2']; //an Array to return form validation mistakes $form_validation_errors = array(); $status='normal'; // the varible that contains the code $token = bin2hex(random_bytes(50)); //Verify the forms to ensure that there are no forms submitted empty if (empty($username) OR empty($email) OR empty($password_1) OR empty($password_2) ) { array_push($form_validation_errors, "You cannot submit empty fields"); } // Verify whether the two passwords you have entered match if ($password_1 != $password_2) { array_push($form_validation_errors, "Please enter matching passwords"); } $user_check = mysqli_fetch_assoc(mysqli_query($link, "SELECT * FROM users WHERE username='$username' OR email='$email' LIMIT 1")); //If you find the user have already registered if ($user_check) { if ($user_check['username'] === $username OR $user_check['email'] === $email ) { array_push($form_validation_errors, "You cannot register twice, Please Log in"); } } // Finally, register user if there are no errors in the form if (count($form_validation_errors) == 0) { $password = md5($password_1);//encrypt the password before saving in the database
$query = "INSERT INTO users (username, email, user,password) VALUES('$username', '$email','$status','$password')";
mysqli_query($link, $query); $_SESSION['success'] = "You have registered Successfully Kiongos!!!"; header('location: Register.php'); } } |
Now at the bottom of your code, add the email sending code. This code will send the email verification token to the email.
|
if (isset($_GET['token'])) { $token = $_GET['token']; $sql = "SELECT * FROM users WHERE token='$token' LIMIT 1"; $result = mysqli_query($conn, $sql);
if (mysqli_num_rows($result) > 0) { $user = mysqli_fetch_assoc($result); $query = "UPDATE users SET verified=1 WHERE token='$token'";
if (mysqli_query($conn, $query)) { $_SESSION['id'] = $user['id']; $_SESSION['username'] = $user['username']; $_SESSION['email'] = $user['email']; $_SESSION['verified'] = true; $_SESSION['message'] = "Your email address has been verified successfully"; $_SESSION['type'] = 'alert-success'; header('location: index.php'); exit(0); } } else { echo "User not found!"; } } else { echo "No token provided!"; } |
How do I check PHP checking for Unique Username?
To avoid duplication, which can lead to mistakes or confusion, it is crucial to ensure that critical user information such as email and username are unique when enrolling the user into the system. This will ensure that user data in the database and user sessions may be uniquely identifiable. For example, consider the following scenario: two users have registered with identical usernames and emails, and you need to show the user data of one of them; it will be tough to distinguish between the two. The situation might deteriorate in a crucial system, such as a financial system or a corporate ERP.
In this blog section, we will ensure that the system checks to see whether it has previously registered to verify that the username and email address are unique. To do this, we will get the user data, compare it to the user input, and then, if it is unique, the user will register; otherwise, the error "You cannot register twice, please log in" will be displayed. Now let's go:
Open your Connectrion.php and add the code below to check the username and email from the database
|
$user_check = mysqli_fetch_assoc(mysqli_query($link, "SELECT * FROM users WHERE username='$username' OR email='$email' LIMIT 1")); //If you find the user has already registered if ($user_check) { if ($user_check['username'] === $username OR $user_check['email'] === $email ) { array_push($form_validation_errors, "You cannot register twice, Please Log in"); } } |
The code will look like this:
 |
The complete user registration code will be:
|
// 1. USER REGISTRATION CODE // When you click the register button to register the user if (isset($_POST['register'])) { // get all the data submitted from the forms $username = $_POST['username']; $email = $_POST['email']; $password_1 = $_POST['pass_1']; $password_2 = $_POST['pass_2']; //an Array to return form validation mistakes $form_validation_errors = array(); $status='normal'; // the variable that contains the code $token = bin2hex(random_bytes(50)); //Verify the forms to ensure that there are no forms submitted empty if (empty($username) OR empty($email) OR empty($password_1) OR empty($password_2) ) { array_push($form_validation_errors, "You cannot submit empty fields"); }
// Verify whether the two passwords you have entered the match if ($password_1 != $password_2) { array_push($form_validation_errors, "Please enter matching passwords"); }
$user_check = mysqli_fetch_assoc(mysqli_query($link, "SELECT * FROM users WHERE username='$username' OR email='$email' LIMIT 1")); //If you find the user has already registered if ($user_check) { if ($user_check['username'] === $username OR $user_check['email'] === $email ) { array_push($form_validation_errors, "You cannot register twice, Please Log in"); } } // Finally, register the user if there are no errors in the form if (count($form_validation_errors) == 0) { $password = md5($password_1);//encrypt the password before saving in the database $query = "INSERT INTO users (username, email, user,password) VALUES('$username', '$email','$status','$password')"; mysqli_query($link, $query); $_SESSION['success'] = "You successfully registered Kiongos!!!"; header('location: Register.php'); } } |
Now, if we run this code on the browser, the following code will be displayed
 |
The final, directory Login_Registration will contain the following 8 files:
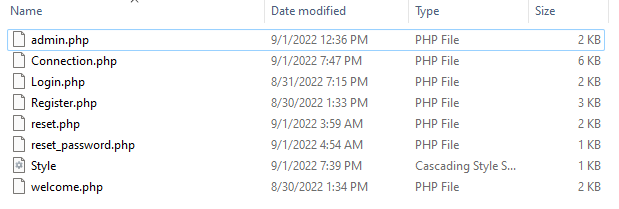 |
How to create Admin Panel
When the Admin logs in, he must execute several functions, such as viewing the uploaded blog posts, deleting the current blog posts, uploading a new blog post, and eventually signing out to return to the index page. Our admin dashboard will have a separate theme from the rest of the website, with a different color scheme and style or orientation.
To create the admin dashboard with these functionalities, open the admin.php and paste the code below:
|
<?php session_start();
if (!isset($_SESSION['username'])) { $_SESSION['msg'] = "You must log in first"; header('location: Login.php'); } //if user decides to logout if (isset($_GET['logout'])) { session_destroy(); unset($_SESSION['username']); header("location: login.php"); }
?>
<?php include('uploads.php') ?>
<!doctype html> <html lang="en"> <head> <meta charset="utf-8"> <meta name="viewport" content="width=device-width, initial-scale=1"> <meta name="description" content=""> <meta name="author" content="Mark Otto, Jacob Thornton, and Bootstrap contributors"> <meta name="generator" content="Hugo 0.84.0"> <title>Admin Dashboard</title>
<link rel="canonical" href="https://getbootstrap.com/docs/5.0/examples/dashboard/">
<link href="https://cdn.jsdelivr.net/npm/bootstrap@5.2.0/dist/css/bootstrap.min.css" rel="stylesheet" integrity="sha384-gH2yIJqKdNHPEq0n4Mqa/HGKIhSkIHeL5AyhkYV8i59U5AR6csBvApHHNl/vI1Bx" crossorigin="anonymous">
<link rel="stylesheet" type="text/css" href="font-awesome/css/font-awesome.css"> <link rel="stylesheet" type="text/css" href="font-awesome/css/font-awesome.min.css">
<style> .bd-placeholder-img { font-size: 1.125rem; text-anchor: middle; -webkit-user-select: none; -moz-user-select: none; user-select: none; }
@media (min-width: 768px) { .bd-placeholder-img-lg { font-size: 3.5rem; } } </style>
<!-- Custom styles for this template --> <link href="dashboard.css" rel="stylesheet"> </head> <body>
<header class="navbar navbar-dark sticky-top bg-dark flex-md-nowrap p-0 shadow"> <a class="navbar-brand col-md-3 col-lg-2 me-0 px-3" href="#">
<?php if (isset($_SESSION['username'])) : ?> Welcome <strong><?php echo $_SESSION['username']; ?></strong> <?php endif ?> </a> <button class="navbar-toggler position-absolute d-md-none collapsed" type="button" data-bs-toggle="collapse" data-bs-target="#sidebarMenu" aria-controls="sidebarMenu" aria-expanded="false" aria-label="Toggle navigation"> <span class="navbar-toggler-icon"></span> </button> <input class="form-control form-control-dark w-100" type="text" placeholder="Search" aria-label="Search"> <div class="navbar-nav"> <div class="nav-item text-nowrap"> <?php if (isset($_SESSION['username'])) : ?> <a class="nav-link px-3" href="index.php?logout='1'">Sign out</a> <?php endif ?> </div> </div> </header>
<div class="container-fluid"> <div class="row"> <nav id="sidebarMenu" class="col-md-3 col-lg-2 d-md-block bg-light sidebar collapse"> <div class="position-sticky pt-3"> <ul class="nav flex-column"> <li class="nav-item"> <a class="nav-link active" aria-current="page" href="#"> <span data-feather="home"></span> Dashboard </a> </li> <li class="nav-item"> <a class="nav-link" href="admin.php"> <span class="fa fa-tasks"></span> Posts </a> </li> <li class="nav-item"> <a class="nav-link" href="admin_post.php"> <span class="fa fa-pencil"></span> Upload Post </a> </li> <li class="nav-item">
<?php if (isset($_SESSION['username'])) : ?> <a class="nav-link px-3" href="index.php?logout='1'"> <span class="fa fa-user"></span> Sign out</a> <?php endif ?>
</li>
</ul>
</div> </nav>
<!---enter Display user table---> <main class="col-md-9 ms-sm-auto col-lg-10 px-md-4"> <div class="d-flex justify-content-between flex-wrap flex-md-nowrap align-items-center pt-3 pb-2 mb-3 border-bottom"> <!--display the admin name --> <h1 class="h2">Dashboard</h1> <div class="btn-toolbar mb-2 mb-md-0"> </div> </div>
<div class="table-responsive">
<?php $connection = mysqli_connect("localhost","root",""); $db = mysqli_select_db($connection, 'loginregister');
$query = "SELECT * FROM user_posts"; $query_run = mysqli_query($connection, $query); ?> <table class="table table-striped table-sm"> <thead> <tr> <th scope="col"> #</th> <th scope="col"> Blog Title</th> <th scope="col">Blog Description</th> <th scope="col">Blog Image </th>
<th scope="col"> Action </th> </tr> </thead> <?php if($query_run) { foreach($query_run as $row) { ?> <tbody> <tr> <td style="width:10%;"> <?php echo $row['id']; ?> </td> <td style="width:30%;"> <?php echo $row['title']; ?> </td> <td style="width:35///%;"> <?php echo $row['description']; ?> </td> <td style="width:15%;"> <img src="images/<?php echo $row['image']; ?> " width="100" height="50"> </td> <td style="width:10%;"> <button type="button" name="delete_blog" class="btn btn-danger deletebtn btn-sm"> <span class="fa fa-trash"></span> Remove </button> </td> </tr> </tbody> <?php } } else { echo "No Record Found"; } ?> </table> </div>
<!-- the delete data confirmation-->
<div class="modal fade" id="deletemodal" tabindex="-1" aria-labelledby="exampleModalLabel" aria-hidden="true"> <div class="modal-dialog"> <div class="modal-content"> <div class="modal-header"> <h5 class="modal-title" id="exampleModalLabel"> <span class="fa fa-trash"></span> Delete Blog Post</h5> <button type="button" class="btn-close" data-bs-dismiss="modal" aria-label="Close"></button> </div> <form action="deletecode.php" method="POST"> <div class="modal-body"> <input type="hidden" name="delete_id" id="delete_id"> <h5> Do you want to delete this Blog?</h5> </div> <div class="modal-footer"> <button type="button" class="btn btn-secondary" data-bs-dismiss="modal">Close</button> <button type="submit" name="deletedata" class="btn btn-danger"> Yes </button> </div>
</form> </div> </div> </div>
<div class="modal fade" id="editmodall" tabindex="-1" role="dialog" aria-labelledby="exampleModalLabel" aria-hidden="true"> <div class="modal-dialog" role="document"> <div class="modal-content"> <div class="modal-header"> <h5 class="modal-title" id="exampleModalLabel"> Edit Student Data </h5> <button type="button" class="close" data-dismiss="modal" aria-label="Close"> <span aria-hidden="true">×</span> </button> </div>
<form action="updatecode.php" method="POST">
<div class="modal-body">
<input type="hidden" name="update_id" id="update_id">
<div class="form-group"> <label> First Name </label> <input type="text" name="fname" id="fname" class="form-control" placeholder="Enter First Name"> </div>
<div class="form-group"> <label> Last Name </label> <input type="text" name="lname" id="lname" class="form-control" placeholder="Enter Last Name"> </div>
<div class="form-group"> <label> Course </label> <input type="text" name="course" id="course" class="form-control" placeholder="Enter Course"> </div>
<div class="form-group"> <label> Phone Number </label> <input type="text" name="contact" id="contact" class="form-control" placeholder="Enter Phone Number"> </div> </div> <div class="modal-footer"> <button type="button" class="btn btn-secondary" data-dismiss="modal">Close</button> <button type="submit" name="updatedata" class="btn btn-primary">Update Data</button> </div> </form>
</div> </div> </div> </div> </div> <script src="https://cdn.jsdelivr.net/npm/bootstrap@5.2.0/dist/js/bootstrap.bundle.min.js" integrity="sha384-A3rJD856KowSb7dwlZdYEkO39Gagi7vIsF0jrRAoQmDKKtQBHUuLZ9AsSv4jD4Xa" crossorigin="anonymous"></script>
<script src="https://cdn.jsdelivr.net/npm/feather-icons@4.28.0/dist/feather.min.js" integrity="sha384-uO3SXW5IuS1ZpFPKugNNWqTZRRglnUJK6UAZ/gxOX80nxEkN9NcGZTftn6RzhGWE" crossorigin="anonymous"></script><script src="https://cdn.jsdelivr.net/npm/chart.js@2.9.4/dist/Chart.min.js" integrity="sha384-zNy6FEbO50N+Cg5wap8IKA4M/ZnLJgzc6w2NqACZaK0u0FXfOWRRJOnQtpZun8ha" crossorigin="anonymous"></script><script src="dashboard.js"></script>
<script src="https://cdnjs.cloudflare.com/ajax/libs/jquery/3.3.1/jquery.min.js"></script> <script src="https://cdnjs.cloudflare.com/ajax/libs/popper.js/1.14.6/umd/popper.min.js"></script> <script src="https://stackpath.bootstrapcdn.com/bootstrap/4.2.1/js/bootstrap.min.js"></script>
<script src="https://cdn.datatables.net/1.10.18/js/jquery.dataTables.min.js"></script> <script src="https://cdn.datatables.net/1.10.18/js/dataTables.bootstrap4.min.js"></script>
<script> $(document).ready(function () {
$('.viewbtn').on('click', function () { $('#viewmodal').modal('show'); $.ajax({ //create an ajax request to display.php type: "GET", url: "display.php", dataType: "html", //expect html to be returned success: function (response) { $("#responsecontainer").html(response); //alert(response); } }); });
}); </script> <script> $(document).ready(function () {
$('#datatableid').DataTable({ "pagingType": "full_numbers", "lengthMenu": [ [10, 25, 50, -1], [10, 25, 50, "All"] ], responsive: true, language: { search: "_INPUT_", searchPlaceholder: "Search Your Data", } });
}); </script>
<script> $(document).ready(function () {
$('.deletebtn').on('click', function () {
$('#deletemodal').modal('show');
$tr = $(this).closest('tr');
var data = $tr.children("td").map(function () { return $(this).text(); }).get();
console.log(data);
$('#delete_id').val(data[0]);
}); }); </script>
<script> $(document).ready(function () {
$('.editbtn').on('click', function () {
$('#editmodal').modal('show');
$tr = $(this).closest('tr');
var data = $tr.children("td").map(function () { return $(this).text(); }).get();
console.log(data);
$('#update_id').val(data[0]); $('#fname').val(data[1]); $('#lname').val(data[2]); $('#course').val(data[3]); $('#contact').val(data[4]); }); }); </script> </body> </html> |
To fetch from the database, create uploads.php and paste the code below:
|
<?php // create a database connection $link = mysqli_connect('localhost', 'root', '', 'loginregister');
//an Array to return form validation mistakes $post_upload_success = array();
// If the user clicks the upload button ... if (isset($_POST['upload_post'])) {
// receive post infotmation $title = mysqli_real_escape_string($link, $_POST['title']); $description = mysqli_real_escape_string($link, $_POST['description']); $image = $_FILES['image']['name'];
// paste the information to the images folder $target = "images/".basename($image);
$sql = "INSERT INTO user_posts (title, description, image ) VALUES ('$title', '$description','$image')"; // execute query mysqli_query($link, $sql);
if (move_uploaded_file($_FILES['image']['tmp_name'], $target)) { array_push($post_upload_success, "Post uploaded successfully!!"); }else{ array_push($post_upload_success, "Post uploadintg Failed!!"); } } $result = mysqli_query($link, "SELECT * FROM user_posts");
//if admin posts a new post if (isset($_POST['admin_post'])) {
$admin_upload_success = array();
// receive post infotmation $title = mysqli_real_escape_string($link, $_POST['title']); $description = mysqli_real_escape_string($link, $_POST['description']); $image = $_FILES['image']['name'];
// paste the information to the images folder $target = "images/".basename($image);
$sql = "INSERT INTO user_posts (title, description, image ) VALUES ('$title', '$description','$image')"; // execute query mysqli_query($link, $sql);
if (move_uploaded_file($_FILES['image']['tmp_name'], $target)) { array_push($post_upload_success, "Post uploaded successfully!!"); }else{ array_push($post_upload_success, "Post uploadintg Failed!!"); }
} ?> |
This page will upload and insert the code to our database table.
Now, if you run this code on your web browser, the following page will be displayed, with the side menu bar with the posts retrieved from the database, the upload post option and the sign out option.
 |
Now we have added a lot of code which fetches the data from the database and we have added the JavaScript code that calls the delete functionality which deletes the data from the database. We are going to use bootstrap to create modals to pop up with the delete confirmation when you click on the “remove” button.
The bootstrap modal code
|
<!-- the delete data confirmation--> <div class="modal fade" id="deletemodal" tabindex="-1" aria-labelledby="exampleModalLabel" aria-hidden="true"> <div class="modal-dialog"> <div class="modal-content"> <div class="modal-header"> <h5 class="modal-title" id="exampleModalLabel"> <span class="fa fa-trash"></span> Delete Blog Post</h5> <button type="button" class="btn-close" data-bs-dismiss="modal" aria-label="Close"></button> </div> <form action="deletecode.php" method="POST"> <div class="modal-body"> <input type="hidden" name="delete_id" id="delete_id"> <h5> Do you want to delete this Blog?</h5> </div> <div class="modal-footer"> <button type="button" class="btn btn-secondary" data-bs-dismiss="modal">Close</button> <button type="submit" name="deletedata" class="btn btn-danger"> Yes </button> </div>
</form> </div> </div> </div>
The JavaScript Code
<script> $(document).ready(function () {
$('.deletebtn').on('click', function () {
$('#deletemodal').modal('show');
$tr = $(this).closest('tr');
var data = $tr.children("td").map(function () { return $(this).text(); }).get();
console.log(data);
$('#delete_id').val(data[0]);
}); }); </script> |
Now if you click on the “remove” button the delete confirmation modal will pop, however it still not deletes.
 |
Now to enable delete function to work, create deletecode.php and add the code below
|
<?php $connection = mysqli_connect("localhost","root",""); $db = mysqli_select_db($connection, 'loginregister');
if(isset($_POST['deletedata'])) { $id = $_POST['delete_id'];
$query = "DELETE FROM user_posts WHERE id='$id'"; $query_run = mysqli_query($connection, $query);
$item_deleted = array();
if($query_run) { array_push($item_deleted, "Blog Post deleted Successfully"); header("Location:admin.php"); } else { echo '<script> alert("Data Not Deleted"); </script>'; } }
?> |
Now we need to ensure that the user uploads post. To do so we should create a new page, admin_post.php and paste the code below:
|
<?php session_start();
if (!isset($_SESSION['username'])) { $_SESSION['msg'] = "You must log in first"; header('location: Login.php'); } //if user decides to logout if (isset($_GET['logout'])) { session_destroy(); unset($_SESSION['username']); header("location: login.php"); }
?>
<?php include('uploads.php') ?>
<!doctype html> <html lang="en"> <head> <meta charset="utf-8"> <meta name="viewport" content="width=device-width, initial-scale=1"> <meta name="description" content=""> <meta name="author" content="Mark Otto, Jacob Thornton, and Bootstrap contributors"> <meta name="generator" content="Hugo 0.84.0"> <title>Admin Dashboard</title>
<link rel="canonical" href="https://getbootstrap.com/docs/5.0/examples/dashboard/">
<link href="https://cdn.jsdelivr.net/npm/bootstrap@5.2.0/dist/css/bootstrap.min.css" rel="stylesheet" integrity="sha384-gH2yIJqKdNHPEq0n4Mqa/HGKIhSkIHeL5AyhkYV8i59U5AR6csBvApHHNl/vI1Bx" crossorigin="anonymous">
<link rel="stylesheet" type="text/css" href="font-awesome/css/font-awesome.css"> <link rel="stylesheet" type="text/css" href="font-awesome/css/font-awesome.min.css">
<style> .bd-placeholder-img { font-size: 1.125rem; text-anchor: middle; -webkit-user-select: none; -moz-user-select: none; user-select: none; }
@media (min-width: 768px) { .bd-placeholder-img-lg { font-size: 3.5rem; } } </style>
<!-- Custom styles for this template --> <link href="dashboard.css" rel="stylesheet"> </head> <body>
<header class="navbar navbar-dark sticky-top bg-dark flex-md-nowrap p-0 shadow"> <a class="navbar-brand col-md-3 col-lg-2 me-0 px-3" href="#">
<?php if (isset($_SESSION['username'])) : ?> Welcome <strong><?php echo $_SESSION['username']; ?></strong> <?php endif ?> </a> <button class="navbar-toggler position-absolute d-md-none collapsed" type="button" data-bs-toggle="collapse" data-bs-target="#sidebarMenu" aria-controls="sidebarMenu" aria-expanded="false" aria-label="Toggle navigation"> <span class="navbar-toggler-icon"></span> </button> <input class="form-control form-control-dark w-100" type="text" placeholder="Search" aria-label="Search"> <div class="navbar-nav"> <div class="nav-item text-nowrap"> <?php if (isset($_SESSION['username'])) : ?> <a class="nav-link px-3" href="index.php?logout='1'">Sign out</a> <?php endif ?> </div> </div> </header>
<div class="container-fluid"> <div class="row"> <nav id="sidebarMenu" class="col-md-3 col-lg-2 d-md-block bg-light sidebar collapse"> <div class="position-sticky pt-3"> <ul class="nav flex-column"> <li class="nav-item"> <a class="nav-link active" aria-current="page" href="#"> <span data-feather="home"></span> Dashboard </a> </li> <li class="nav-item"> <a class="nav-link" href="admin.php"> <span class="fa fa-tasks"></span> Posts </a> </li> <li class="nav-item"> <a class="nav-link" href="admin_post.php"> <span class="fa fa-pencil"></span> Upload Post </a> </li> <li class="nav-item">
<?php if (isset($_SESSION['username'])) : ?> <a class="nav-link px-3" href="index.php?logout='1'"> <span class="fa fa-user"></span> Sign out</a> <?php endif ?>
</li>
</ul>
</div> </nav>
<!---enter Display user table---> <main class="col-md-9 ms-sm-auto col-lg-10 px-md-4"> <div class="d-flex justify-content-between flex-wrap flex-md-nowrap align-items-center pt-3 pb-2 mb-3 border-bottom"> <!--display the admin name --> <h1 class="h2">Upload Post</h1> <div class="btn-toolbar mb-2 mb-md-0"> </div> </div>
<div>
<form method="POST" action="admin_post.php" enctype="multipart/form-data"> <input type="hidden" name="size" value="1000000"> <fieldset> <legend> <span class="fa fa-pencil"></span> Post a Blog</legend> <!-- notification message --> <?php if (count($post_upload_success) > 0) : ?> <div class="alert alert-success" role="alert" > <?php foreach ($post_upload_success as $display_message) : ?> <p><?php echo $display_message ?></p> <?php endforeach ?> </div> <?php endif ?>
<div class="mb-3"> <label for="TextInput" class="form-label">Post Title</label> <input type="text" name="title" id="disabledTextInput" class="form-control" placeholder="Post Title" required/> </div>
<div class="mb-3"> <label for="disabledTextInput" class="form-label">Post Description</label> <textarea
id="text" cols="40" rows="4" name="description" id="disabledTextInput" class="form-control" placeholder="Post Description" required>
</textarea>
<div class="mb-3"> <label for="disabledTextInput" class="form-label">Image</label> <input type="file" name="image" id="disabledTextInput" class="form-control" required> </div> <button type="submit" name="admin_post" class="btn btn-primary">Upload</button>
</fieldset> </form> </div> <!-- the delete data confirmation-->
<div class="modal fade" id="deletemodal" tabindex="-1" aria-labelledby="exampleModalLabel" aria-hidden="true"> <div class="modal-dialog"> <div class="modal-content"> <div class="modal-header"> <h5 class="modal-title" id="exampleModalLabel"> <span class="fa fa-trash"></span> Delete Blog Post</h5> <button type="button" class="btn-close" data-bs-dismiss="modal" aria-label="Close"></button> </div> <form action="deletecode.php" method="POST"> <div class="modal-body"> <input type="hidden" name="delete_id" id="delete_id"> <h5> Do you want to delete this Blog?</h5> </div> <div class="modal-footer"> <button type="button" class="btn btn-secondary" data-bs-dismiss="modal">Close</button> <button type="submit" name="deletedata" class="btn btn-danger"> Yes </button> </div>
</form> </div> </div> </div> </div> </div>
<script src="https://cdn.jsdelivr.net/npm/bootstrap@5.2.0/dist/js/bootstrap.bundle.min.js" integrity="sha384-A3rJD856KowSb7dwlZdYEkO39Gagi7vIsF0jrRAoQmDKKtQBHUuLZ9AsSv4jD4Xa" crossorigin="anonymous"></script>
<script src="https://cdn.jsdelivr.net/npm/feather-icons@4.28.0/dist/feather.min.js" integrity="sha384-uO3SXW5IuS1ZpFPKugNNWqTZRRglnUJK6UAZ/gxOX80nxEkN9NcGZTftn6RzhGWE" crossorigin="anonymous"></script><script src="https://cdn.jsdelivr.net/npm/chart.js@2.9.4/dist/Chart.min.js" integrity="sha384-zNy6FEbO50N+Cg5wap8IKA4M/ZnLJgzc6w2NqACZaK0u0FXfOWRRJOnQtpZun8ha" crossorigin="anonymous"></script><script src="dashboard.js"></script>
<script src="https://cdnjs.cloudflare.com/ajax/libs/jquery/3.3.1/jquery.min.js"></script> <script src="https://cdnjs.cloudflare.com/ajax/libs/popper.js/1.14.6/umd/popper.min.js"></script> <script src="https://stackpath.bootstrapcdn.com/bootstrap/4.2.1/js/bootstrap.min.js"></script> <script src="https://cdn.datatables.net/1.10.18/js/jquery.dataTables.min.js"></script> <script src="https://cdn.datatables.net/1.10.18/js/dataTables.bootstrap4.min.js"></script>
<script> $(document).ready(function () {
$('.viewbtn').on('click', function () { $('#viewmodal').modal('show'); $.ajax({ //create an ajax request to display.php type: "GET", url: "display.php", dataType: "html", //expect html to be returned success: function (response) { $("#responsecontainer").html(response); //alert(response); } }); });
}); </script> <script> $(document).ready(function () {
$('#datatableid').DataTable({ "pagingType": "full_numbers", "lengthMenu": [ [10, 25, 50, -1], [10, 25, 50, "All"] ], responsive: true, language: { search: "_INPUT_", searchPlaceholder: "Search Your Data", } }); }); </script> <script> $(document).ready(function () {
$('.deletebtn').on('click', function () {
$('#deletemodal').modal('show');
$tr = $(this).closest('tr');
var data = $tr.children("td").map(function () { return $(this).text(); }).get();
console.log(data);
$('#delete_id').val(data[0]);
}); }); </script>
<script> $(document).ready(function () {
$('.editbtn').on('click', function () {
$('#editmodal').modal('show');
$tr = $(this).closest('tr');
var data = $tr.children("td").map(function () { return $(this).text(); }).get();
console.log(data);
$('#update_id').val(data[0]); $('#fname').val(data[1]); $('#lname').val(data[2]); $('#course').val(data[3]); $('#contact').val(data[4]); }); }); </script>
</body> </html> |
If you run this code, the following page will be displayed and the admin will be able to upload the new posts.
 |
That’s all for the admin.
Final Thoughts
We have finally learned how to create a MySQL database and a database table using SQL queries learned how to register a user by inserting user data into the database, authenticate the user and carry the user session, and finally log out the user by destroying the session. In addition, we have also learned how to encrypt and decrypt critical user details, such as passwords using the md5 encrypting/decrypting function.