Flutter Horizontal Listview with a Snap Effect
Create a Horizontal Listview with Sanp Effect. How to add Snap Effect for the List itemsin the flutter. Scroll list in horizontal | RRTutors
This implementation demonstrates a horizontal list in Flutter with an elegant snap effect, showing how to create smooth, attractive horizontal scrolling UI components. The code features:
Key Features
- PageView with Snap Effect - Automatically snaps to the nearest item when scrolling ends
- Visual Feedback - Items scale up when centered and down when not, providing clear visual cues
- Smooth Animations - Uses TweenAnimationBuilder for fluid transitions between states
- Page Indicators - Shows the current position with interactive dot indicators
- Multiple Implementation Options - Includes both PageView and ListView.builder approaches
Implementation Details
The solution uses PageView.builder with a custom PageController that has a viewportFraction of 0.8, allowing users to see partial items on either side while focusing on the current one. The snap effect is built into PageView by default.
For enhanced user experience, the current item scales to 1.0 while others scale to 0.9, creating a subtle but effective focus effect. The transition between these states is smoothly animated using TweenAnimationBuilder.
#1 Flutter Horizontal List with Snap Effect: A Complete Guide
|
import 'package:flutter/material.dart'; class SnapHorizontalList extends StatefulWidget { @override class _SnapHorizontalListState extends State<SnapHorizontalList> { @override @override void _onScroll() { @override // Example of how to use this widget in a main app class MyApp extends StatelessWidget { @override |
#2 Flutter Horizontal LIstview with Snpa Effect
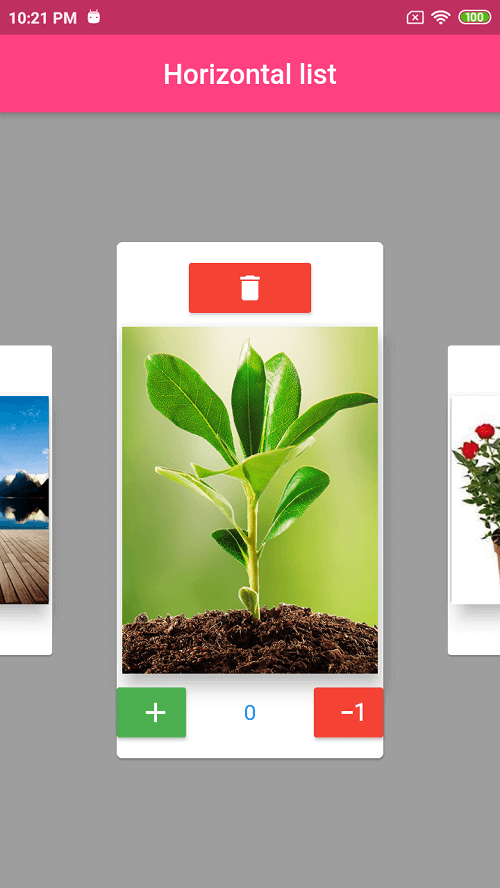
How to create a list of cards scrolling horizontally with snap to fit effect when swiped either from left or right.
In this post we will learn how to create Horizontal Scollable Card with Snap effect.
For this Example i used scroll_snap_list plugin.
This example i havecreated a List of Data classes which contains Image and Count of items to be selected.
Let's get started
Step 1: Create a Flutter application
Step2: Add required plugin in pubspec.yaml file.
dependencies:
  flutter:
    sdk: flutter
  scroll_snap_list:
|
Import plugin in dart file
import 'package:scroll_snap_list/scroll_snap_list.dart';
|
Step 3: Create a Data class file which contains image path and item count variable
class Data{
  int count;
  String path;
  Data(this.count,this.path);

}
|
Step 4: Create UI to display the data items
Widget _buildItemList(BuildContext context, int index){
  if(index == data.length)
    return Center(
      child: CircularProgressIndicator(),
    );
  return Container(
    width: 200,
    child: Center(
      child: Container(
        height: 380,

        child: Card(
          color: Colors.white,
          child: Column(
            mainAxisAlignment: MainAxisAlignment.center,
            children: [
              (index==current)?Container(child:RaisedButton(

                child: Icon(Icons.delete),
                color: Colors.red,
                onPressed: () {
                  setState(() {
                    data.removeAt(index);

                  });
                },
              )):Container(),
              Card(
                elevation: 10,
                child: Container(

                  width: 200,
                  height: 250,
                  child:
                  Image.network(data[index].path,scale: 1,fit: BoxFit.cover,),
                ),
              ),
              (index==current)?Row(
                crossAxisAlignment: CrossAxisAlignment.center,
                mainAxisAlignment: MainAxisAlignment.spaceBetween,
                children: [
                Container(
                  width: 50,
                  child: RaisedButton(

                    child: Icon(Icons.add),
                    color: Colors.green,
                    onPressed: () {
                      setState(() {
                        if(data[index].count<10)
                          data[index].count=data[index].count+1;
                      });
                    },

                  ),
                ),
                Text("${data[index].count}",style: TextStyle(color: Colors.blue,fontSize: 16),),
                Container(width: 50,
                  child: RaisedButton(

                    child: Icon(Icons.exposure_minus_1),
                    color: Colors.red,
                    onPressed: () {

                      setState(() {
                        if(data[index].count>0)
                          data[index].count=data[index].count-1;
                      });
                    },
                  ),
                )
              ],):Container()
            ],
          ),
        ),
      ),
    ),
  );
}
|
Step 5: Now its time to add our List data to ScrollSnapList widget.
This widget will handle the list scrolling and make snap animation effect for the current list item.
ScrollSnapList(
  itemBuilder: _buildItemList,
  onItemFocus: (pos){
    setState(() {
      current=pos;
    });
    print('Done! $pos');
  },
  itemSize: 200,
  dynamicItemSize: true,
  onReachEnd: (){
    print('Done!');
  },
  itemCount: data.length,
)
|
This ScrollSnapList widget has property called itemBuilder which will take the data as input.
Step 6: Run Application
Complete Example code
import 'package:flutter/material.dart';
import 'package:scroll_snap_list/scroll_snap_list.dart';

void main() => runApp(MyApp());

class MyApp extends StatelessWidget {
  @override
  Widget build(BuildContext context) {
    return MaterialApp(
      debugShowCheckedModeBanner: false,
      home: DemoApp(),
      theme: ThemeData(
        brightness: Brightness.dark,
      ),
    );
  }
}

class DemoApp extends StatefulWidget {
  @override
  _DemoAppState createState() => _DemoAppState();
}

class _DemoAppState extends State<DemoApp> {

  int current=0;

  List<Data> data = [
    Data(0,
    "https://img.freepik.com/free-photo/milford-sound-new-zealand-travel-destination-concept_53876-42945.jpg"),
  Data(0,"https://watchandlearn.scholastic.com/content/dam/classroom-magazines/watchandlearn/videos/animals-and-plants/plants/what-are-plants-/What-Are-Plants.jpg"),
  Data(0,"https://encrypted-tbn0.gstatic.com/images?q=tbn:ANd9GcRc7drAdH_rr-5-s1dR37nexpspDiygTjd_eg&usqp=CAU"),
  Data(0,"https://images-na.ssl-images-amazon.com/images/I/51Gguy1yh9L.jpg"),
  Data(0,"https://nestreeo.com/wp-content/uploads/2020/03/Pyrostegia_venusta.jpg"),
  Data(0,"https://encrypted-tbn0.gstatic.com/images?q=tbn:ANd9GcQW7IvtmZDCGOoFuqg5s7QWSX7sWpf3bqZcsQ&usqp=CAU"),
    Data(0,"https://images-na.ssl-images-amazon.com/images/I/51Gguy1yh9L.jpg"),
    Data(0,"https://nestreeo.com/wp-content/uploads/2020/03/Pyrostegia_venusta.jpg"),
    Data(0,"https://encrypted-tbn0.gstatic.com/images?q=tbn:ANd9GcQW7IvtmZDCGOoFuqg5s7QWSX7sWpf3bqZcsQ&usqp=CAU"),
  ];

  Widget _buildItemList(BuildContext context, int index){
    if(index == data.length)
      return Center(
        child: CircularProgressIndicator(),
      );
    return Container(
      width: 200,
      child: Center(
        child: Container(
          height: 380,

          child: Card(
            color: Colors.white,
            child: Column(
              mainAxisAlignment: MainAxisAlignment.center,
              children: [
                (index==current)?Container(child:RaisedButton(

                  child: Icon(Icons.delete),
                  color: Colors.red,
                  onPressed: () {
                    setState(() {
                      data.removeAt(index);

                    });
                  },
                )):Container(),
                Card(
                  elevation: 10,
                  child: Container(

                    width: 200,
                    height: 250,
                    child:
                    Image.network(data[index].path,scale: 1,fit: BoxFit.cover,),
                  ),
                ),
                (index==current)?Row(
                  crossAxisAlignment: CrossAxisAlignment.center,
                  mainAxisAlignment: MainAxisAlignment.spaceBetween,
                  children: [
                  Container(
                    width: 50,
                    child: RaisedButton(

                      child: Icon(Icons.add),
                      color: Colors.green,
                      onPressed: () {
                        setState(() {
                          if(data[index].count<10)
                            data[index].count=data[index].count+1;
                        });
                      },

                    ),
                  ),
                  Text("${data[index].count}",style: TextStyle(color: Colors.blue,fontSize: 16),),
                  Container(width: 50,
                    child: RaisedButton(

                      child: Icon(Icons.exposure_minus_1),
                      color: Colors.red,
                      onPressed: () {

                        setState(() {
                          if(data[index].count>0)
                            data[index].count=data[index].count-1;
                        });
                      },
                    ),
                  )
                ],):Container()
              ],
            ),
          ),
        ),
      ),
    );
  }

  @override
  void initState() {
    // TODO: implement initState
    super.initState();
    current=0;
  }
  @override
  Widget build(BuildContext context) {
    return Scaffold(
      backgroundColor: Colors.grey,
      appBar: AppBar(
        backgroundColor: Colors.pinkAccent,
        title: Text('Horizontal list',style: TextStyle(color: Colors.white),),
        centerTitle: true,
      ),
      body: Container(
        child: Column(
          children: [
            Expanded(
                child: ScrollSnapList(
                  itemBuilder: _buildItemList,
                  onItemFocus: (pos){
                    setState(() {
                      current=pos;
                    });
                    print('Done! $pos');
                  },
                  itemSize: 200,
                  dynamicItemSize: true,
                  onReachEnd: (){
                    print('Done!');
                  },
                  itemCount: data.length,
                )
            ),
          ],
        ),
      ),
    );
  }
}

class Data{
  int count;
  String path;
  Data(this.count,this.path);

}
|
Also read Flutter Dynamic Expansion Listview Example