How to create TextField, SecureField, TextEditor and Button in SwiftUI
Master SwiftUI with this tutorial. Learn to create TextField, SecureField, TextEditor, and Button components for iOS app development on rrtutors.com.
In SwiftUI, you can use TextField for single line text input andd TextEditor for multiple line text input. As you know for sensitive(secure) information like password, we can still use TextField from UIKit but SwiftUI provided different component as SecureField.
Let's get into each individual component;
TextField:
A control that displays an editable text interface. We can customize the appearance and interaction of TextField by using TextFieldStyle Instance.
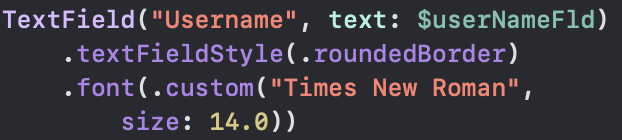 |
TextField is having two parameters:
- String which is a placholder for TextField
- Binding which will capture the text entered by the user
For the Binding object we require to create @State property wrapper to capture the text entered by the user.
SwiftUI uses the @State property wrapper to allow us to modify values inside a struct, which would normally not be allowed because structs are value types.
When we put @State before a property, we effectively move its storage out from our struct and into shared storage managed by SwiftUI. This means SwiftUI can destroy and recreate our struct whenever needed (and this can happen a lot!), without losing the state it was storing.
@State should be used with simple struct types such as String, Int, and arrays, and generally shouldn’t be shared with other views. If you want to share values across views, you should probably use @ObservedObject or @EnvironmentObject instead – both of those will ensure that all views will be refreshed when the data changes.
 |
 |
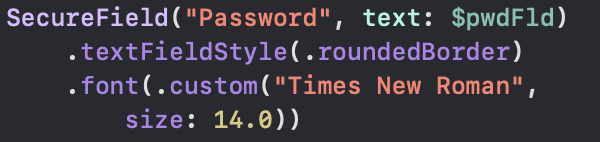
SecureField:
A control into which the user securely enters private text.
 |
 |
 |
TextEditor:
TextEditor is a view in SwiftUI which allows you to display and edit text in your app. The text can consist of multiple lines and can be scrollable.
In order to initialize a TextEditor, you need to pass in a binding to a @State variable which will store the text entered in the TextEditor and also you can format the text like how we did for TextField.
 |
 |
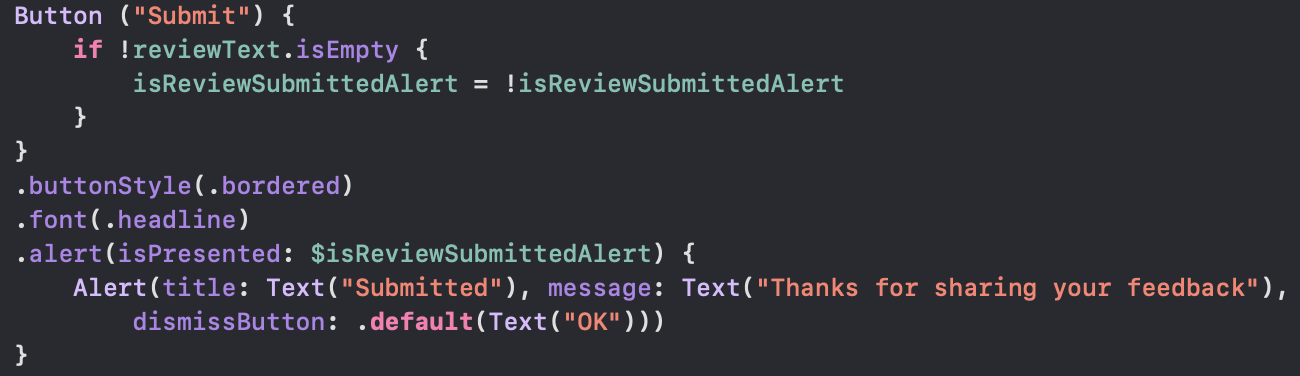
Button:
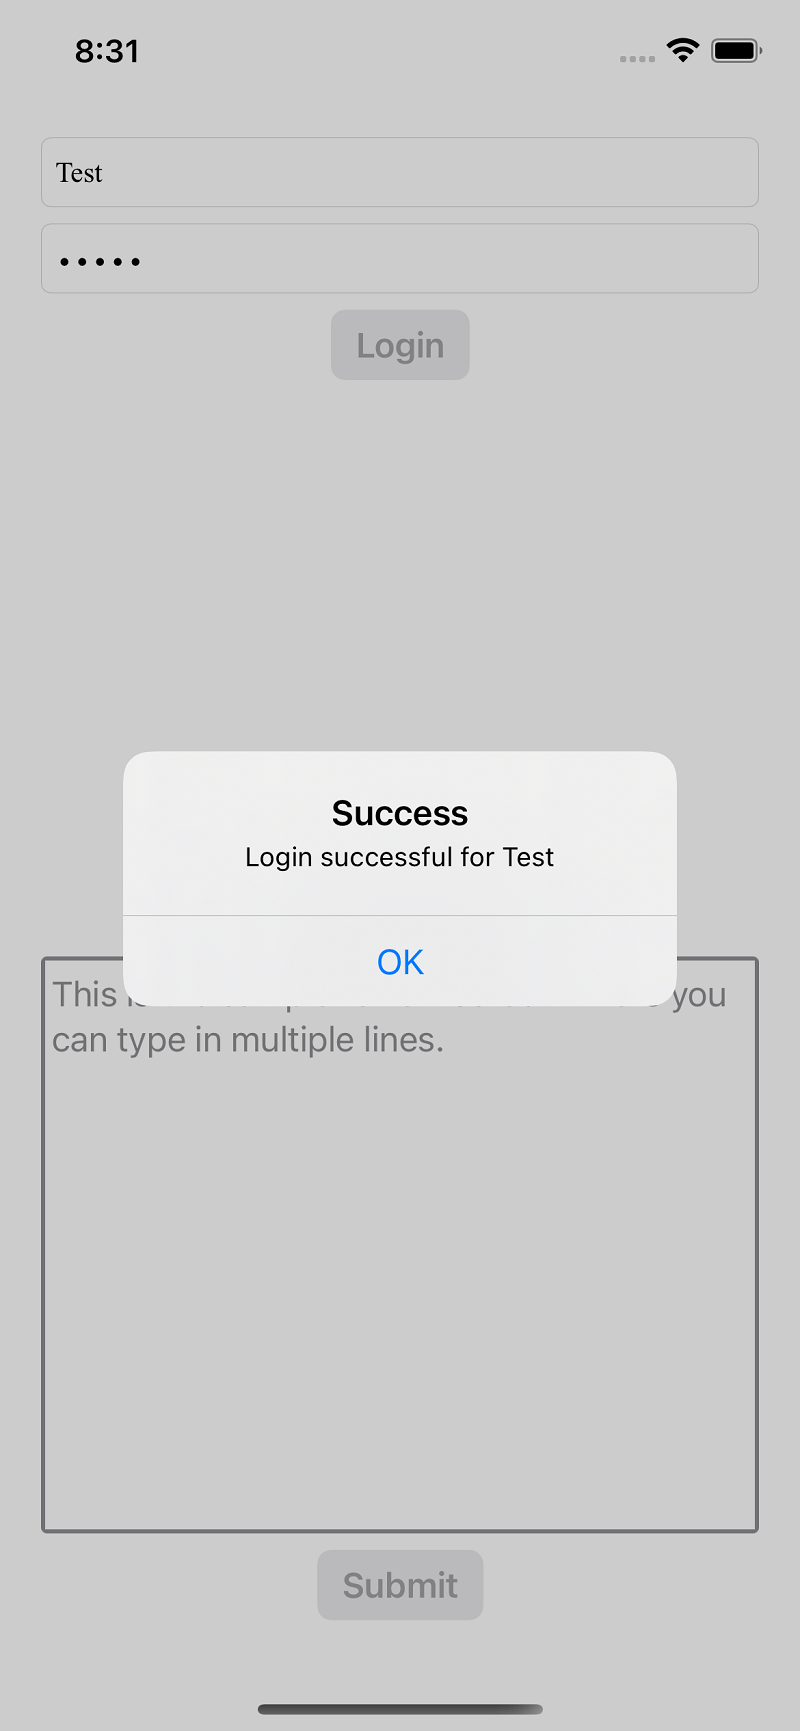
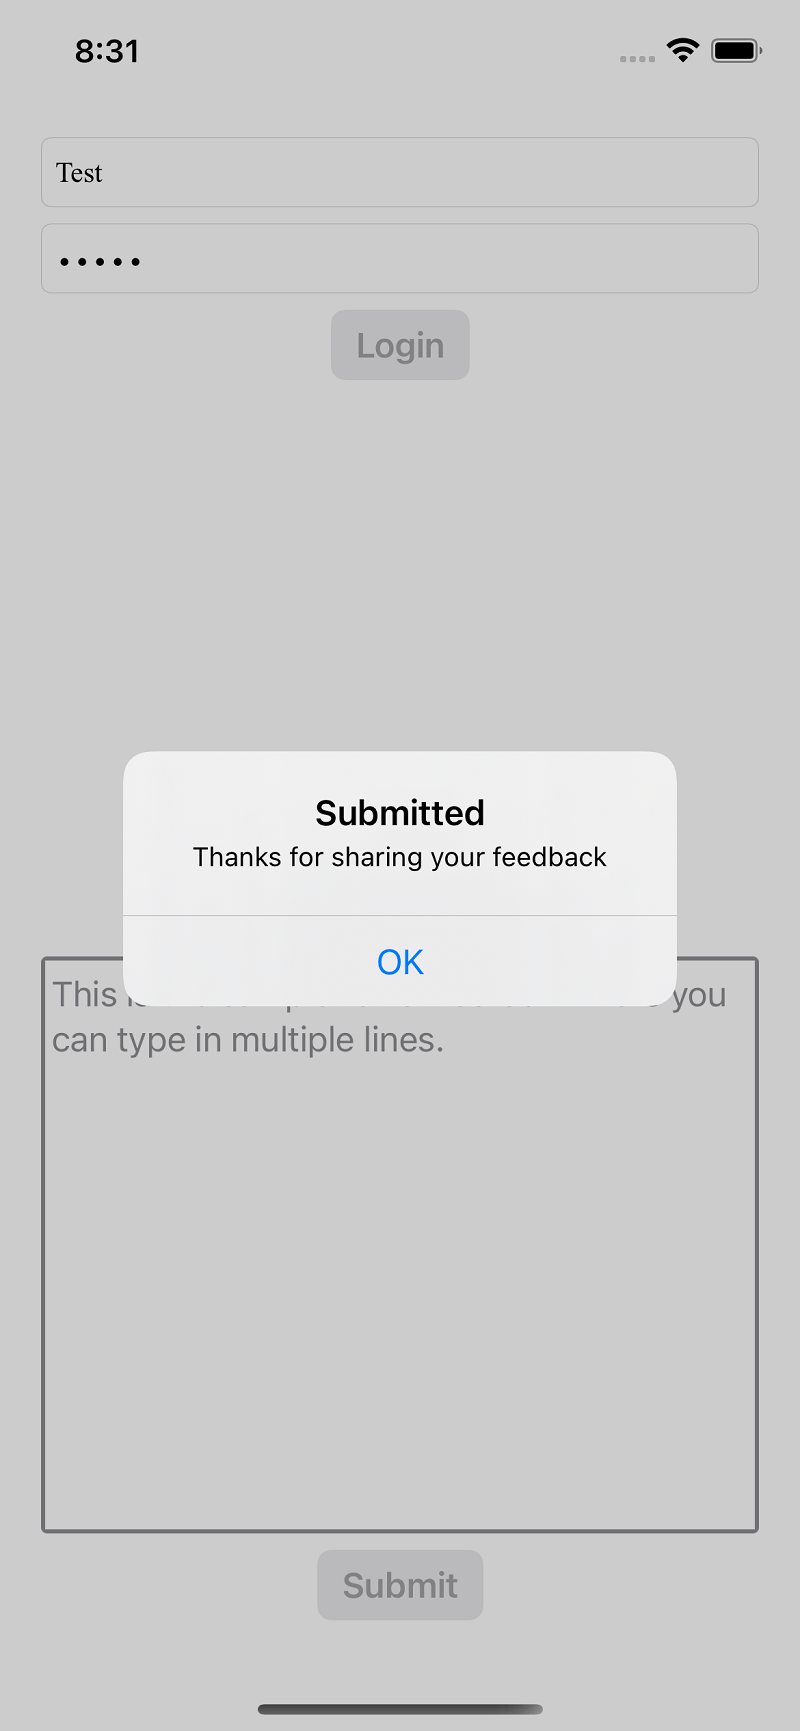
Button is similar to UIKit but the way to use is little bit different in SwiftUI. You need to use @State property wrapper inorder to capture the action of a button and implement the action whatever is required. In the example project, when user tap on Button, we are showing an alert with the captured Username/review text.
 |
 |
 |
You can interact with preview as well without running the app in simulator/device. For that, you just need to click on Play button in preview pane.
 |
You can download complete code for the above example in the below link. I have created subviews as well and you can check how we can embed them in ContentView.
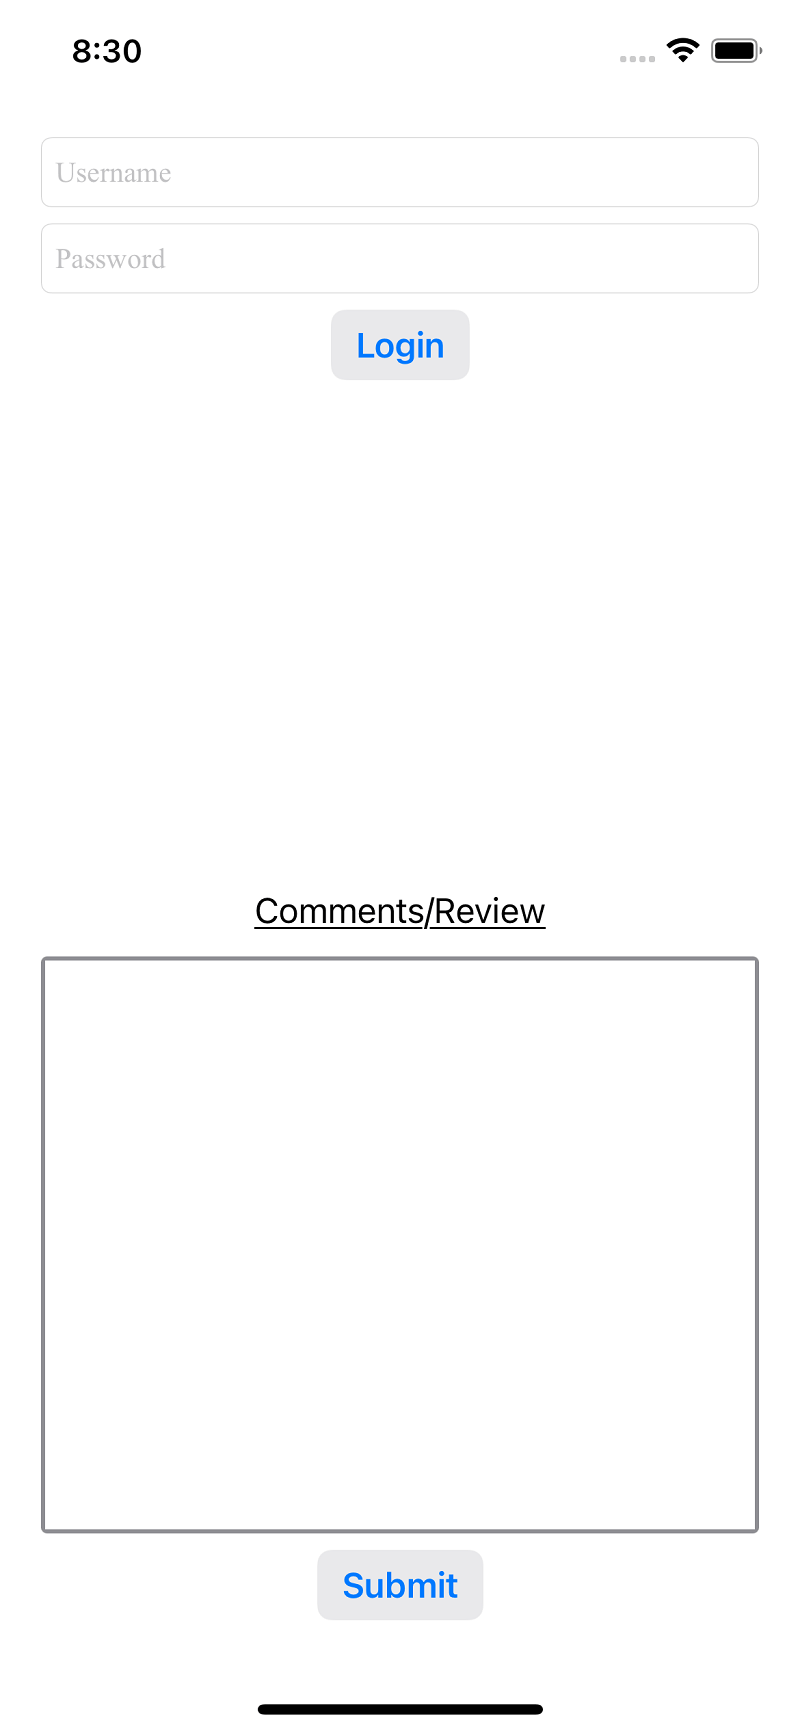
Here is the output:
 |
 |
 |
Conclusion:
In this tutorial, you learnt how to create TextField, SecureField, TextEditor and Button.
Create First SwiftUI project in Xcode
How do i create Text Component in SwiftUI
More SwiftUI textfield Questions
- How do i create Multiline Textfield in SwiftUI
- How do i auto focus Textfield with SwiftUI to open keyboard
- How do i make SwiftUI TextField Border
- How do i make SwiftUI TextField Alignment
- How do i make SwiftUI Textfield Validation
- How do i make SwiftUI Textfield clickable
- How do i set SwiftUI TextField numbers, email only text type
- How do i add Icon to SwiftUI Textfield
- How do i add SwiftUI TextField Color
- How do i handle SwiftUI Textfield OnSubmit event