In this android example tutorial, we will see how to create a fragment and add to the activity in Android Studio by using Kotlin Language.
What is Fragments in Android?
Android Fragment is a type of activity that is also referred to as a sub-activity. An action may contain multiple fragments. Fragments are many screens contained within a single activity. Because fragments are included in activity, the lifecycle of an Android fragment is influenced by the lifecycle of an activity.
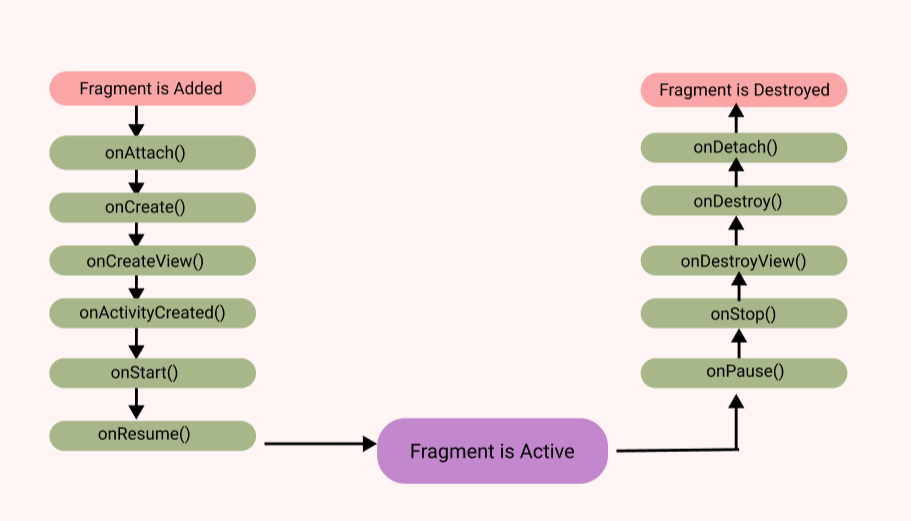
Lifecycle of Fragment:
Android Fragment Lifecycle Methods:
| onAttach(Activity) |
Called only once when it is attached with activity. |
| onCreate(Bundle) |
Used to initialize the fragment. |
| onCreateView(LayoutInflater, ViewGroup, Bundle) |
Creates and returns view hierarchy. |
| onActivityCreated(Bundle) |
Invoked after the completion of onCreate() method. |
| onStart() |
Makes the fragment visible. |
| onResume() |
Makes the fragment interactive. |
| onPause() |
Called when fragment is no longer interactive. |
| onStop() |
Called when fragment is no longer visible. |
| onDestroyView() |
Allows the fragment to clean up resources. |
| onDestroy() |
Allows the fragment to do final clean up of fragment state. |
| onDetach() |
Called immediately prior to the fragment no longer being associated with its activity. |
Implementation:
Step 1: Create a new Project in android studio.
|
Go to File > New > New Project > Empty Activity > Next > Enter Name > Select Language Kotlin > Finish.
|
Step 2: Go to activity_main.xml file and add the following code
|
<RelativeLayout xmlns:android="http://schemas.android.com/apk/res/android"
xmlns:tools="http://schemas.android.com/tools"
android:layout_width="match_parent"
android:layout_height="match_parent"
tools:context=".MainActivity">
<FrameLayout
android:id="@+id/frame"
android:layout_width="match_parent"
android:layout_height="match_parent"
android:layout_above="@+id/navBottomBar"></FrameLayout>
<LinearLayout
android:id="@+id/navBottomBar"
android:layout_width="match_parent"
android:layout_height="wrap_content"
android:elevation="12dp"
android:padding="10dp"
android:layout_alignParentBottom="true"
>
<FrameLayout
android:id="@+id/ic_home"
android:layout_width="match_parent"
android:layout_height="wrap_content"
android:layout_weight="1">
<LinearLayout
android:layout_width="match_parent"
android:layout_height="match_parent"
android:gravity="center"
android:weightSum="2"
android:orientation="vertical">
<ImageView
android:layout_width="26dp"
android:layout_height="26dp"
android:background="@drawable/home"
android:layout_weight="1"></ImageView>
<TextView
android:layout_width="wrap_content"
android:layout_height="match_parent"
android:text="Home"
android:textStyle="bold"
android:textColor="@color/black"
android:layout_weight="1"></TextView>
</LinearLayout>
</FrameLayout>
<FrameLayout
android:id="@+id/ic_settings"
android:layout_width="match_parent"
android:layout_height="wrap_content"
android:layout_weight="1">
<LinearLayout
android:layout_width="match_parent"
android:layout_height="wrap_content"
android:gravity="center"
android:weightSum="2"
android:orientation="vertical">
<ImageView
android:layout_width="26dp"
android:layout_height="26dp"
android:background="@drawable/ic_baseline_settings_24"
android:backgroundTint="@color/black"
android:layout_weight="1"></ImageView>
<TextView
android:layout_width="wrap_content"
android:layout_height="match_parent"
android:text="Settings"
android:textStyle="bold"
android:textColor="@color/black"
android:layout_weight="1"></TextView>
</LinearLayout>
</FrameLayout>
</LinearLayout>
</RelativeLayout>
|
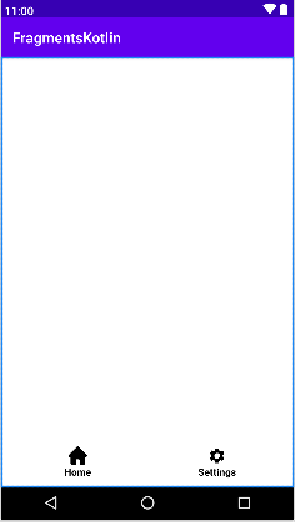
The screen ui will be like after adding above xml.
Step 3: Create a new package for fragments
|
app > java > com.example.fragment > right-click > new > package> Enter name (Fragment) > OK.
|
Step 4: Create a new fragment inside Fragment package
|
app > java > com.example.Fragment > Fragment > right-click > new > Fragment > Blank Fragment > enter name (HomeFragment) > FINISH.
|
By using same create one more fragment name SettingsFragment.
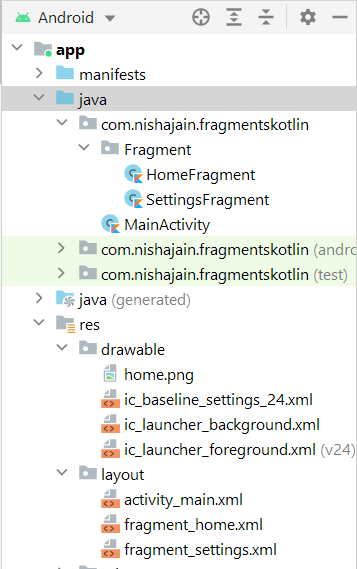
Your view of project be like:
Step 5: Open MainActivity.kt file and add the following code below setContentView(R.layout.activity_main).
|
val icHome = findViewById(R.id.ic_home)
val icSettings = findViewById(R.id.ic_settings)
replaceFragment(HomeFragment())
icHome.setOnClickListener {
replaceFragment(HomeFragment())
}
icSettings.setOnClickListener {
replaceFragment(SettingsFragment())
}
}
fun replaceFragment(fragment: Fragment) {
val transaction = supportFragmentManager.beginTransaction()
transaction.replace(R.id.frame, fragment)
transaction.commit()
}
|
At runtime, a FragmentManager can add, remove, replace, and perform other actions with fragments in response to user interaction. Each collection of fragment changes that you commit is referred to as a transaction, and you can specify what to do inside the transaction using the FragmentTransaction class's APIs. Many actions can be combined into a single transaction.
For example, a transaction can add or change multiple fragments.
You can get an instance of FragmentTransaction from the FragmentManager by calling beginTransaction(), as shown in the following example:
| val transaction = supportFragmentManager.beginTransaction() |
We use the replace method to replace the fragment with another fragment and activity & commit the fragment.
|
transaction.replace(R.id.frame, fragment)
transaction.commit()
|
Step 6: Open fragment_home.xml from res => layout folder and add the following.
|
xmlns:tools="http://schemas.android.com/tools"
android:layout_width="match_parent"
android:layout_height="match_parent"
android:layout_gravity="center"
android:background="#ABADBC"
tools:context=".Fragment.HomeFragment">
android:layout_width="match_parent"
android:layout_height="match_parent"
android:gravity="center"
android:textSize="30sp"
android:textColor="@color/black"
android:text="My Home" />
|
Step 7: HomeFragment.kt file be like:
|
class HomeFragment : Fragment() {
override fun onCreateView(
inflater: LayoutInflater, container: ViewGroup?,
savedInstanceState: Bundle?
): View? {
return inflater.inflate(R.layout.fragment_home, container, false)
}
}
|
Step 8: Open fragment_settings.xml and add the following code:
|
xmlns:tools="http://schemas.android.com/tools"
android:layout_width="match_parent"
android:layout_height="match_parent"
android:background="#B0B6D8"
tools:context=".Fragment.SettingsFragment">
android:layout_width="match_parent"
android:layout_height="match_parent"
android:gravity="center"
android:textSize="30sp"
android:textColor="@color/black"
android:text="My Settings" />
|
Step 9: SettingsFragment.kt file be like:
|
class SettingsFragment : Fragment() {
override fun onCreateView(
inflater: LayoutInflater, container: ViewGroup?,
savedInstanceState: Bundle?
): View? {
// Inflate the layout for this fragment
return inflater.inflate(R.layout.fragment_settings, container, false)
}
}
|
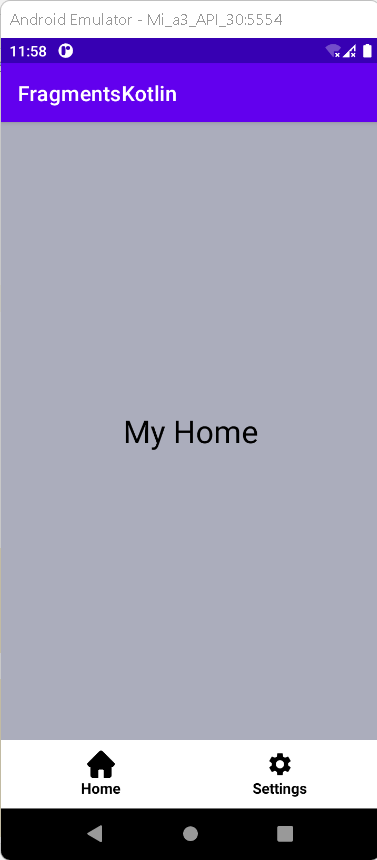
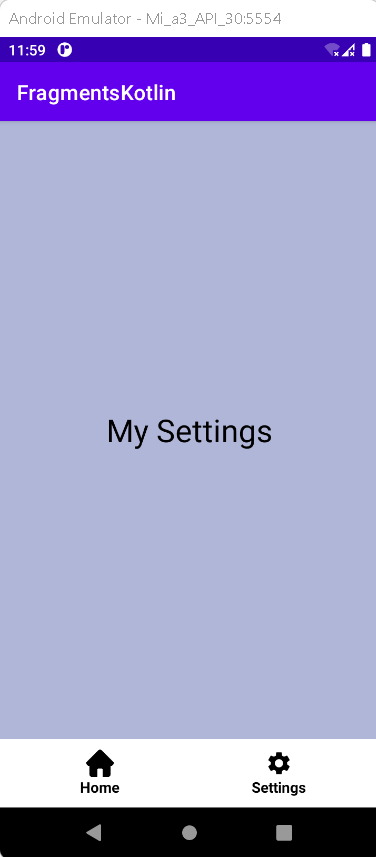
Step 10: Run the app on emulator or real device, you will get the output as given below
OUTPUT:
Complete Source Code of Fragments in Activity Example
activity_main.xml file
|
xmlns:tools="http://schemas.android.com/tools"
android:layout_width="match_parent"
android:layout_height="match_parent"
tools:context=".MainActivity">
android:id="@+id/frame"
android:layout_width="match_parent"
android:layout_height="match_parent"
android:layout_above="@+id/navBottomBar">
android:id="@+id/navBottomBar"
android:layout_width="match_parent"
android:layout_height="wrap_content"
android:elevation="12dp"
android:padding="10dp"
android:layout_alignParentBottom="true"
>
android:id="@+id/ic_home"
android:layout_width="match_parent"
android:layout_height="wrap_content"
android:layout_weight="1">
android:layout_width="match_parent"
android:layout_height="match_parent"
android:gravity="center"
android:weightSum="2"
android:orientation="vertical">
android:layout_width="26dp"
android:layout_height="26dp"
android:background="@drawable/home"
android:layout_weight="1">
android:layout_width="wrap_content"
android:layout_height="match_parent"
android:text="Home"
android:textStyle="bold"
android:textColor="@color/black"
android:layout_weight="1">
android:id="@+id/ic_settings"
android:layout_width="match_parent"
android:layout_height="wrap_content"
android:layout_weight="1">
android:layout_width="match_parent"
android:layout_height="wrap_content"
android:gravity="center"
android:weightSum="2"
android:orientation="vertical">
android:layout_width="26dp"
android:layout_height="26dp"
android:background="@drawable/ic_baseline_settings_24"
android:backgroundTint="@color/black"
android:layout_weight="1">
android:layout_width="wrap_content"
android:layout_height="match_parent"
android:text="Settings"
android:textStyle="bold"
android:textColor="@color/black"
android:layout_weight="1">
|
MainActivity.kt file
|
import androidx.appcompat.app.AppCompatActivity
import android.os.Bundle
import android.widget.FrameLayout
import androidx.fragment.app.Fragment
import com.nishajain.fragmentskotlin.Fragment.HomeFragment
import com.nishajain.fragmentskotlin.Fragment.SettingsFragment
class MainActivity : AppCompatActivity() {
override fun onCreate(savedInstanceState: Bundle?) {
super.onCreate(savedInstanceState)
setContentView(R.layout.activity_main)
val icHome = findViewById(R.id.ic_home)
val icSettings = findViewById(R.id.ic_settings)
replaceFragment(HomeFragment())
icHome.setOnClickListener {
replaceFragment(HomeFragment())
}
icSettings.setOnClickListener {
replaceFragment(SettingsFragment())
}
}
fun replaceFragment(fragment: Fragment) {
val transaction = supportFragmentManager.beginTransaction()
transaction.replace(R.id.frame, fragment)
transaction.commit()
}
}
|
fragment_home.xml file
|
xmlns:tools="http://schemas.android.com/tools"
android:layout_width="match_parent"
android:layout_height="match_parent"
android:layout_gravity="center"
android:background="#ABADBC"
tools:context=".Fragment.HomeFragment">
android:layout_width="match_parent"
android:layout_height="match_parent"
android:gravity="center"
android:textSize="30sp"
android:textColor="@color/black"
android:text="My Home" />
|
|
HomeFragment.kt file
|
import android.os.Bundle
import androidx.fragment.app.Fragment
import android.view.LayoutInflater
import android.view.View
import android.view.ViewGroup
import com.nishajain.fragmentskotlin.R
class HomeFragment : Fragment() {
override fun onCreateView(
inflater: LayoutInflater, container: ViewGroup?,
savedInstanceState: Bundle?
): View? {
return inflater.inflate(R.layout.fragment_home, container, false)
}
}
|
fragment_settings.xml file
|
xmlns:tools="http://schemas.android.com/tools"
android:layout_width="match_parent"
android:layout_height="match_parent"
android:background="#B0B6D8"
tools:context=".Fragment.SettingsFragment">
android:layout_width="match_parent"
android:layout_height="match_parent"
android:gravity="center"
android:textSize="30sp"
android:textColor="@color/black"
android:text="My Settings" />
|
SettingsFragment.kt file
|
import android.os.Bundle
import androidx.fragment.app.Fragment
import android.view.LayoutInflater
import android.view.View
import android.view.ViewGroup
import com.nishajain.fragmentskotlin.R
class SettingsFragment : Fragment() {
override fun onCreateView(
inflater: LayoutInflater, container: ViewGroup?,
savedInstanceState: Bundle?
): View? {
// Inflate the layout for this fragment
return inflater.inflate(R.layout.fragment_settings, container, false)
}
}
|
Conclusion : In this article we have covered how to create fragments and add to activity in Android Studio by using Kotlin Language.