Add Button to Activity & Handle Click Events - RRutors
Android Kotlin Button and Button click events. Learn button handling in Kotlin with examples on rrtutors.com. Start developing now! Check it out today!
In this Android example tutorial we will see how to work with Button and Button onClick events. Android Button is simply a View or User Interface that is used to tap or perform any action.
For Example: To show any message or helps to jump to another ui screen.
Implementation:
First of all, open kotlin project in Android Studio.
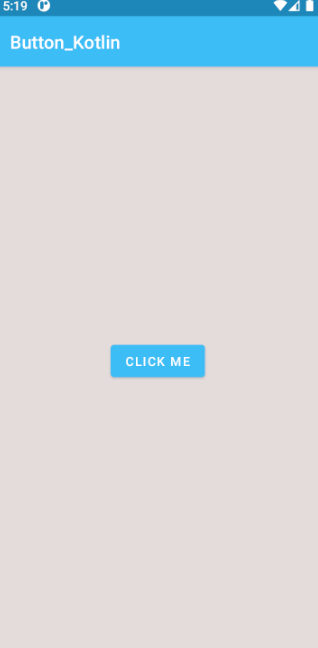
1. Add a Button in activity_main.xml file inside LinearLayout.
<Button android:id="@+id/btn" android:layout_width="wrap_content" android:layout_height="wrap_content" android:background="#3EBDF6" android:drawableLeft="@drawable/click" android:drawableTint="@color/white" android:text="Click Me"></Button> |
2. Add attributes in Button like text, textColor, backgroundColor, textSize, textStyle in the activity_main.xml file
To set the backgroundColor in Button we will use backgroundTint property.
| android:backgroundTint="#3EBDF6" |
We have many properties in Button in android such as gravity, id, drawableLeft, drawableRight , so on
drawableLeft Property is used for attach icon on left side of Button
| android:drawableLeft="@drawable/click" |
For drawable icon : Go to app > res > drawable > right click on drawable > new > Vector Asset > click on Clip Art box > select any icon you want then tap on Ok , change name if you want and tap to Next and Finish.
Note: Icon or image name should be in small letters.
Now add the drawable icon in activity_main.xml file inside button view using drawableLeft property as given above and access it using '@' and icon name.
|
|

3. Now let's use our Button inside Activity. To use any view from layout to activity by using its id property
with findViewById() method.
| val button = findViewById(R.id.btn) as Button |
Here R.id.btn is the id of the button which is defined in activity_main.xml file.
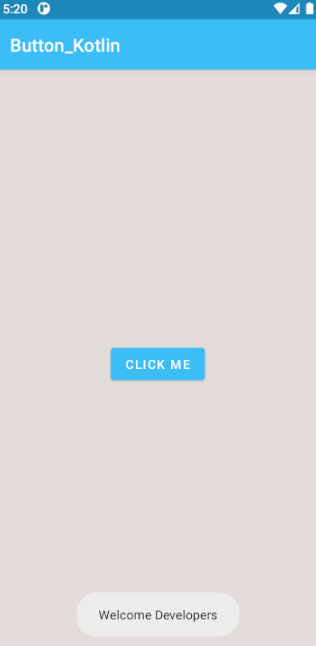
4. Now we can add event listener on Button by implementing onClickListener to the Button instance.
| button.setOnClickListener{ Toast.makeText(this@MainActivity, "Welcome Developers", Toast.LENGTH_SHORT).show() } |
5. In the above code OnClick of Button it will display a Toast of 'Welcome Developers'.
Note: Toast is a small message displayed on the screen.
6. Now run the application and you will see the below output.
Output:
 |
 |
Complete source code for Android Button example:
- activity_main.xml file
<?xml version="1.0" encoding="utf-8"?>
<LinearLayout xmlns:android="http://schemas.android.com/apk/res/android"
xmlns:tools="http://schemas.android.com/tools"
android:orientation="vertical"
android:layout_width="match_parent"
android:layout_height="match_parent"
android:gravity="center"
android:background="#FACDC9"
tools:context=".MainActivity">
<Button
android:id="@+id/btn"
android:layout_width="wrap_content"
android:layout_height="wrap_content"
android:background="#3EBDF6"
android:drawableLeft="@drawable/click"
android:drawableTint="@color/white"
android:text="Click Me"></Button>
</LinearLayout>
- MainActivity.kt file
import androidx.appcompat.app.AppCompatActivity
import android.os.Bundle
import android.widget.Button
import android.widget.Toastclass MainActivity : AppCompatActivity() {
override fun onCreate(savedInstanceState: Bundle?) {
super.onCreate(savedInstanceState)
setContentView(R.layout.activity_main)
val button = findViewById(R.id.btn) as Button
button.setOnClickListener{
Toast.makeText(this@MainActivity,
"Welcome Developers", Toast.LENGTH_SHORT).show()
}
}
}
Conclusion: We have covered how to add Button in Android and add Click event for the Button with kotlin code.