Google Map - How to load Google Maps in Android using Kotlin.
Explore how to load Google Maps in Android and add markers to your map. This guide from RRTutors will walk you through integrating Google Maps in your app.
In this android example tutorial, we will learn how to load google maps in android studio using kotlin language. Android Studio is the recommended development environment for building an app with the Maps SDK for Android.
Implementation:
Step 1. Create a new Project in android studio.
|
Go to File > New > New Project > Google Maps Activity > Next > Enter Name > Select Language Kotlin > Finish. |
After creating the new project, Android Studio starts Gradle and builds your project, which may take a few seconds.
Android Studio opens the google_maps_api.xml and the MapsActivity.kt files in the editor. Notice that the google_maps_api.xml file contains instructions for getting a Google Maps API key before running the application.
Step 2. Getting a Google Maps API key
To access Google Maps we need an API key. Let's create Google Maps API key
First way to get Google Api Key:
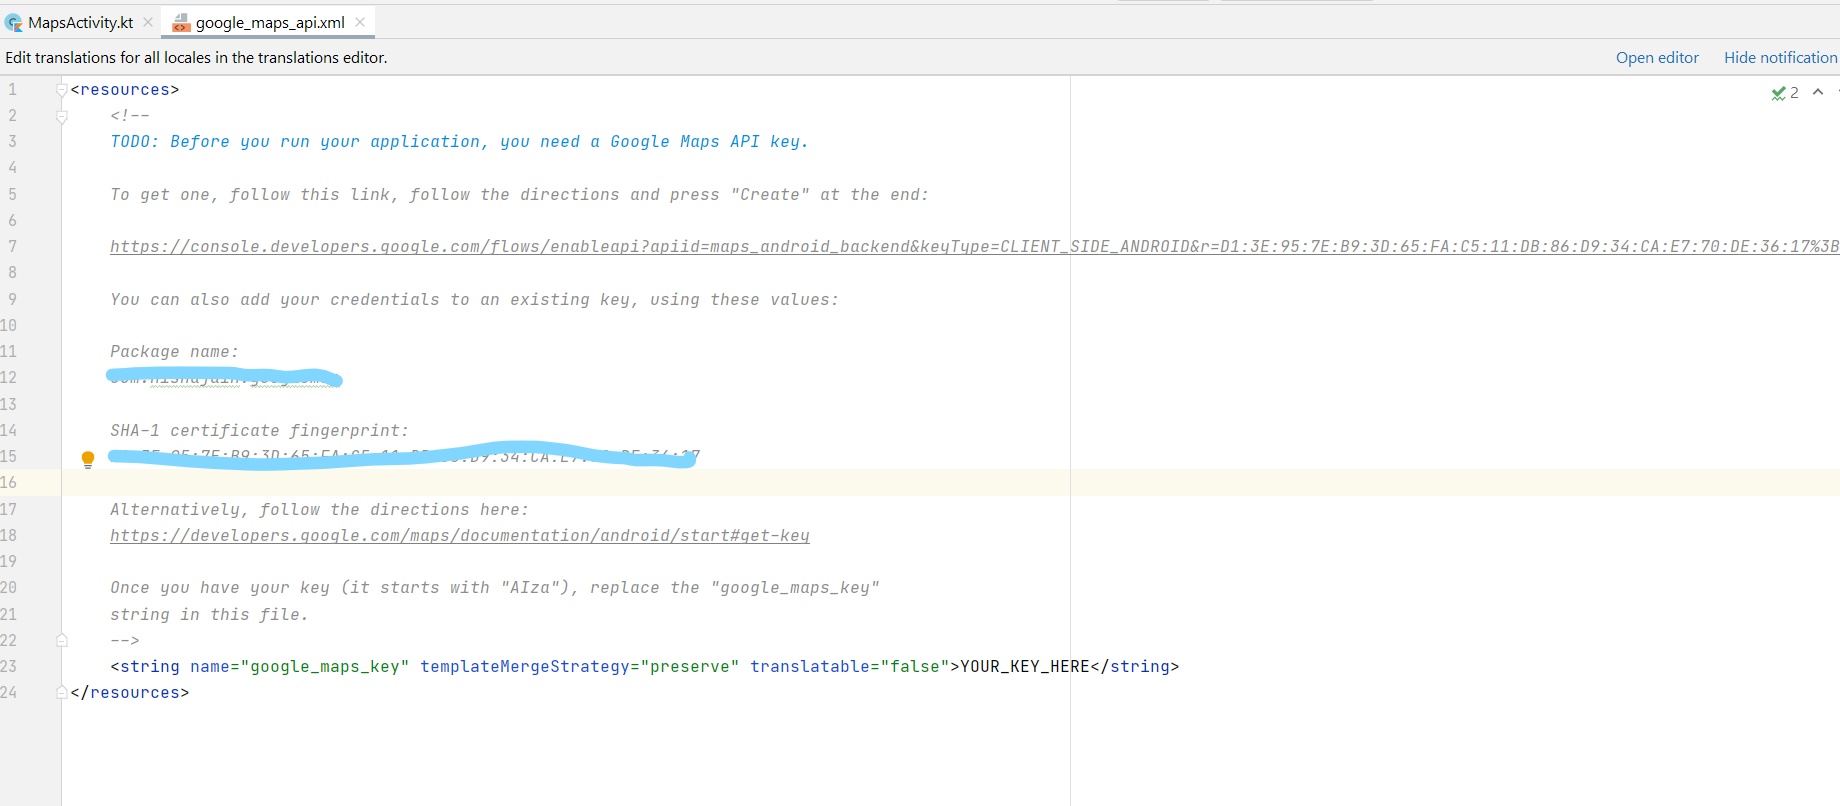
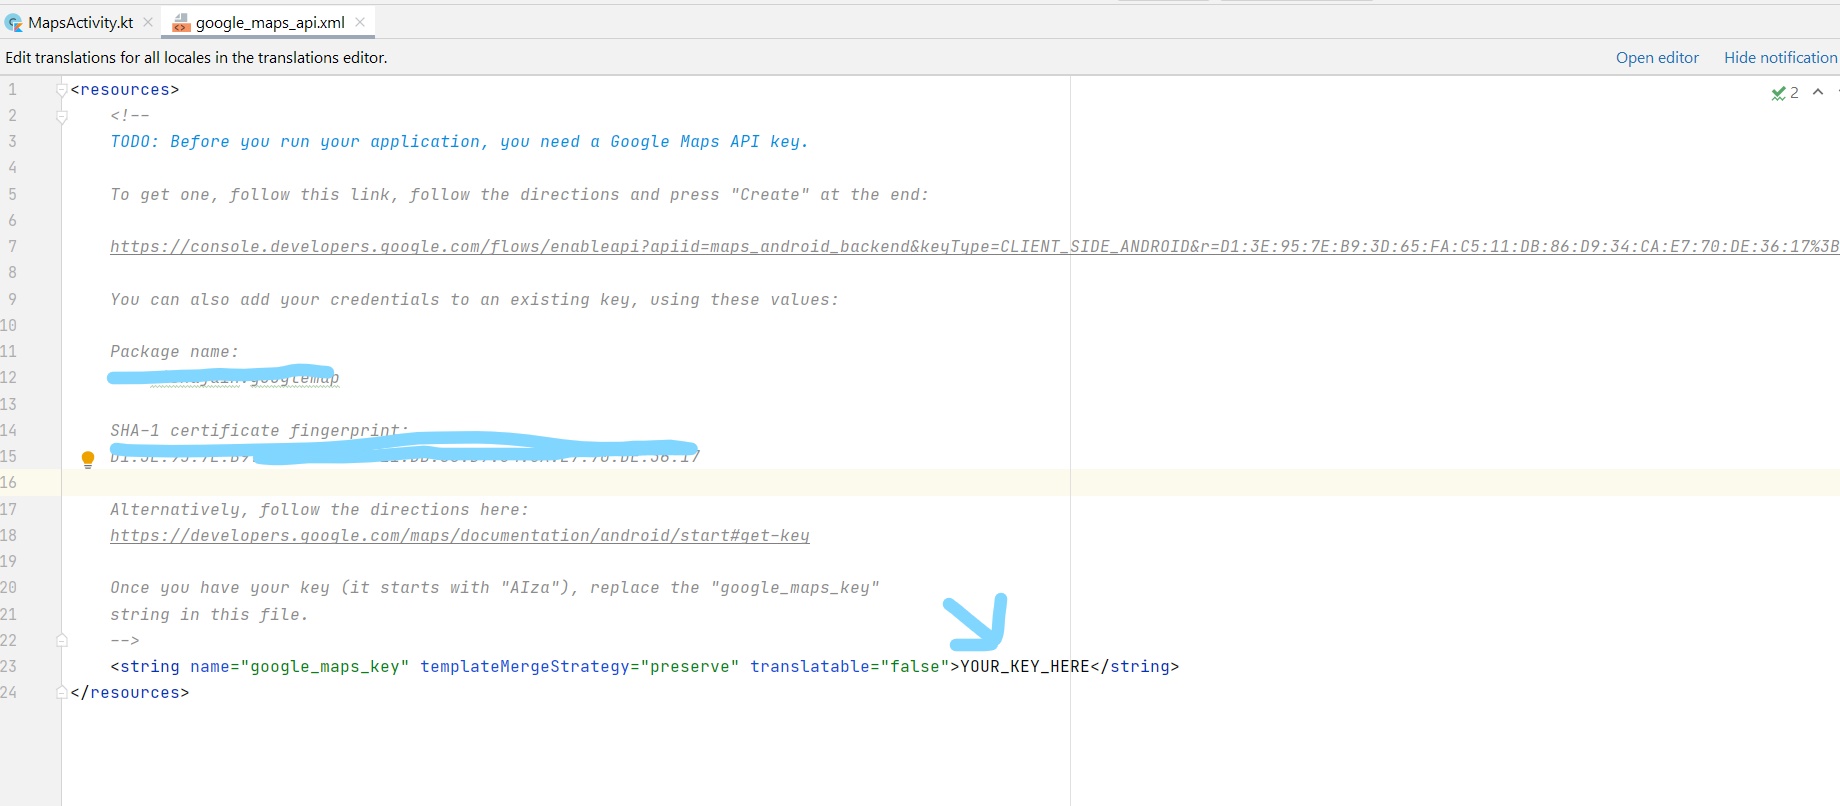
Use the link provided in the google_maps_api.xml file that Android Studio created for you:
Please copy the link provided in the google_maps_api.xml file and paste it into your browser. The link takes you to the Google Cloud Platform Console and
supplies the required information to the Google Cloud Platform Console via URL parameters, thus reducing the manual input required.
 |
Perform these specific tasks in your browser screen to achieve Api Key:
|
Next > enable > Create new Api key |
Your api key is created now you will see the output:
 |
After this you will have a new Api key which will be started from "AIza". Copy that key and paste inside google_maps_api.xml file.
 |
Second way to achieve Google Api Key:
Copy the credentials details provided in the google_maps_api.xml file.
Now go to the Google Cloud Platform Console using below link.
|
https://console.cloud.google.com/ |
Use the copied credentials to create a new API key or add your app to an existing API key.
Step 3. Look at the code
activity_maps.xml file
| <fragment xmlns:android="http://schemas.android.com/apk/res/android" xmlns:tools="http://schemas.android.com/tools" android:id="@+id/map" android:name="com.google.android.gms.maps.SupportMapFragment" android:layout_width="match_parent" android:layout_height="match_parent" tools:context=".MapsActivity" /> |
MapsActivity.kt file
To get hold of the GoogleMap object in our MapsActivity class we need to implement the OnMapReadyCallback interface and override the onMapReady callback method.
Adding markers on the Google Map
|
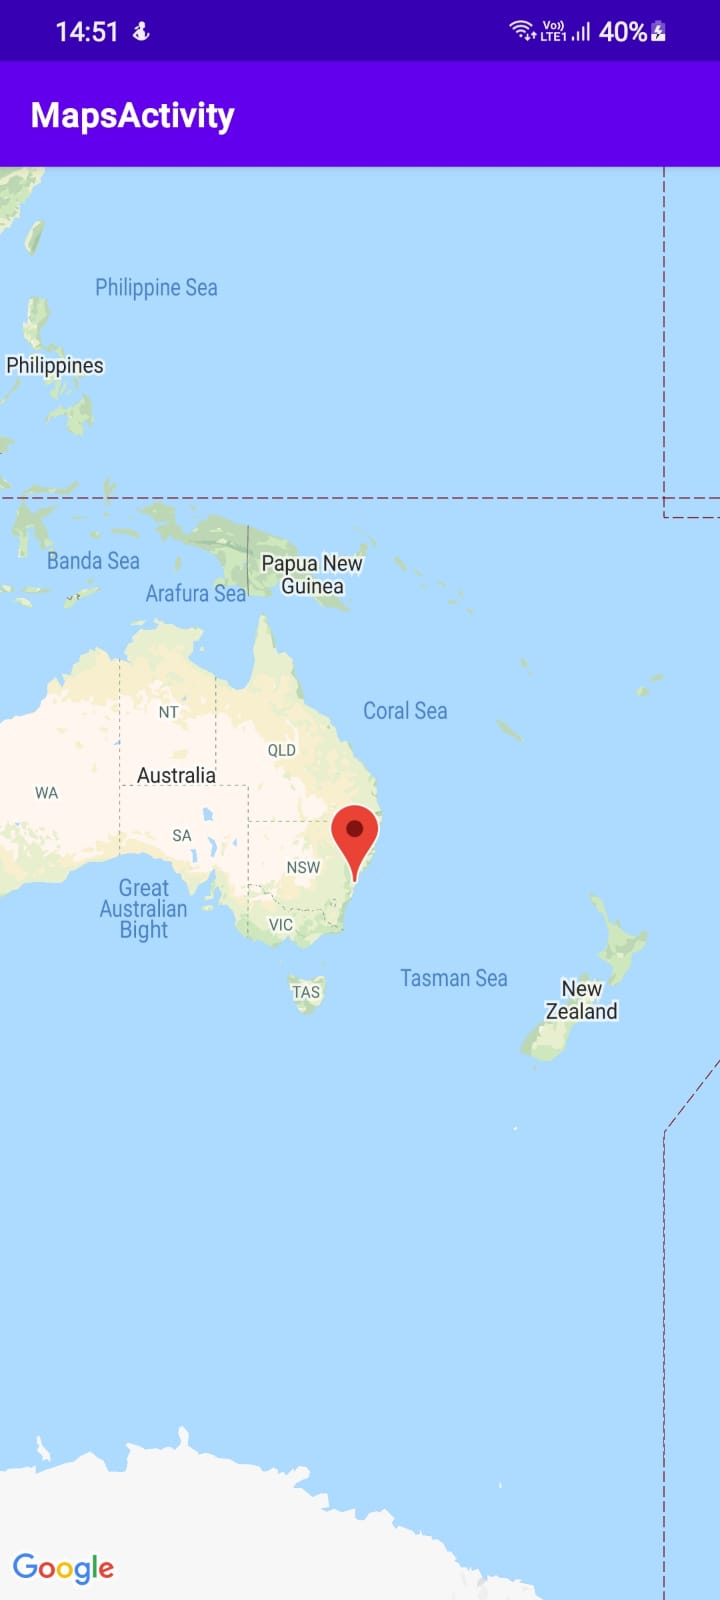
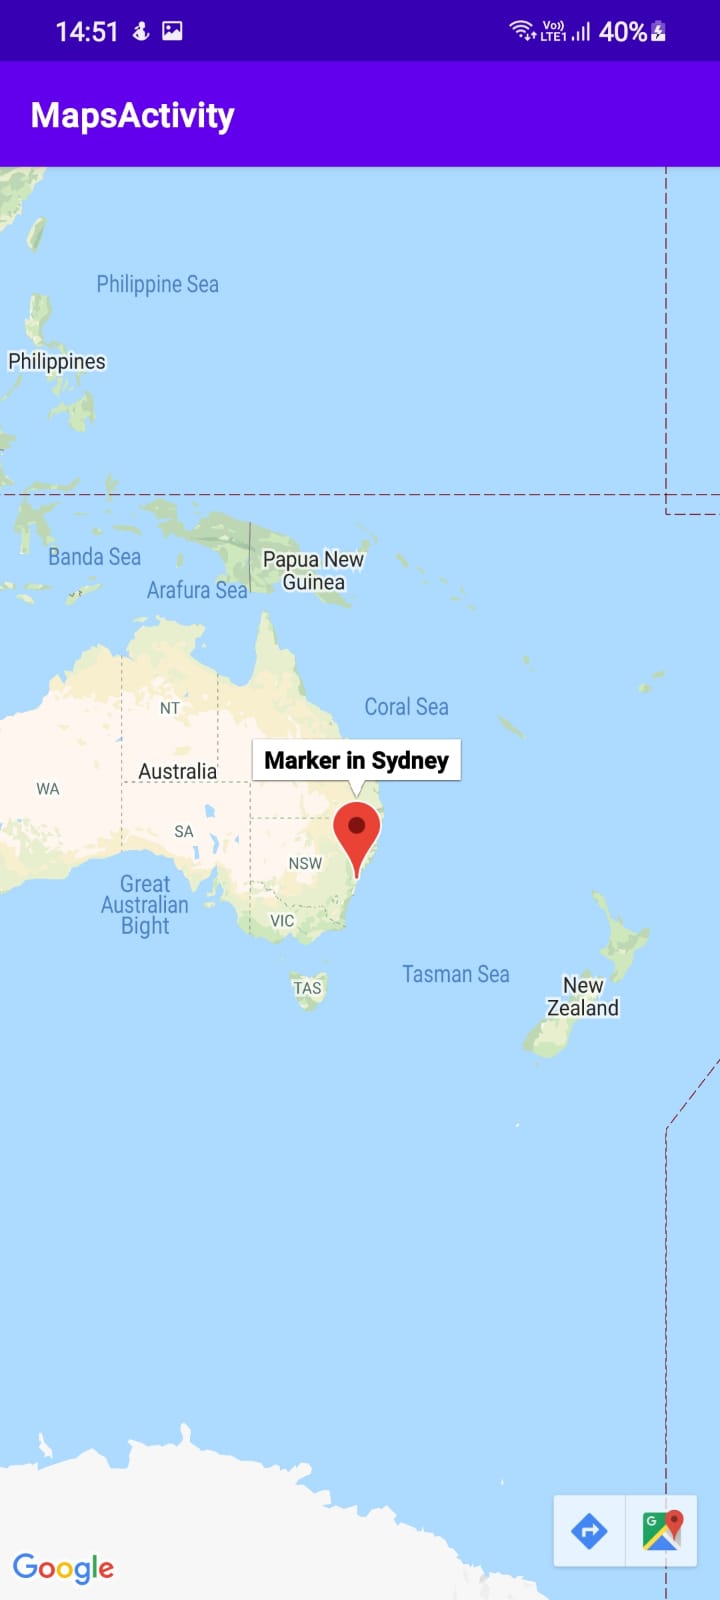
val sydney = LatLng(-34.0, 151.0) |
Full code of MapsActivity.kt file
|
class MapsActivity : AppCompatActivity(), OnMapReadyCallback { private lateinit var mMap: GoogleMap override fun onCreate(savedInstanceState: Bundle?) { binding = ActivityMapsBinding.inflate(layoutInflater) // Obtain the SupportMapFragment and get notified when the map is ready to be used. // Add a marker in Sydney and move the camera |
Here LatLng is the Latitude and Longitude which is used for the location. As we see the values inside LatLng method we can customize the positions. In this example
we are using sydney latitude and longitude, you can enter your current latitude & longitude and find your LatLng on google by enter a query (LatLng of (Your city) name).
Step 4. Build and Run your app in real device (Sometimes emulator not supports the Google Play Services) and get the following output.
OUTPUT:
 |
 |
Complete Source Code of Google Maps in Android Example:
activity_maps.xml file
|
|
MapsActivity.kt file
|
import androidx.appcompat.app.AppCompatActivity import com.google.android.gms.maps.CameraUpdateFactory class MapsActivity : AppCompatActivity(), OnMapReadyCallback { private lateinit var mMap: GoogleMap override fun onCreate(savedInstanceState: Bundle?) { binding = ActivityMapsBinding.inflate(layoutInflater) // Obtain the SupportMapFragment and get notified when the map is ready to be used. // Add a marker in Sydney and move the camera |
google_maps_api.xml file
|
<resources> To get one, follow this link, follow the directions and press "Create" at the end: https://console.developers.google.com/flows/enableapi?apiid=maps_android_backend&keyType=CLIENT_SIDE_ANDROID&r=D1:3E:95:7E:B9:3D:65:FA:C5:11:DB:86:D9:34:CA:E7:70:DE:36:17%3Bcom.nishajain.googlemap You can also add your credentials to an existing key, using these values: Package name: SHA-1 certificate fingerprint: Alternatively, follow the directions here: Once you have your key (it starts with "AIza"), replace the "google_maps_key"
|
build.gradle(app) file
|
plugins { android { defaultConfig { testInstrumentationRunner "androidx.test.runner.AndroidJUnitRunner" buildTypes { dependencies { implementation 'androidx.core:core-ktx:1.7.0' |
Conclusion: In this article we have covered how to implement google maps in Android apps using Kotlin language.