Send Image Push Notification from Firebase console FCM
Learn how to send push notifications with images using Firebase Cloud Messaging (FCM) in Android Studio with Kotlin at rrtutors.com Check it out!
In this android tutorial example, we will see how to send notification with image using Firebase Cloud Messaging (FCM) in Android Studio by using Kotlin Langauge.Firebase Cloud Messaging is a free, real-time solution for sending push notifications to client apps. FCM can consistently send notifications with payloads up to 4Kb. This page includes a sample app that demonstrates how to use this service. Though FCM supports sending notifications via an app server, the Firebase admin SDK is used in this case.
Implementation of Notification With Image:
Step 1. Create a new Project in android studio.
|
Go to File > New > New Project > Google Maps Activity > Next > Enter Name > Select Language Kotlin > Finish. |
After creating the new project, Android Studio starts Gradle and builds your project, which may take a few seconds.
Step 2. Integrate the app with firebase:
Go to Firebase console:
|
https://console.firebase.google.com/ |
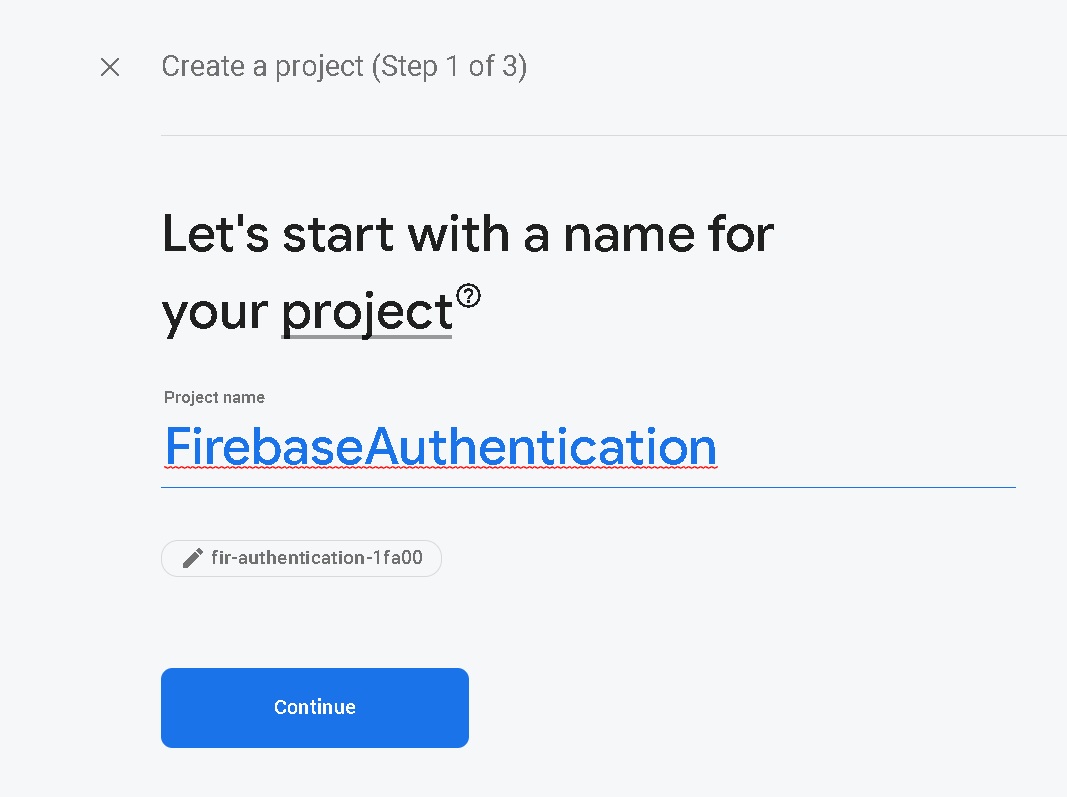
Click on Add Project (+) and enter the project name then click Continue:
 |
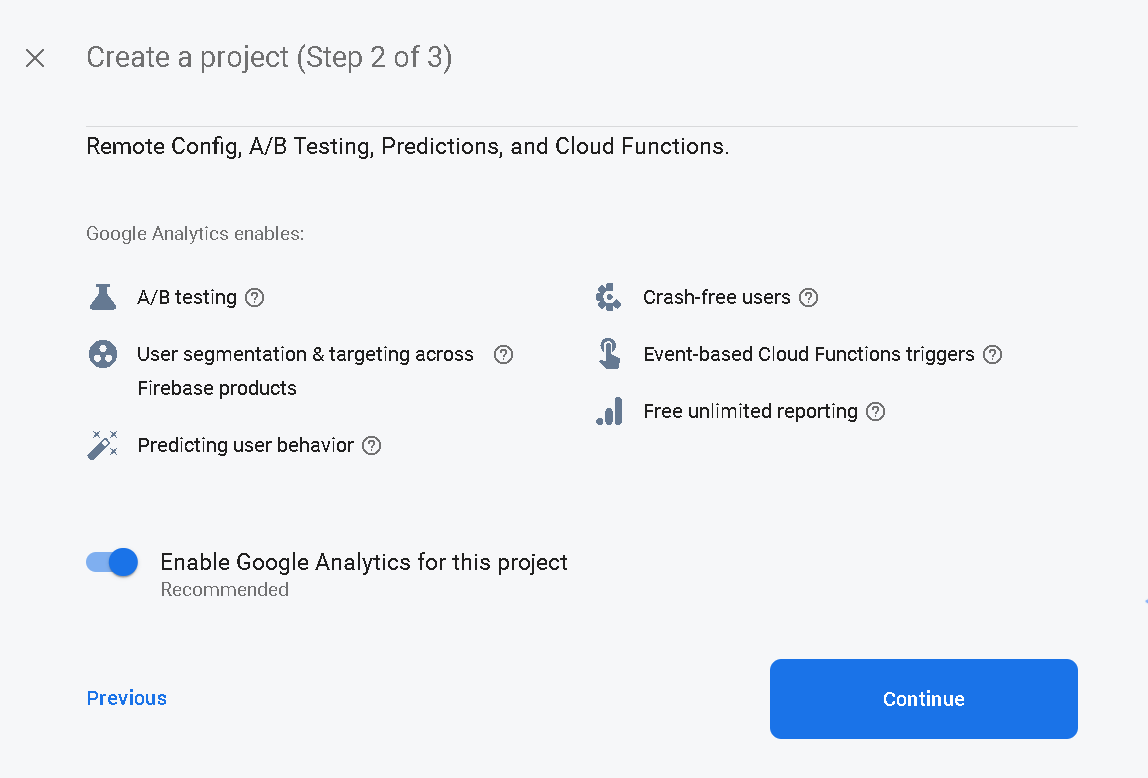
You will see this screen after continue and click Continue Again:
 |
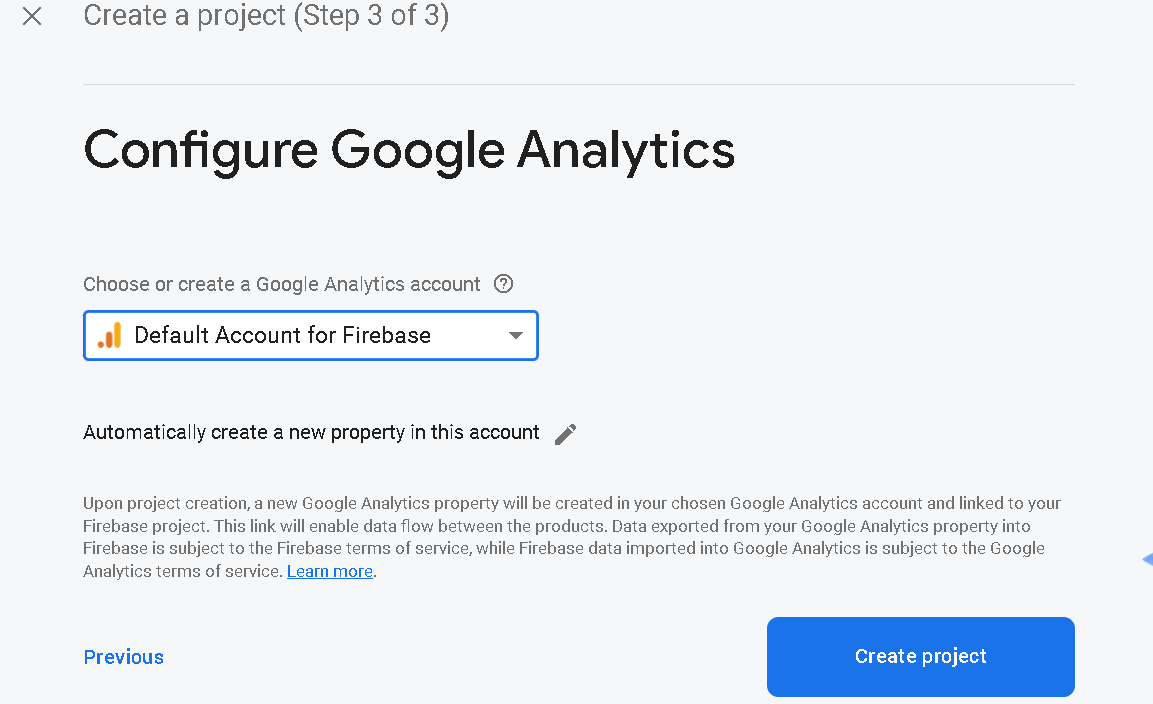
You will land to this screen that will ask for Choose or create a Google Ananlytics Account and click on drag drop and choose the 'Default Account for Firebase' and then click 'Create Project'.
 |
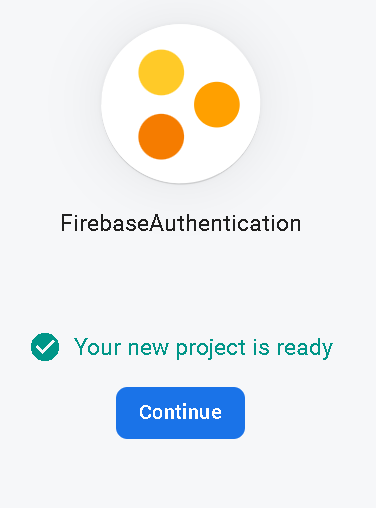
You will see please wait screen and you will get a message "Your new project is ready" and click to Continue.
 |
You will redirect to the project dashboard, Here you will add a android app:
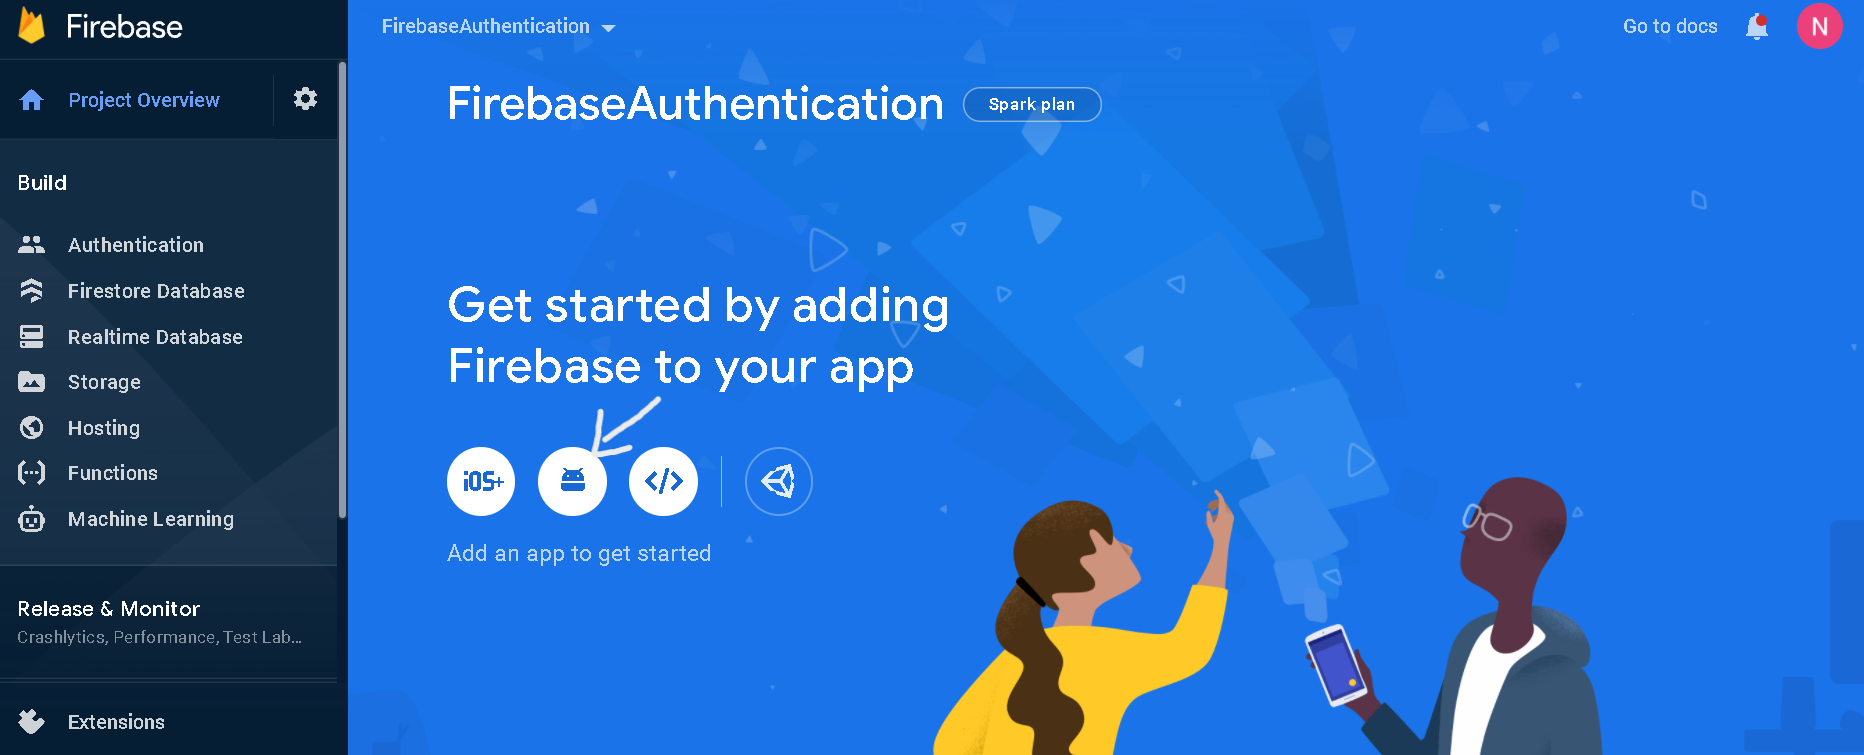 |
Choose Android Option like in above image and add the following information:
1. Register App
Enter you package name, you will get your package name -> Open AndroidManifest.xml file , there you will package = "com.example.packageName" under manifest tag.
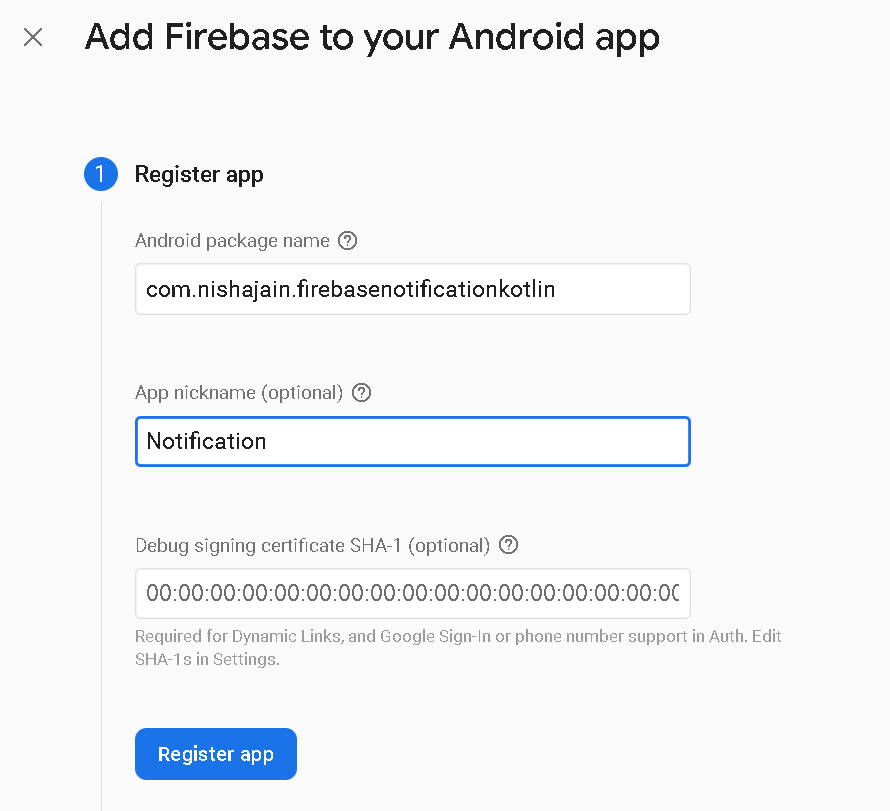 |
Click on Register App.
2. Donwload Config File
Download google-Services.json file and click on Next.
3. Add Firebase SDK
Click next, without changing anything.
4. Final click on Continue to Console.
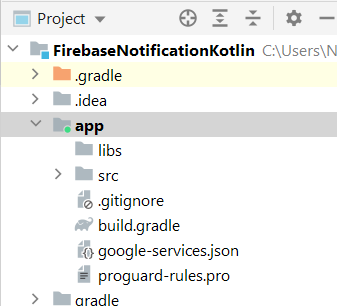
Step 3. Now we will add the downloaded google-services.json file to the app.
Copy the google-services.json file and paste inside:
|
FirebaseOtpLogin > app > right-click > paste |
Your Project Structure be like:
 |
Step 4. Add the internet permission to AndroidManifest.xml file above application tag
|
<uses-permission android:name="android.permission.INTERNET"></uses-permission> |
Step 5. Open project level gradle file (build.gradle(project)) and add the following inside dependencies
|
classpath 'com.google.gms:google-services:4.3.10' |
Step 6. Now go to build.gradle(app) file
Add the firebase messaging dependency inside dependencies
|
implementation 'com.google.firebase:firebase-messaging:23.0.0' |
Apply google-services plugin in the bottom of file:
|
apply plugin: 'com.google.gms.google-services' |
Click Sync Now to continue.
Step 7. Now go to activity_main.xml and add the following layout code:
|
<?xml version="1.0" encoding="utf-8"?> <TextView </LinearLayout> |
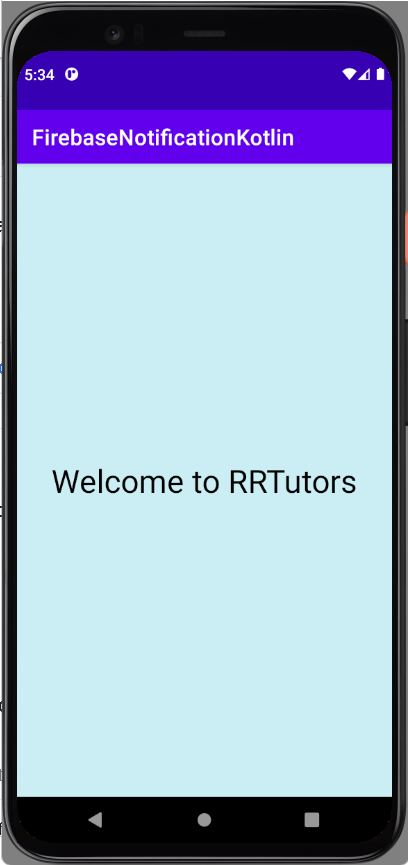
Step 8. Run your app once and the output screen be like:
 |
Step 9. Create and Send Notification from Firebase Console
Select Cloud Messaging option from the left side of dashboard
 |
Click on Send Your First Message.
You will see following screen:
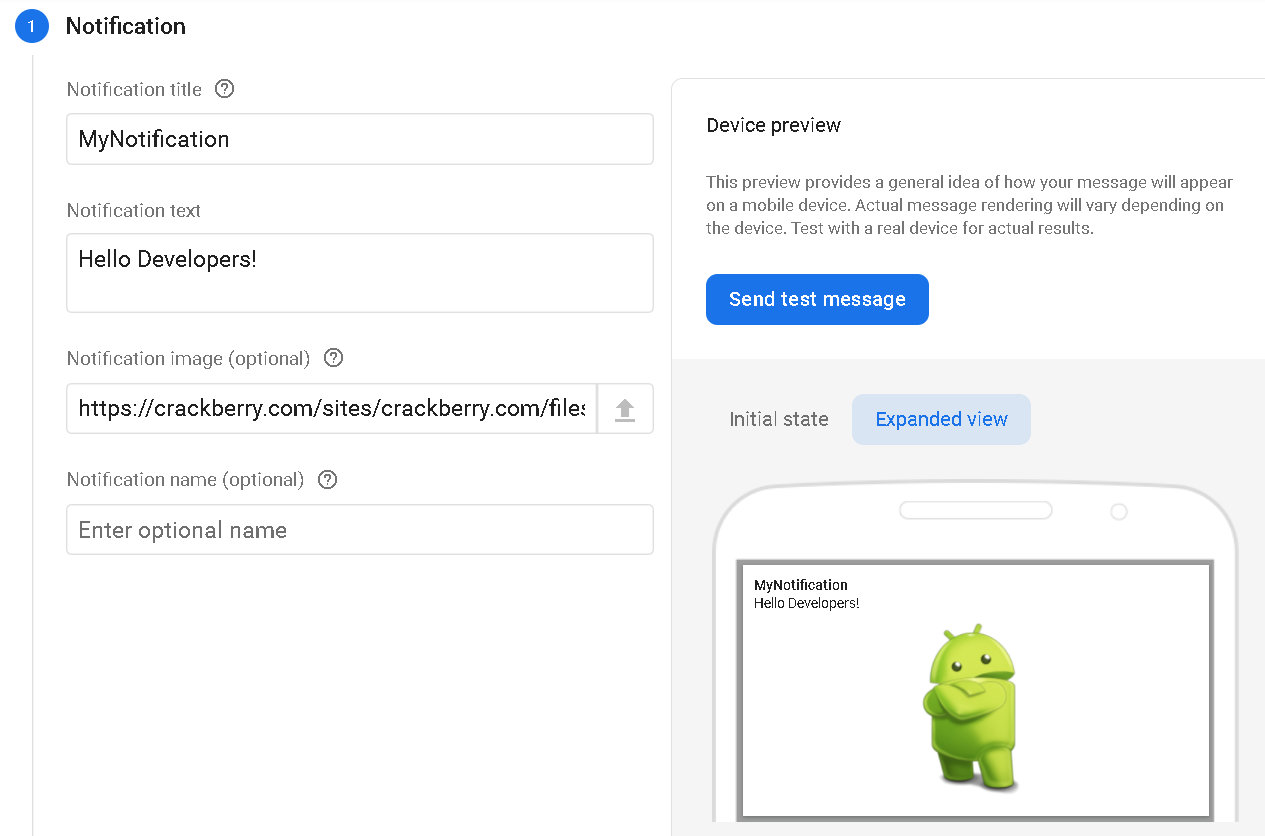 |
1. Notification
Enter Notification Title, Notification text and Image Url .
Click Next.
2. Target
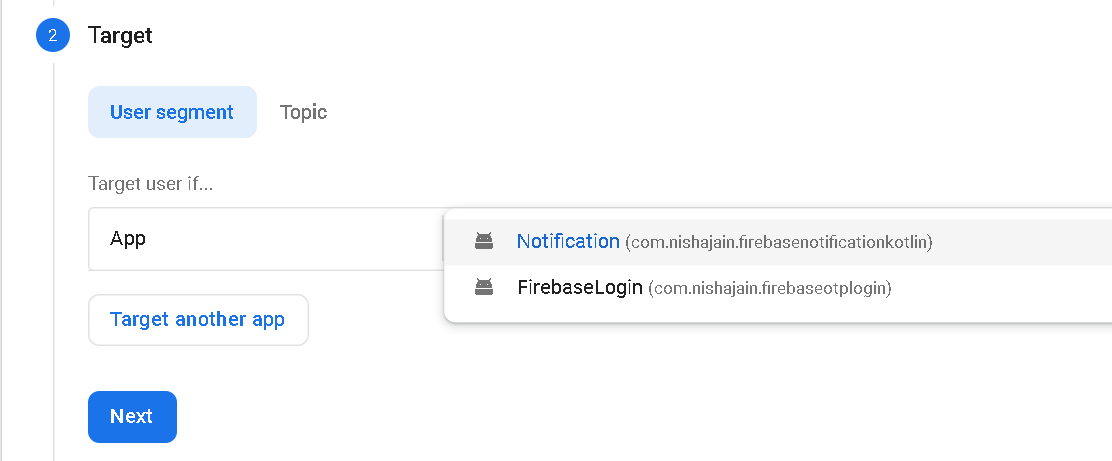 |
Select an App from drop down and Click Next.
3. Scheduling
You can choose particular time but we will choose NOW.
Click Next.
4. Conversation Events
Click Next.
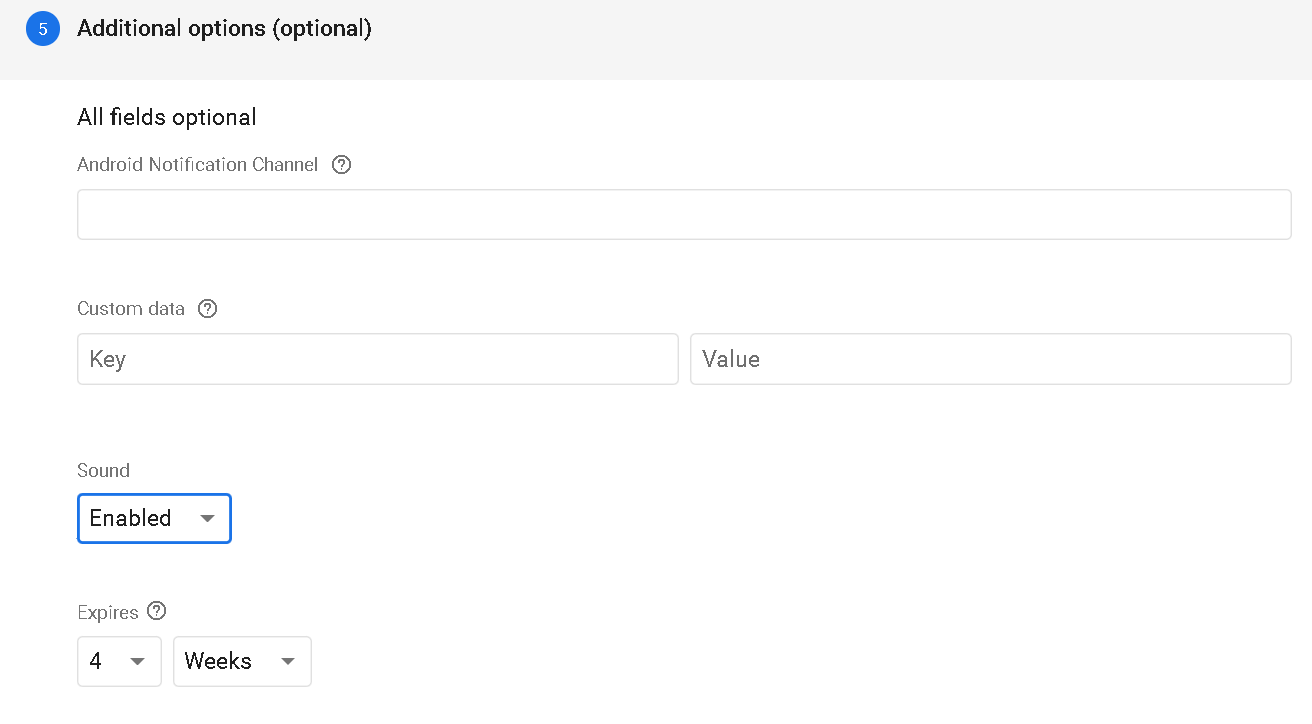
5. Additional Options
Sound > Enable it
 |
Finally click on Review
 |
Step 10. You will see a following screen
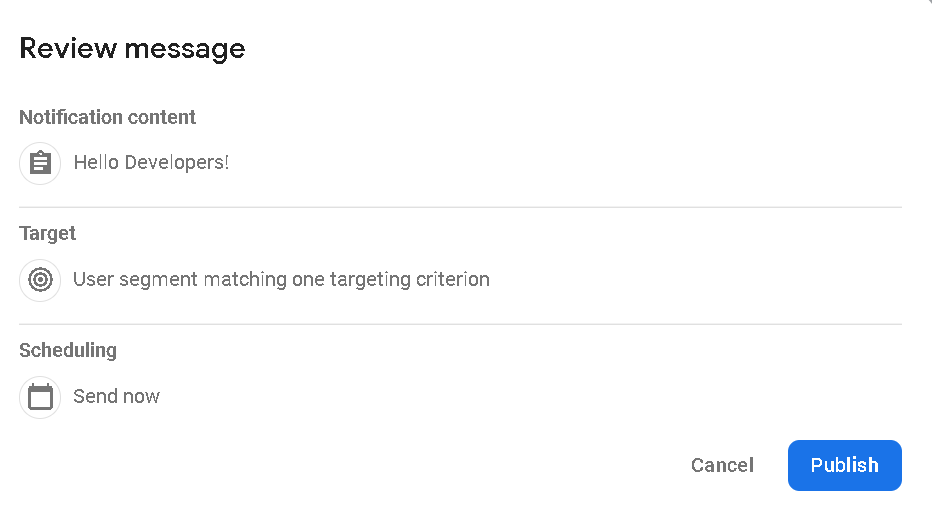 |
And Click on Publish.
Step 11. Wait for a while sometimes it take time to send notification message.
And you will see a output:
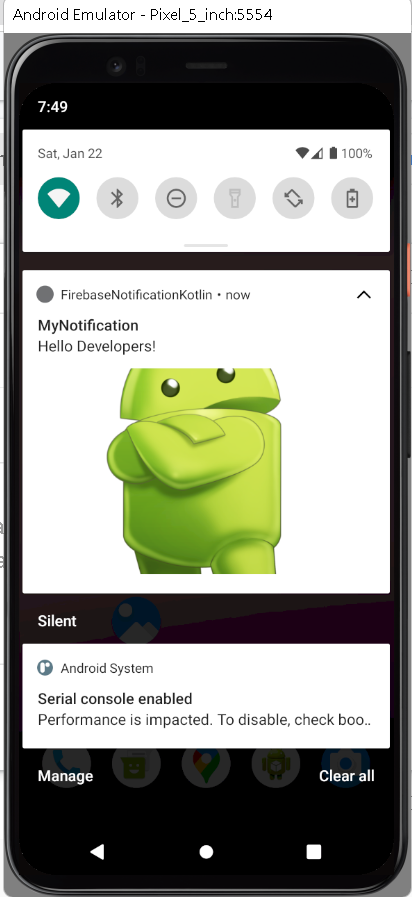 |
When you click on notification it will redirect you to the home screen of the app.
You will see your created notification in firebase dashboard.
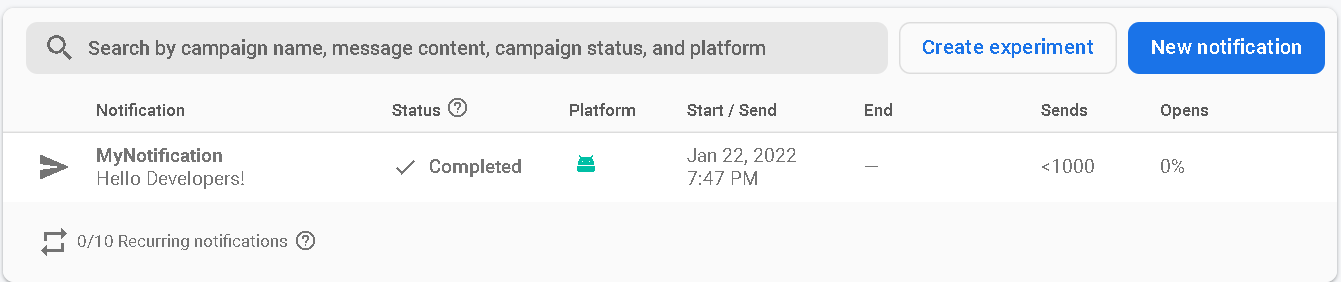 |
Note: If you not get Notification please add your SHA Keys to firebase project by following:
Get SHA keys by following these steps given below and click enter :
 |
And your keys be like:
 |
On the Firebase console go to Project Overview -> Project Setting, and click add fingerprint button, and add your SHA keys copied from firebase
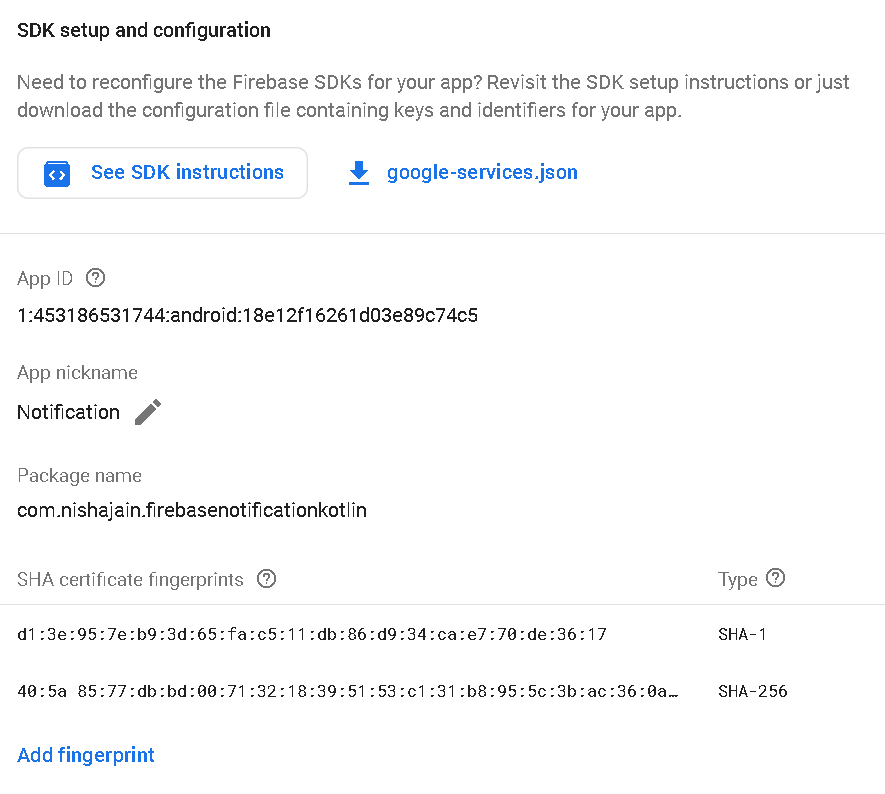 |
and download the google-services.json file and follow the step no. 3
Conclusion: In this article, we covered how to push notification with Image from firebase console using Firebase Cloud Messaging(FCM) in Android Studio using Kotlin language.
Related
Firebase Mobile number authentication in Android with kotlin code
Firebase FCM Pushnotifications with Android kotlin