Authenticate Mobile Number| Firebase in Android Kotlin
Understand OTP-based authentication in Android apps, allowing users to verify their phone numbers for a seamless sign-up process at rrtutors.com
In this android example, we will learn how to Authenticate Mobile number and get OTP using Firebase in android studio using kotlin language. When we first use an Android app, we usually have to go through the sign-up process. User's legitimacy can be verified via a variety of methods, including Google, Facebook, Instagram, and others. However, it is highly common among all of these phone or OTP authentications. It's because customers only have to submit their phone number. After that, the app will take care of the rest ( most of the time app detects the OTP messages without user interaction ).
What is Firebase phone or OTP authentication?
The Firebase offers this as one of its services. It's used to sign users in by sending them a one-time password to their device.
Although OTP authentication is highly convenient, it is less secure than email or other methods of authentication.
Implementation of Mobile Number Authentication Using Firebase:
Step 1 Create a new Project in android studio.
|
Go to File > New > New Project > Google Maps Activity > Next > Enter Name > Select Language Kotlin > Finish. |
After creating the new project, Android Studio starts Gradle and builds your project, which may take a few seconds.
Step 2 Integrate the app with firebase:
We will add the project to firebase manually:
Go to firebase Console
Click on Add Project (+) and enter the project name then click Continue:
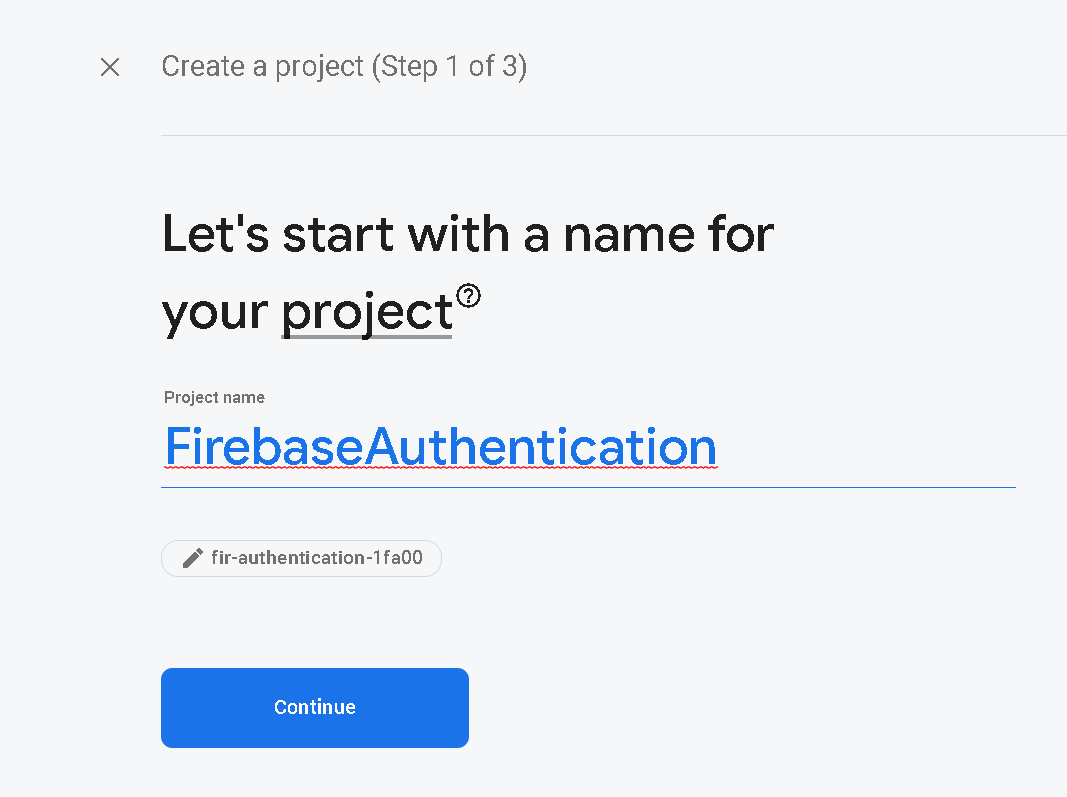 |
You will see this screen after continue and click Continue Again:
 |
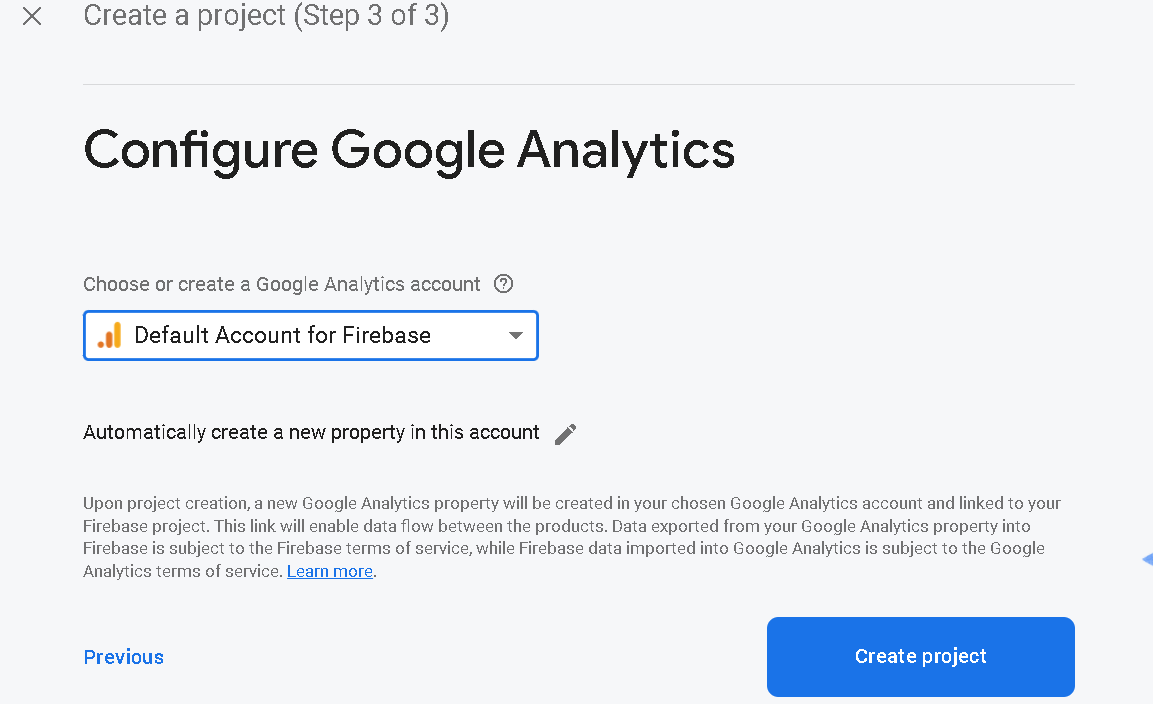
You will land to this screen that will ask for Choose or create a Google Ananlytics Account and click on drag drop and choose the 'Default Account for Firebase' and then click 'Create Project'.
 |
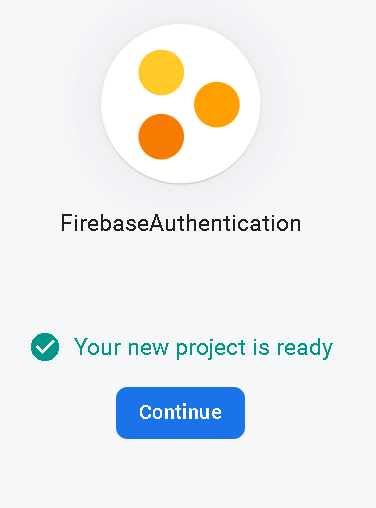
You will see please wait screen and you will get a message "Your new project is ready" and click to Continue.
 |
You will redirect to the project dashboard, Here you will add a android app:
 |
Choose Android Option like in above image and add the following information:
1. Register App
Enter you package name, you will get your package name -> Open AndroidManifest.xml file , there you will package = "com.example.packageName" under manifest tag.
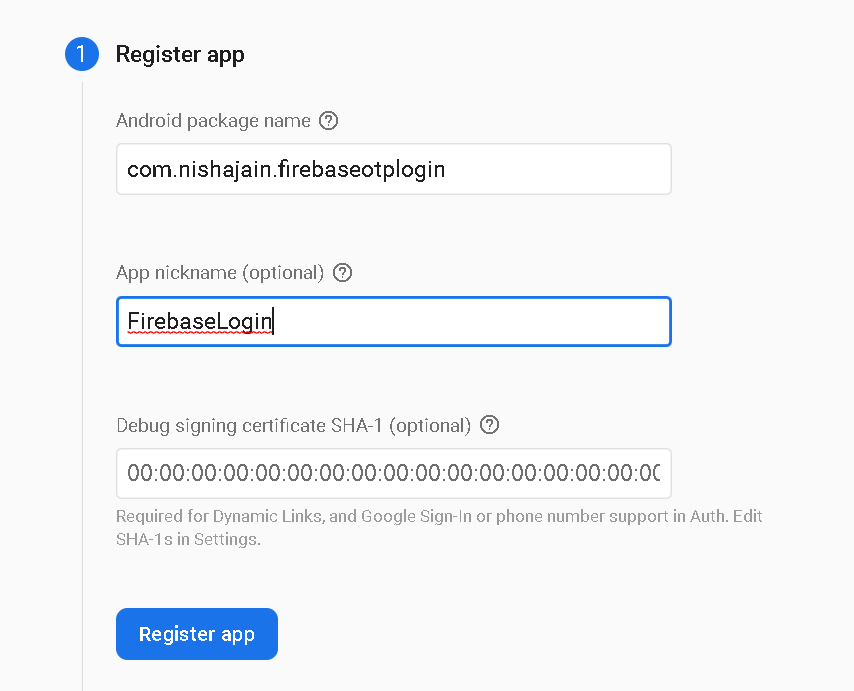 |
Click on Register App.
2. Donwload Config File
Download google-Services.json file and click on Next.
3. Add Firebase SDK
Click next, without changing anything.
4. Final click on Continue to Console.
Step 3 On the left side of Firebase console you find the option 'Authentication', click on it and Get Started.
Go to Sign-in Method
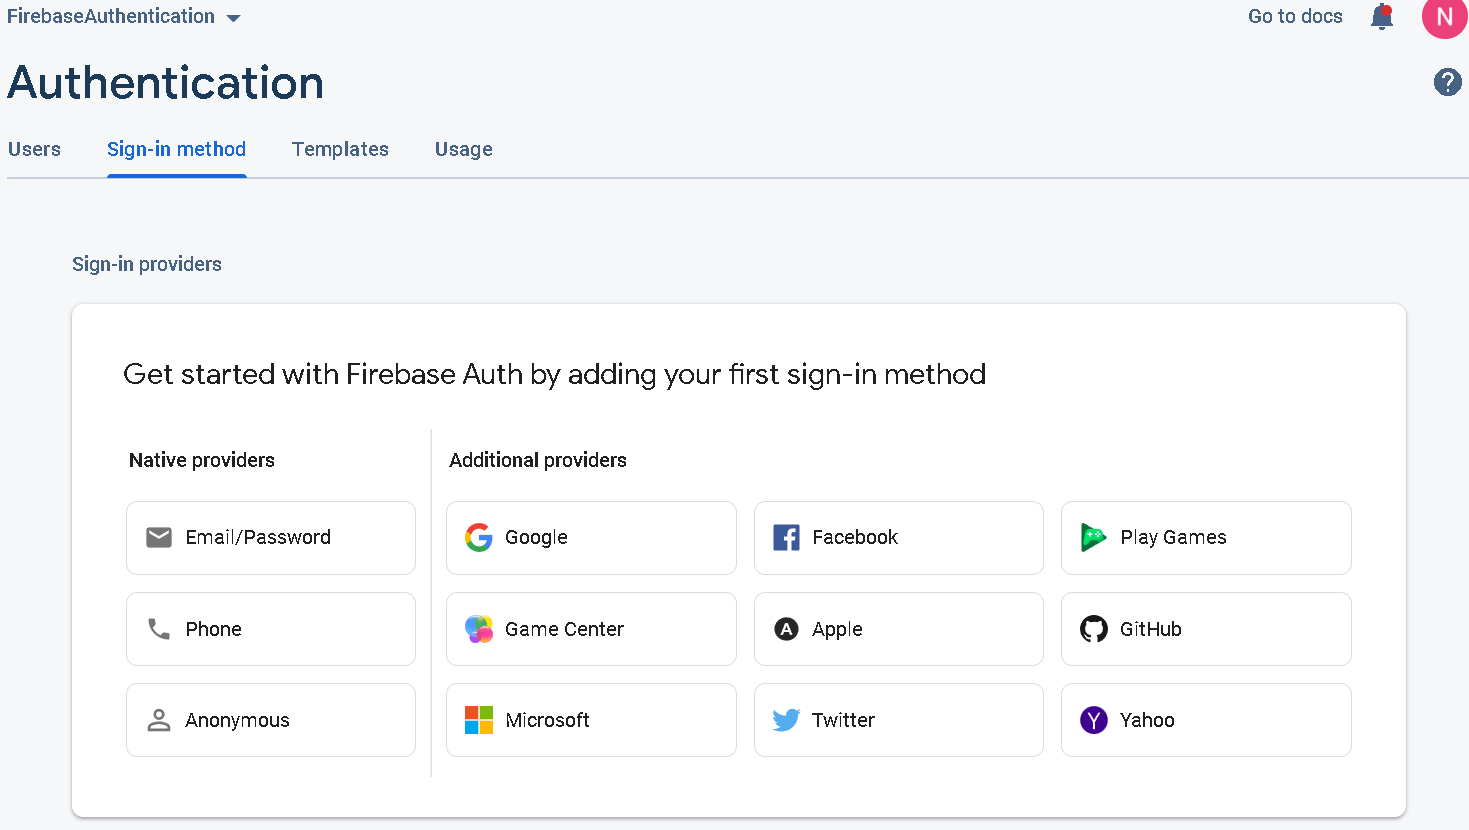 |
Click on Phone :
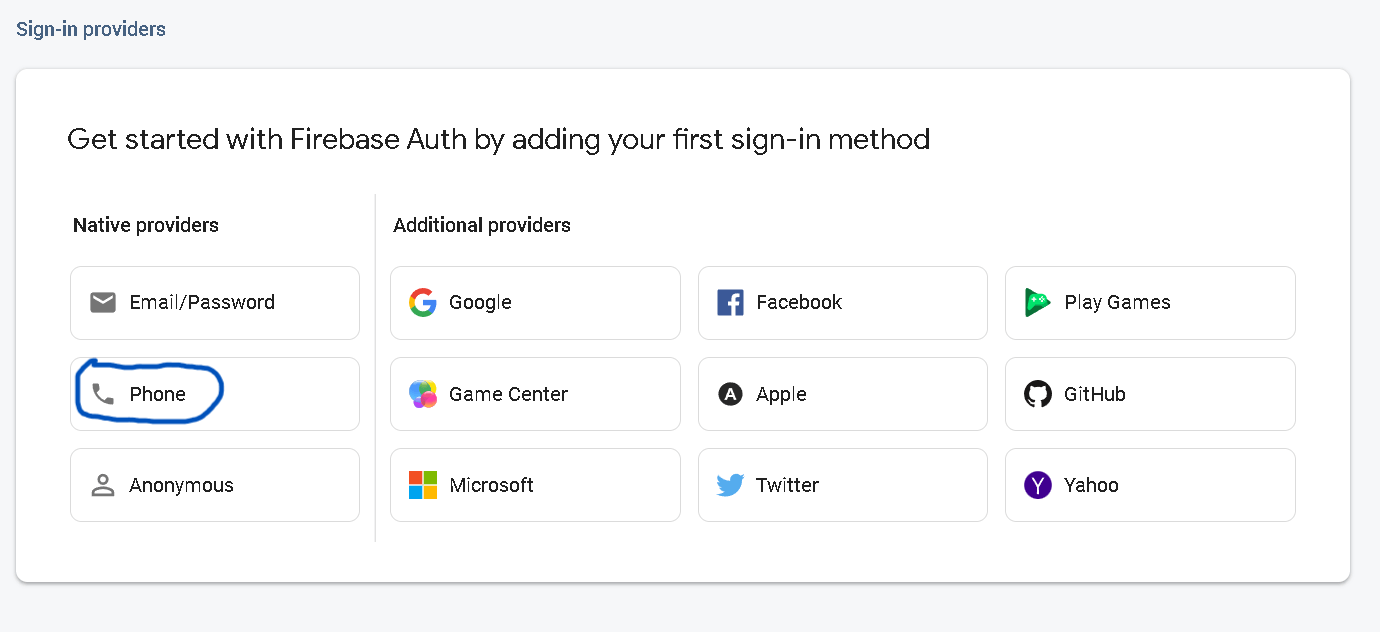 |
Enable the toggle button and save it.
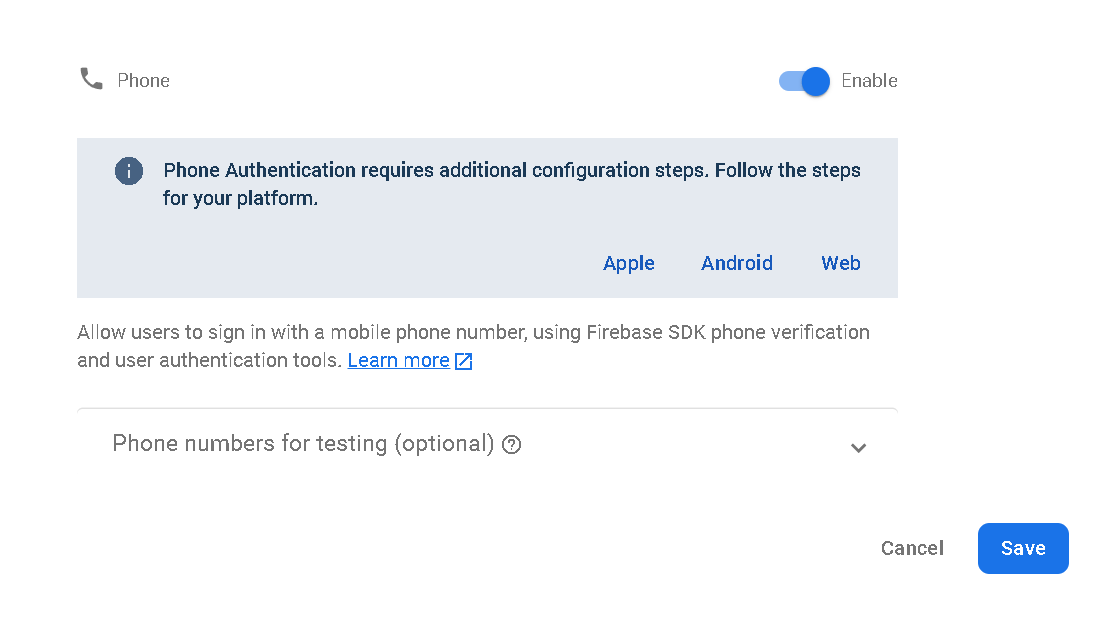 |
Phone authentication is enabled and the firebase setup is done.
Step 3. Now we will add the downloaded google-services.json file to the app.
Copy the google-services.json file and paste inside:
|
FirebaseOtpLogin > app > right-click > paste. |
Your structure be like:
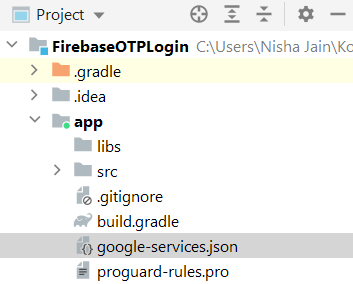 |
Note: Please change the Android to Project in top-left drop down.
Step 4. Open build.gradle(app) and add the firebase auth dependency inside dependencies:
|
implementation 'com.google.firebase:firebase-auth:21.0.1' |
And add the plugin in bottom of the file
|
apply plugin: 'com.google.gms.google-services' |
Step 5. Add google services plugin in project level gradle file:
|
classpath 'com.google.gms:google-services:4.3.10' |
Step 6. Now open your activity_main.xml file and add the following layout for entering phone no.
<?xml version="1.0" encoding="utf-8"?>
<LinearLayout xmlns:android="http://schemas.android.com/apk/res/android"
    xmlns:app="http://schemas.android.com/apk/res-auto"
    xmlns:tools="http://schemas.android.com/tools"
    android:layout_width="match_parent"
    android:layout_height="match_parent"
    android:orientation="vertical"
    android:padding="20dp"
    android:gravity="center"
    tools:context=".MainActivity">

    <EditText
        android:id="@+id/mobileNumber"
        android:layout_width="match_parent"
        android:layout_height="wrap_content"
        android:ems="10"
        android:hint="Enter your Mobile Number"
        android:inputType="phone" />

    <Button
        android:id="@+id/button"
        android:layout_width="match_parent"
        android:layout_height="wrap_content"
        android:layout_marginStart="100dp"
        android:layout_marginLeft="100dp"
        android:layout_marginTop="20dp"
        android:layout_marginEnd="100dp"
        android:layout_marginRight="100dp"
        android:text="Send OTP"
        app:layout_constraintEnd_toEndOf="parent"
        app:layout_constraintStart_toStartOf="parent"
        app:layout_constraintTop_toBottomOf="@+id/mobileNumber" />
</LinearLayout>
|
Step 7. Go to MainActivity.kt file and add the following code for enter mobile no. and send number for authentication:
class MainActivity : AppCompatActivity() {
    var number: String = ""

    // create instance of firebase auth
    lateinit var auth: FirebaseAuth

    // we will use this to match the sent otp from firebase
    lateinit var storedVerificationId: String
    lateinit var resendToken: PhoneAuthProvider.ForceResendingToken
    private lateinit var callbacks: PhoneAuthProvider.OnVerificationStateChangedCallbacks

    override fun onCreate(savedInstanceState: Bundle?) {
        super.onCreate(savedInstanceState)
        setContentView(R.layout.activity_main)
        val sendOtp = findViewById(R.id.button)

        auth = FirebaseAuth.getInstance()

        // start verification on click of the button
        sendOtp.setOnClickListener {
            login()
        }

        // Callback function for Phone Auth
        callbacks = object : PhoneAuthProvider.OnVerificationStateChangedCallbacks() {

            // This method is called when the verification is completed
            override fun onVerificationCompleted(credential: PhoneAuthCredential) {
                startActivity(Intent(applicationContext, MainActivity::class.java))
                finish()
                Log.d("Msg", "onVerificationCompleted Success")
            }

            // Called when verification is failed add log statement to see the exception
            override fun onVerificationFailed(e: FirebaseException) {
                Log.d("MSg", "onVerificationFailed  $e")
            }

            // On code is sent by the firebase this method is called
            // in here we start a new activity where user can enter the OTP
            override fun onCodeSent(
                verificationId: String,
                token: PhoneAuthProvider.ForceResendingToken
            ) {
                Log.d("Msg", "onCodeSent: $verificationId")
                storedVerificationId = verificationId
                resendToken = token

                // Start a new activity using intent
                // also send the storedVerificationId using intent
                // we will use this id to send the otp back to firebase
                val intent = Intent(applicationContext, OTPActivity::class.java)
                intent.putExtra("storedVerificationId", storedVerificationId)
                startActivity(intent)
                finish()
            }
        }
    }

    private fun login() {
        number = findViewById(R.id.mobileNumber).text.trim().toString()

        // get the phone number from edit text and append the country cde with it
        if (number.isNotEmpty()) {
            number = "+91$number"
            sendVerificationCode(number)
        } else {
            Toast.makeText(this, "Enter mobile number", Toast.LENGTH_SHORT).show()
        }
    }

    // this method sends the verification code
    // and starts the callback of verification
    // which is implemented above in onCreate
    private fun sendVerificationCode(number: String) {
        val options = PhoneAuthOptions.newBuilder(auth)
            .setPhoneNumber(number) // Phone number to verify
            .setTimeout(60L, TimeUnit.SECONDS) // Timeout and unit
            .setActivity(this) // Activity (for callback binding)
            .setCallbacks(callbacks) // OnVerificationStateChangedCallbacks
            .build()
        PhoneAuthProvider.verifyPhoneNumber(options)
        Log.d("Msg", "Auth started")
    }
}
|
Step 8. Create a new Empty Activity (OTPActivity) where we will code for enter otp and send user to dashboard, homePage etc...
Step 9. Open activity_otp.xml file and add the following layout code:
<?xml version="1.0" encoding="utf-8"?>
<LinearLayout xmlns:android="http://schemas.android.com/apk/res/android"
    xmlns:tools="http://schemas.android.com/tools"
    android:layout_width="match_parent"
    android:layout_height="match_parent"
    android:orientation="vertical"
    android:gravity="center"
    android:padding="20dp"
    tools:context=".OTPActivity">

    <EditText
        android:id="@+id/otpTextField"
        android:layout_width="match_parent"
        android:layout_height="wrap_content"
        android:ems="10"
        android:hint="Enter OTP"
        android:inputType="number" />

    <Button
        android:id="@+id/verifyButton"
        android:layout_width="wrap_content"
        android:layout_height="wrap_content"
        android:text="Verify" />
</LinearLayout>
|
Step 10. Go to OTPActivity.kt file and add following code:
class OTPActivity : AppCompatActivity() {
    // get reference of the firebase auth
    lateinit var auth: FirebaseAuth

    override fun onCreate(savedInstanceState: Bundle?) {
        super.onCreate(savedInstanceState)
        setContentView(R.layout.activity_otpactivity)

        auth=FirebaseAuth.getInstance()

        // get storedVerificationId from the intent
        val storedVerificationId= intent.getStringExtra("storedVerificationId")

        // fill otp and call the on click on button
        findViewById(R.id.verifyButton).setOnClickListener {
            val otp = findViewById(R.id.otpTextField).text.trim().toString()
            if(otp.isNotEmpty()){
                val credential : PhoneAuthCredential = PhoneAuthProvider.getCredential(
                    storedVerificationId.toString(), otp)
                signInWithPhoneAuthCredential(credential)
            }else{
                Toast.makeText(this,"Enter OTP", Toast.LENGTH_SHORT).show()
            }
        }
    }
    // verifies if the code matches sent by firebase
    // if success start the new activity in our case it is main Activity
    private fun signInWithPhoneAuthCredential(credential: PhoneAuthCredential) {
        auth.signInWithCredential(credential)
            .addOnCompleteListener(this) { task ->
                if (task.isSuccessful) {
                    val intent = Intent(this , HomeActivity::class.java)
                    startActivity(intent)
                    finish()
                } else {
                    // Sign in failed, display a message and update the UI
                    if (task.exception is FirebaseAuthInvalidCredentialsException) {
                        // The verification code entered was invalid
                        Toast.makeText(this,"Invalid OTP", Toast.LENGTH_SHORT).show()
                    }
                }
            }
    }
}
|
Step 11. Create a new Activity (HomeActivity) for redirect the user to home screen after otp verified.
Step 12. Open activity_home.xml and add the simple textview to show that successfully you are in....
<?xml version="1.0" encoding="utf-8"?>
<LinearLayout xmlns:android="http://schemas.android.com/apk/res/android"
    xmlns:tools="http://schemas.android.com/tools"
    android:layout_width="match_parent"
    android:layout_height="match_parent"
    android:orientation="vertical"
    android:gravity="center"
    android:background="#DCC9C9"
    tools:context=".HomeActivity">

    <TextView
        android:layout_width="wrap_content"
        android:layout_height="wrap_content"
        android:text="Hello Guys! Welcome"
        android:textColor="@color/purple_700"
        android:textSize="29sp"></TextView>
</LinearLayout>
|
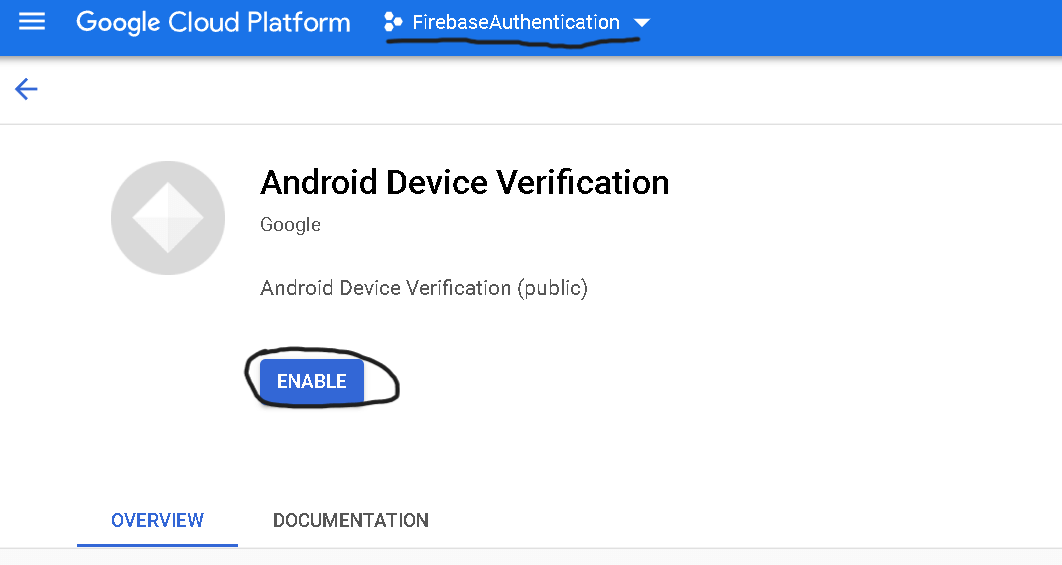
Step 13. Enable the Android Device Verification:
|
https://console.cloud.google.com/apis/library/androidcheck.googleapis.com?pli=1 |
Choose your project and Enable it.
 |
Step 14: Finally, now run your app and you will get the following output:
Main Screen where we add the mobile number:
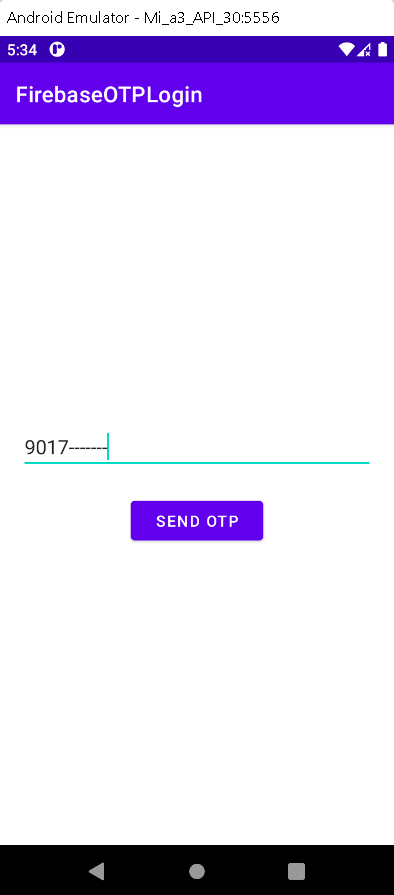 |
OtpScreen:
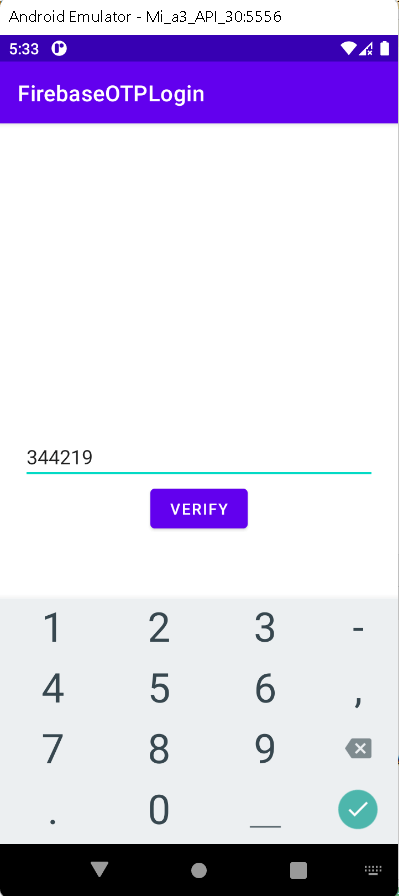 |
HomeScreen when verification done:
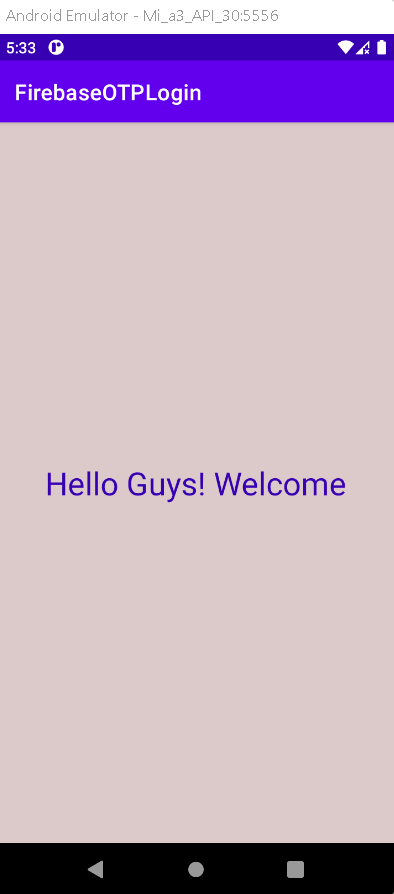 |
|
Sometimes Android Studio throws this issue: |
Solution: Add SHA keys from Android Studio to Firebase
Get SHA keys by following these steps given below and click enter :
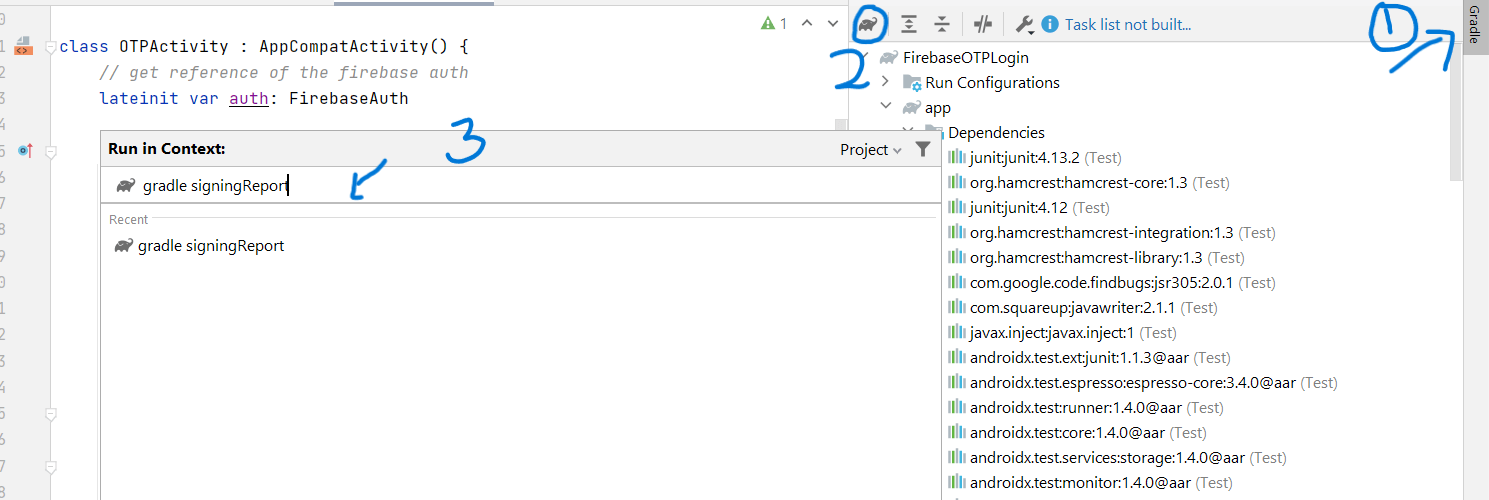 |
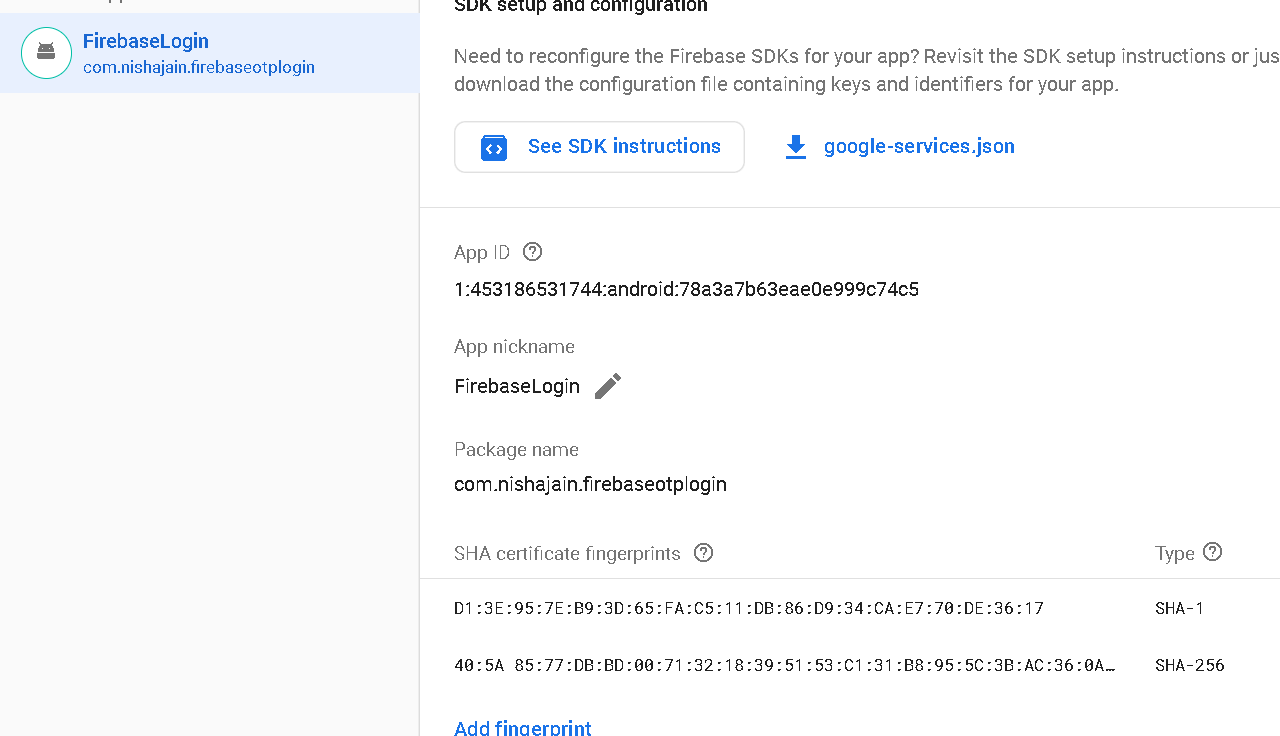
And your keys be like:
 |
On the Firebase console go to Project Overview -> Project Setting, and click add fingerprint button, and add your SHA keys copied from firebase
 |
and download the google-services.json file and follow the step no. 3.
CONCLUSION:
In this article we have covered how to Authenticate Mobile Number with OTP using Firebase in Android Studio using Kotlin language.