How to Upload Image to Firebase Storage in Android Studio using Kotlin
Learn how to upload images to Firebase Storage in Android Studio using Kotlin, offering secure and efficient file handling - RRTutors. Check it out today!
In this android firebase tutorial we will see how to upload image to firebase storage in Android Studio using Kotlin language.Cloud Storage for Firebase is a Google-scaled object storage service that is powerful, easy, and cost-effective. The Firebase SDKs for Cloud Storage provide Google security for file uploads and downloads for your Firebase apps, regardless of network conditions.
Implementation of Upload Image:
Step 1. Create a new Project in android studio.
|
Go to File > New > New Project > Firebase Upload Image Kotlin > Next > Enter Name > Select Language Kotlin > Finish. |
After creating the new project, Android Studio starts Gradle and builds your project, which may take a few seconds.
Step 2. Integrate the app with firebase:
We will add the project to firebase manually:
Go to Firebase console:
|
https://console.firebase.google.com/ |
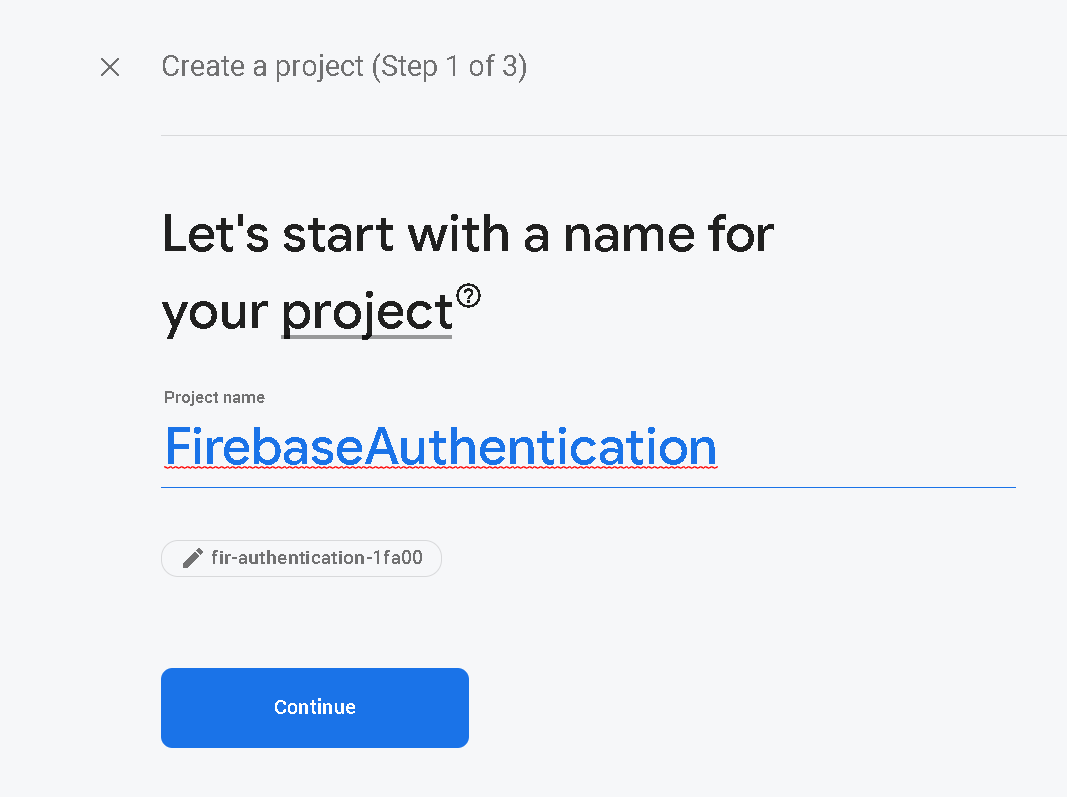
Click on Add Project (+) and enter the project name then click Continue:
 |
You will see this screen after continue and click Continue Again:
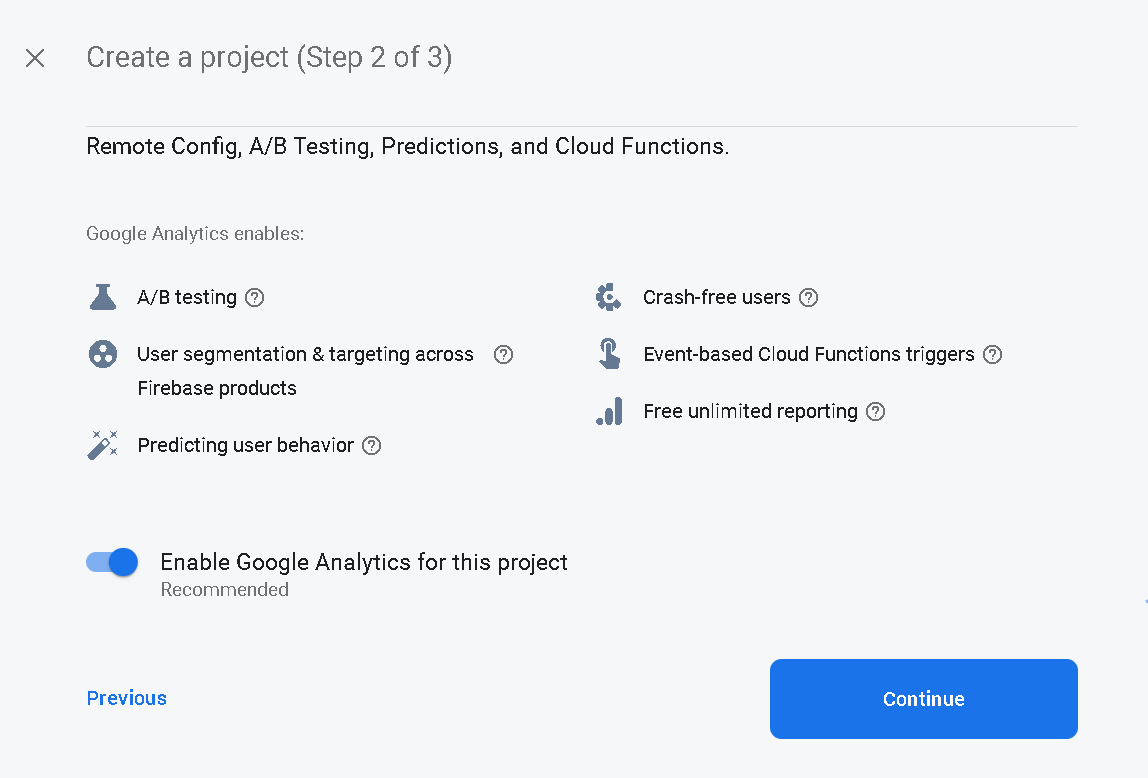 |
You will land to this screen that will ask for Choose or create a Google Ananlytics Account and click on drag drop and choose the 'Default Account for Firebase' and then click 'Create Project'.
 |
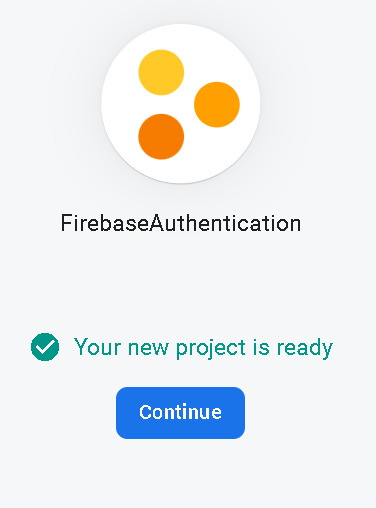
You will see please wait screen and you will get a message "Your new project is ready" and click to Continue.
 |
You will redirect to the project dashboard, Here you will add a android app:
 |
Choose Android Option like in above image and add the following information:
1. Register App
Enter you package name, you will get your package name -> Open AndroidManifest.xml file , there you will package = "com.example.packageName" under manifest tag.
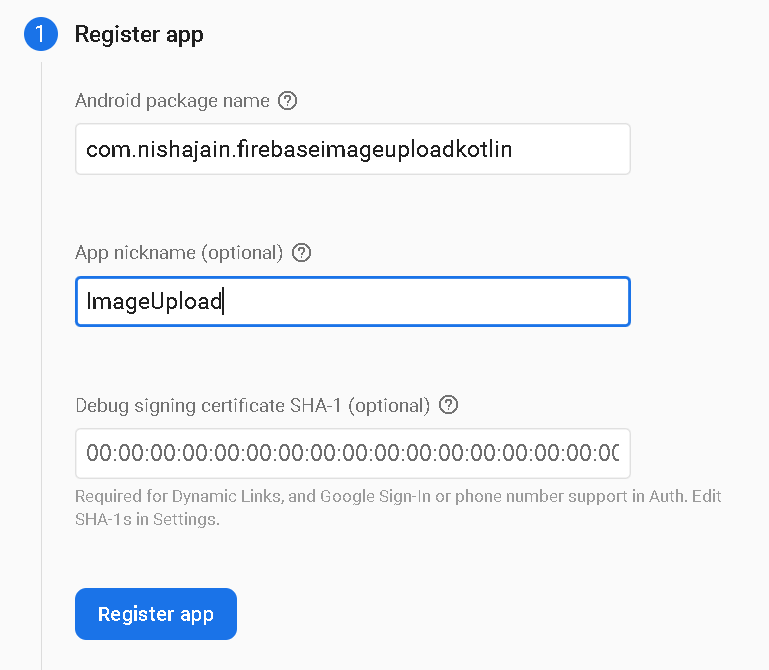 |
Click on Register App.
2. Download Confige File
Download google-Services.json file and click on Next.
3. Add Firebase SDK
Click next, without changing anything.
4. Final click on Continue to Console.
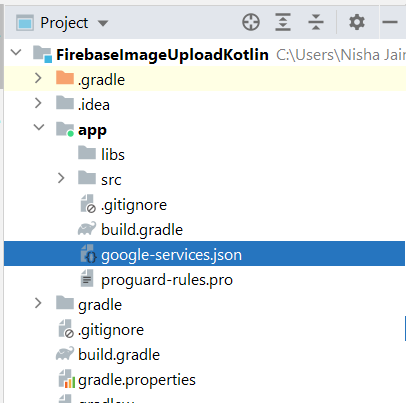
Step 3. Now we will add the downloaded google-services.json file to the app.
Copy the google-services.json file and paste inside:
|
FirebaseOtpLogin > app > right-click > paste. |
Your structure be like:
 |
Step 4. Add the internet permission to AndroidManifest.xml file above application tag
|
<uses-permission android:name="android.permission.INTERNET"></uses-permission> |
Step 5. Open project level gradle file (build.gradle(project)) and add the following inside dependencies
|
classpath 'com.google.gms:google-services:4.3.10' |
Step 6. Now go to build.gradle(app) file
Add the firebase storage dependency inside dependencies
|
implementation 'com.google.firebase:firebase-storage-ktx:20.0.0' |
Apply google-services plugin in the bottom of file:
|
apply plugin: 'com.google.gms.google-services' |
Click Sync Now to continue.
Step 7. Now go to activity_main.xml and add the following layout code:
|
<?xml version="1.0" encoding="utf-8"?> <ImageView <Button <Button </LinearLayout> |
The Layout will give you given appearance:
 |
Step 8. Go to MainActivity.kt file and add the following code:
Create variables
| private val PICK_IMAGE_REQUEST = 71 private var filePath: Uri? = null private var firebaseStore: FirebaseStorage? = null private var storageReference: StorageReference? = null lateinit var imagePreview: ImageView lateinit var btn_choose_image: Button lateinit var btn_upload_image: Button |
Initialize variables below setContentView(R.layout.activity_main).
|
override fun onCreate(savedInstanceState: Bundle?) { firebaseStore = FirebaseStorage.getInstance() } |
Set click listener on upload and choose button
|
btn_choose_image.setOnClickListener { launchGallery() } |
Create a new function launchGallery for Choose image from gallery
|
private fun launchGallery() { |
Override a function onActivityResult()
|
override fun onActivityResult(requestCode: Int, resultCode: Int, data: Intent?) { filePath = data.data |
Create new function for UploadImage()
|
private fun uploadImage(){ |
The Complete code of MainActivity.kt file:
|
import android.app.Activity class MainActivity : AppCompatActivity() { private val PICK_IMAGE_REQUEST = 71
firebaseStore = FirebaseStorage.getInstance() btn_choose_image.setOnClickListener { launchGallery() } private fun launchGallery() { override fun onActivityResult(requestCode: Int, resultCode: Int, data: Intent?) { filePath = data.data private fun uploadImage(){ }else{ } |
Step 9. Before run your project please follow these steps:
In your firebase project console, go to Storage and Click on Get Started
 |
Then choose Start in Production and Click Next.
Go to Rules > change your rules:
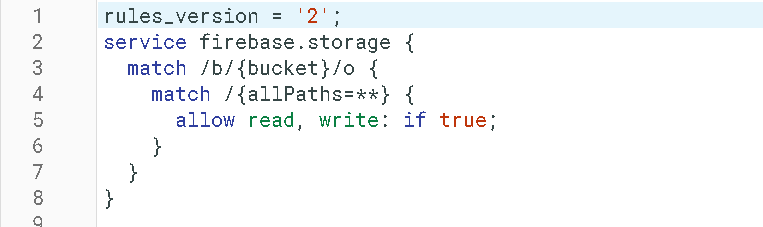 |
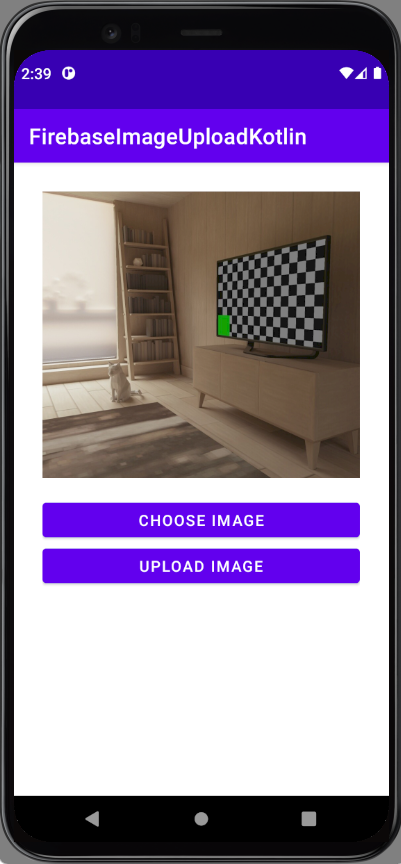
Step 10. Finally run your app and you will get following output.
OUTPUT:
Choose Image and set on ImageView
 |
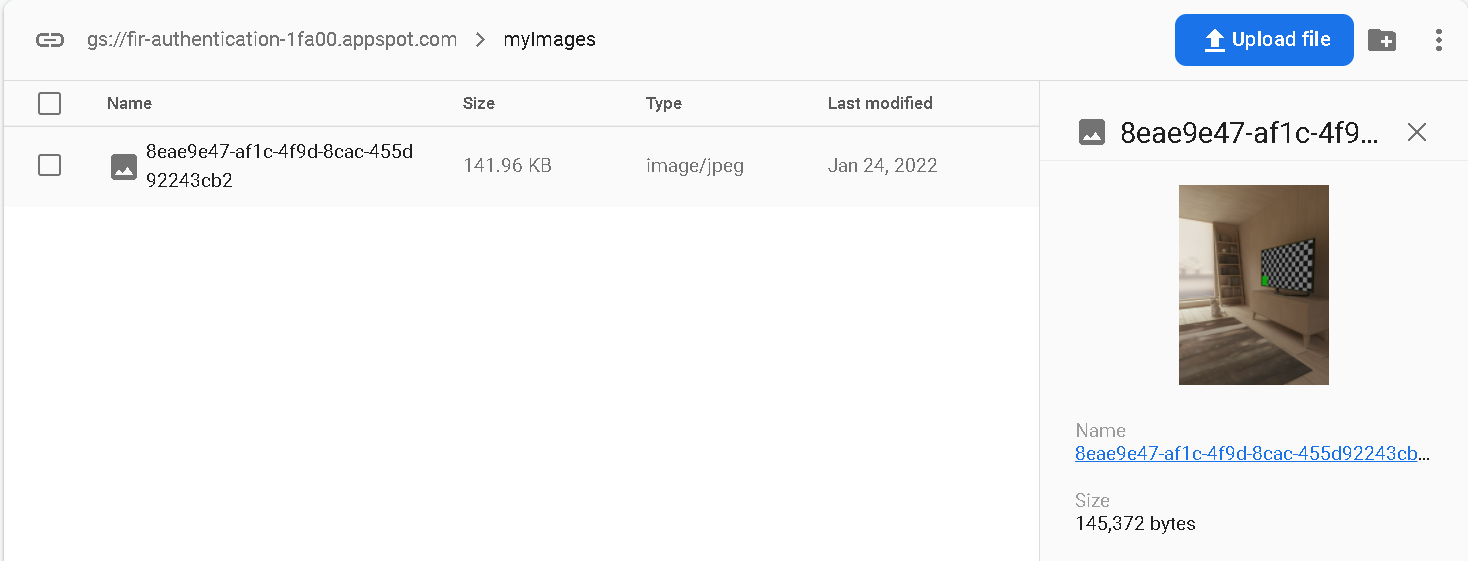
After click on Upload Image, the storage be like:
 |
Inside myImages folder in Firebase Storage:
 |
|
Note: If your image will not uploaded please add your SHA Keys to firebase project by following: |
Get SHA keys by following these steps given below and click enter :
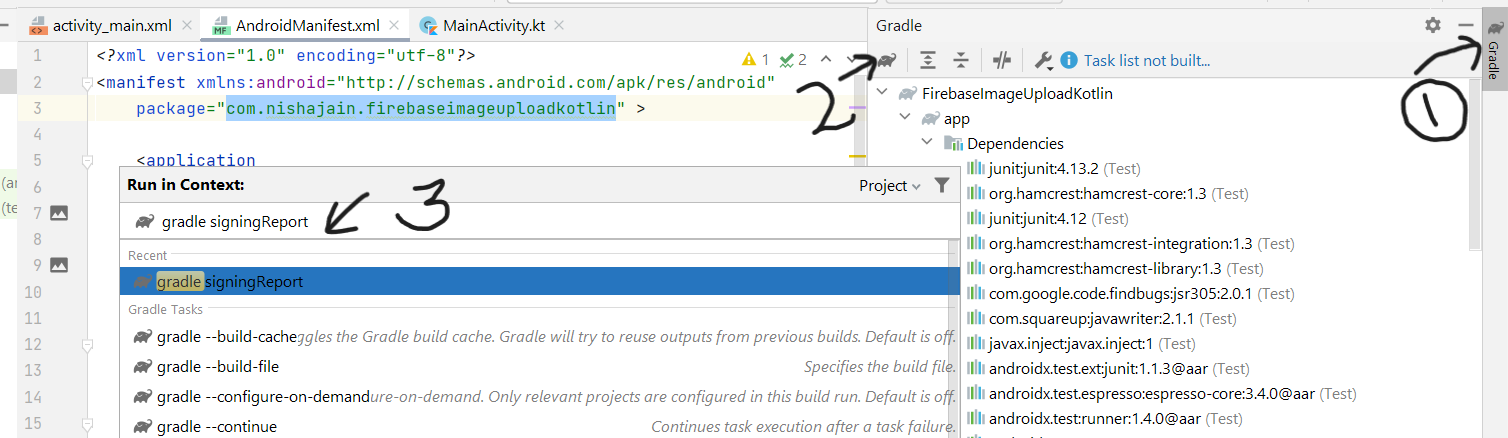 |
And your keys be like:
 |
On the Firebase console go to Project Overview -> Project Setting, and click add fingerprint button, and add your SHA keys copied from firebase
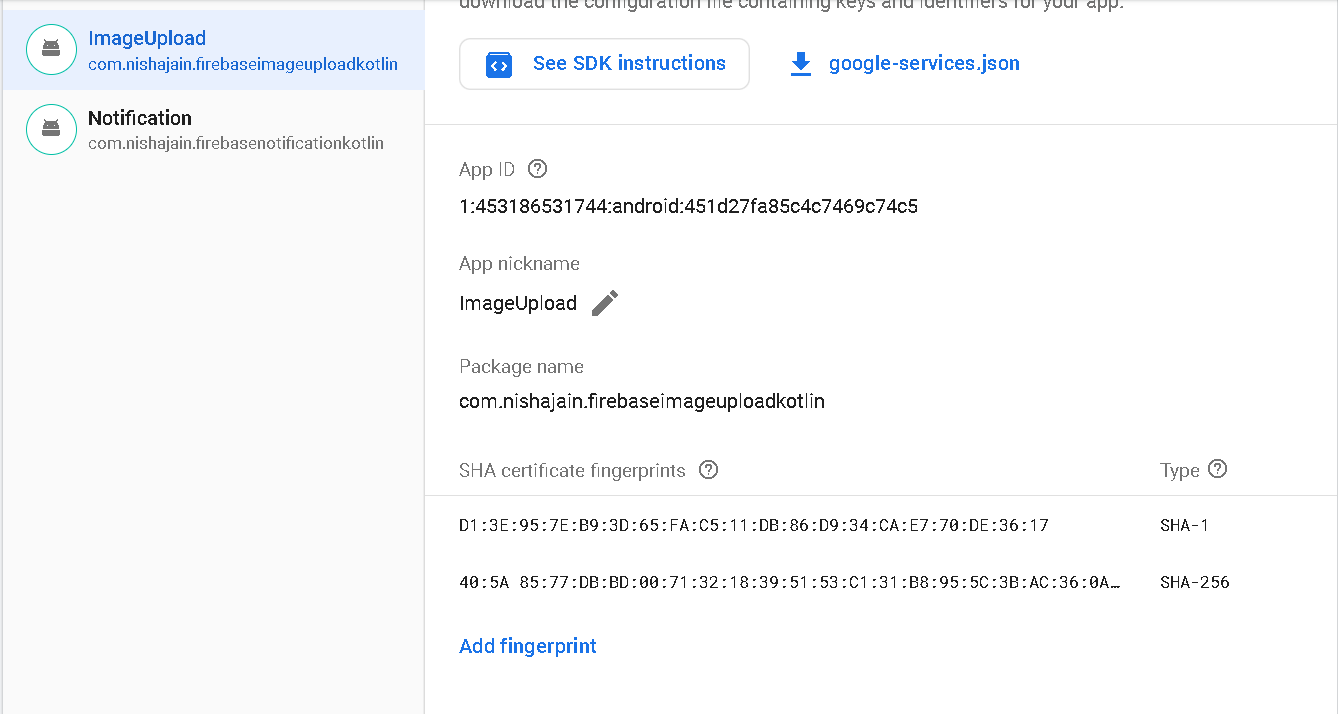 |
and download the google-services.json file and follow the step no. 3.
Conclusion: In this article, we covered how to upload image to firebase storage in Android Studio using Kotlin language.
Related
Firebase Mobile number authentication in Android with kotlin code