How to Direct reply on Notification in Android Studio using Kotlin.
Learn to create direct replies from notifications like WhatsApp in Android Studio using Kotlin language to enhance your app's user engagement at rrtutors.com
In this article, we will see how to direct reply from notification like Whatsapp in Android Studio by using Kotlin Language.
Notification: A notification is a message displayed outside your app's UI by Android to offer the user with reminders, communication from other people,
or other timely information from your app. Users can access your app or perform an action immediately from the notice by tapping it.
You might have seen this feature already in the very popular messaging app WhatsApp.
Implementation:
Step 1. Create a new Project in android studio.
|
Go to File > New > New Project > Empty Activity > Next > Enter Name > Select Language Kotlin > Finish. |
Step 2. Go to activity_main.xml file and add the following code
|
<RelativeLayout xmlns:android="http://schemas.android.com/apk/res/android" <Button
|
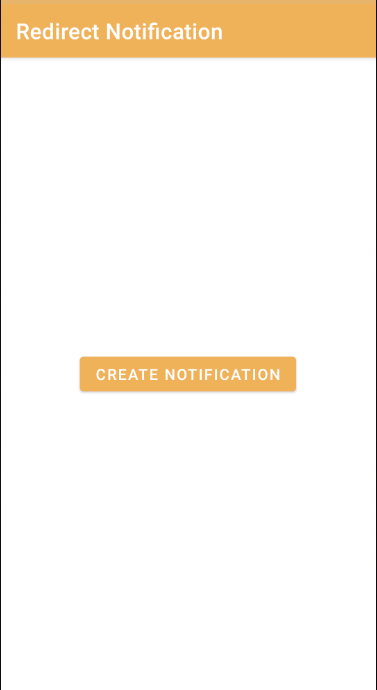
The UI will be like after adding above code:
 |
Step 3. Open MainActivity.kt file and add the following code below setContentView(R.layout.activity_main).
|
val btn = findViewById(R.id.create)
btn.setOnClickListener { // Create an intent // Create a pending intent for the reply button // Create reply action and add the remote input
// Finally, issue the notification private fun createNotificationChannel(channelId:String) { val channel = NotificationChannel(channelId,name,importance) // Finally register the channel with system |
In above code we defined some constant values like CHANNEL_ID, CHANNEL_NAME. Created Notification Channel, inside onCreate().
Added Click Listener event to create Button which is available in activity_main.xml file and inside onClick method we defined the code for displaying the notification.
|
if (Build.VERSION.SDK_INT >= 24) { // Create an intent // Create a pending intent for the reply button // Create reply action and add the remote input
// Finally, issue the notification |
Right now you will see error on NotificationReceiver.class, as we haven’t created it yet.
Step 5. Create a new kotlin class and enter name (NotificationReceiver.kt) and click ENTER . Now, finally we need to handle the input, and other buttons in the notification. For this we will create a Broadcast Receiver.
.
Creating a Notification Action Handler
Add the following code to NotificationReceiver.kt file:
|
class NotificationReceiver : BroadcastReceiver() { context?.apply { // Build a notification and add the action // Finally, issue the notification
|
Step 6. We also need to define this receiver inside our AndroidManifest.xml file. So write the following xml code inside the tag.
| <receiver android:name=".NotificationReceiver" ></receiver> |
Step 7. Run the app on emulator or real device, you will get the output as in Video.
Complete Source Code of Direct Reply on Notification Android Example
activity_main.xml file
|
<?xml version="1.0" encoding="utf-8"?> <Button </RelativeLayout> |
MainActivity.kt file
|
import androidx.appcompat.app.AppCompatActivity import android.content.Intent
override fun onCreate(savedInstanceState: Bundle?) {
btn.setOnClickListener { // Create an intent // Create a pending intent for the reply button // Create reply action and add the remote input
// Finally, issue the notification private fun createNotificationChannel(channelId:String) { val channel = NotificationChannel(channelId,name,importance) // Finally register the channel with system |
NotificationReceiver.kt file
|
context?.apply { // Build a notification and add the action // Finally, issue the notification
|
AndroidManifest.xml file
|
<?xml version="1.0" encoding="utf-8"?> <application <category android:name="android.intent.category.LAUNCHER" /> </manifest> |
Conclusion : In this article we have covered how to direct reply on notification in Android Studio by using Kotlin Language.