Python Tkinter Frame - How Tkinter Frame Works
Learn how to work with Tkinter frame boxes in Python and create simple graphical interfaces with this step-by-step tutorial from RRTutors. Check it out.
The Frame widget is critical for arranging and grouping other widgets user-friendly. It works similar to a container, which specifies the positioning of other widgets.
It organizes the structure and provides cushioning for these widgets by using rectangular sections on the screen. A frame is also be used as a base class for creating complicated widgets.
Let’s take a peek at how the Tkinter Frame works:
How Tkinter Frame Works
To create a Tkinter frame, the following syntax is used:
w = Frame(parent, options)
Where these options represent different widget frame attributes, some of the most frequent Frame widget options are as follows:
-
Bd- specifies the width of the widget border
-
Bg - specifies the background color of the widget
-
Cursor- specifies the appearance of the cursor once hovered on the widget
-
Height- specifies the height of the widget
-
Highlightcolor- specifies the font color when the cursor hovers on the widget
-
Highlightbackground- specifies the background color when the cursor hovers on the widget
-
Relief - specifies the type of the border
-
Width- specifies the width of the widget
Example of a Tkinter Frame
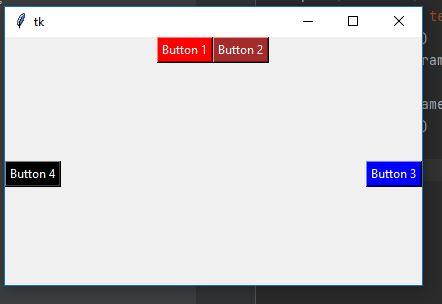
The following example shows the tkinter frame widget arranging a group of four buttons
|
from tkinter import * top = Tk() top.geometry("140x100") frame = Frame(top) frame.pack() leftframe = Frame(top) leftframe.pack(side=LEFT)
rightframe = Frame(top) rightframe.pack(side=RIGHT) btn1 = Button(frame, text="Button 1", bg="red", fg="white", activebackground="red") btn1.pack(side=LEFT) btn2 = Button(frame, text="Button 2", bg="brown", fg="white", activebackground="brown") btn2.pack(side=RIGHT) btn3 = Button(rightframe, text="Button 3", bg="blue", fg="white", activebackground="blue") btn3.pack(side=LEFT) btn4 = Button(leftframe, text="Button 4", bg="black", fg="white", activebackground="white") btn4.pack(side=RIGHT) top.mainloop()
|
Following the execution of the above code, the following Frame will be displayed
 |