Add Custom Ripple Color to RecyclerView with RRutors
Ripple Effect on RecyclerView child items. Set custom ripple colors for item clicks. Learn RecyclerView implementation on rrtutors.com. Start building now!
In this Android Recyclerview tutorial example we will implement Ripple Effect on Recyclerview child items. We can also set Custom ripple effect color to the item click events
What we will cover
- Create Layout with RecyclerView
- Create RecyclerView Adapter with Custom View Holder
- Create Kotlin data class
- Read JSON file from assets folder
- Set Custom Ripple effect color
Let's create Android Project
Step 1: Create Android Project in Android studio
Step 2: Add Recyclerview in your xml file
<?xml version="1.0" encoding="utf-8"?>
<androidx.constraintlayout.widget.ConstraintLayout xmlns:android="http://schemas.android.com/apk/res/android"
        xmlns:tools="http://schemas.android.com/tools"
        xmlns:app="http://schemas.android.com/apk/res-auto"
        android:layout_width="match_parent"
        android:layout_height="match_parent"
        tools:context=".recyclerview.RecycleRippleEffect">

    <androidx.recyclerview.widget.RecyclerView
            android:layout_width="0dp"
            android:layout_height="0dp"
            android:id="@+id/recyclerView"
            app:layout_constraintEnd_toEndOf="parent"
            app:layout_constraintTop_toTopOf="parent"
            app:layout_constraintStart_toStartOf="parent"
            app:layout_constraintBottom_toBottomOf="parent" />

</androidx.constraintlayout.widget.ConstraintLayout>
|
Step 3: Here we are going to add List of Students data to Recyclerview, so let's create a Student Model class.
Here we create Student as Data class
package com.rrtutors.kotlinprograms.recyclerview data class Student(var name:String,var rollNo:String) { } |
Create a Sample Student Json file inside assets folder(In Original Project you will read data from APIs)
students.json
[
  {
    "name": "Rakshak",
    "rollNo": "Schl01"
  },
  {
    "name": "Ramakrishna",
    "rollNo": "Schl02"
  },
  {
    "name": "David Miller",
    "rollNo": "Schl03"
  },
  {
    "name": "Sachin Tendulkar",
    "rollNo": "Schl04"
  },
  {
    "name": "Rahul",
    "rollNo": "Schl05"
  },
  {
    "name": "Revath Modi",
    "rollNo": "Schl06"
  },
  {
    "name": "Jeevan",
    "rollNo": "Schl07"
  }
]
|
Step 4: To set data to Recyclerview we need Adapters, so let's create Recycler Adapter class and its layout file
To Have Ripple Effect Add android:background="?android:attr/selectableItemBackground" property
layout_ripple_child.xml
<?xml version="1.0" encoding="utf-8"?>
<androidx.constraintlayout.widget.ConstraintLayout xmlns:android="http://schemas.android.com/apk/res/android"
        xmlns:app="http://schemas.android.com/apk/res-auto"
        xmlns:tools="http://schemas.android.com/tools"
        android:layout_width="match_parent"
        android:paddingLeft="24dp"
        android:paddingRight="24dp"
        android:background="?android:attr/selectableItemBackground"
        android:layout_height="wrap_content">


    <TextView
            android:id="@+id/st_name"
            android:textSize="22sp"
            android:text="Name"
            android:layout_width="0dp"
            android:padding="5dp"
            android:layout_height="wrap_content"
            android:textStyle="bold"
            app:layout_constraintTop_toTopOf="parent"
            app:layout_constraintStart_toStartOf="parent"
            app:layout_constraintEnd_toEndOf="parent"
            android:layout_marginTop="24dp" />

    <TextView
            android:id="@+id/st_number"
            android:textSize="18sp"
            android:text="No"
            android:padding="5dp"
            android:layout_width="0dp"
            android:layout_height="wrap_content"
            android:textStyle="italic"
            app:layout_constraintStart_toStartOf="parent"
            app:layout_constraintEnd_toEndOf="parent"
            app:layout_constraintTop_toBottomOf="@id/st_name"
            android:layout_marginTop="8dp"
            />


</androidx.constraintlayout.widget.ConstraintLayout>
|
Now create Adapter class
class StudentAdapter(var list:ArrayList<Student>): RecyclerView.Adapter<StudentAdapter.ViewHolder>() {
    override fun onCreateViewHolder(parent: ViewGroup, viewType: Int): ViewHolder {
} } |
In the above Adapter class we passed ViewHolder type, Let's Create ViewHolder class
inner class ViewHolder(itemView: View) : RecyclerView.ViewHolder(itemView){
} |
Now Bind layout to the Viewholder by
override fun onCreateViewHolder(parent: ViewGroup, viewType: Int): ViewHolder {
    val layoutInflater = LayoutInflater.from(parent.context)
    return ViewHolder(layoutInflater.inflate(R.layout.layout_ripple_child, parent, false))

}
|
Step 5: RecyclerView Item Click Listener
Inside our adapter class Create an Interface ClickListener and add abstract fun click which will takes two parameter : View and View position inside Recyclerview
Add setOnItemClickListener inside adapter class, here we will pass above created Interface listener instance
Implement ViewHolder class with View.OnClickListener and override onClick function
So Our Adapter class will be like below
package com.rrtutors.kotlinprograms.recyclerview

import android.graphics.ColorSpace
import android.view.LayoutInflater
import android.view.View
import android.view.ViewGroup
import android.widget.TextView
import androidx.recyclerview.widget.RecyclerView
import com.rrtutors.kotlinprograms.R
import java.util.ArrayList

class StudentAdapter(var list:ArrayList<Student>): RecyclerView.Adapter<StudentAdapter.ViewHolder>() {
    override fun onCreateViewHolder(parent: ViewGroup, viewType: Int): ViewHolder {
        val layoutInflater = LayoutInflater.from(parent.context)
        return ViewHolder(layoutInflater.inflate(R.layout.layout_ripple_child, parent, false))

    }

    override fun onBindViewHolder(holder: ViewHolder, position: Int) {
        (holder as ViewHolder).bind(list.get(position));
    }

    override fun getItemCount(): Int {
        return list.size
    }
    fun setOnItemClickListener(aClickListener: ClickListener) {
        mClickListener = aClickListener
    }


    lateinit var mClickListener: ClickListener
    interface ClickListener {
        fun onClick(pos: Int, aView: View)
    }

    inner class ViewHolder(itemView: View) : RecyclerView.ViewHolder(itemView), View.OnClickListener{

        init {
            itemView.setOnClickListener(this)
        }

        val st_name=itemView.findViewById<TextView>(R.id.st_name)
        val st_number=itemView.findViewById<TextView>(R.id.st_number)
        fun bind(model: Student): Unit {
            st_number.text = model.name
            st_name.text = model.rollNo
        }

        override fun onClick(v: View?) {
            mClickListener.onClick(adapterPosition, itemView)
        }
    }
}
|
Step 6: Activity Class
- Read Students JSON data from assets folder and add into List
- Set Vertical Linear LayoutManager to RecyclerView.
- Create Instance of Adapter and set to recyclerView .
- Using adapter instance Call setOnItemClickListener , override onClick of StudentAdapter.ClickListener show toast message inside onclick function
recyclerView=findViewById<RecyclerView>(R.id.recyclerView) val modelList = readFromAsset(); val adapter = StudentAdapter(modelList as ArrayList<Student>) recyclerView.layoutManager = LinearLayoutManager(this, RecyclerView.VERTICAL, false) recyclerView.adapter = adapter; adapter.setOnItemClickListener(object : StudentAdapter.ClickListener { override fun onClick(pos: Int, aView: View) { Toast.makeText(this@RecycleRippleEffect, modelList.get(pos).name, Toast.LENGTH_SHORT).show() } }) |
In the above code we need to read student json data from assets folder, Let's implement below function to How do we read json file from assets folder
private fun readFromAsset(): List<Student> {
    val modeList = mutableListOf<Student>()
    val bufferReader = application.assets.open("students.json").bufferedReader()
    val json_string = bufferReader.use {
        it.readText()
    }
    val jsonArray = JSONArray(json_string);

    for (i in 0..jsonArray.length() - 1) {
        val jsonObject: JSONObject = jsonArray.getJSONObject(i)
        val model =
            Student(jsonObject.getString("name"), jsonObject.getString("rollNo"))
        modeList.add(model)
    }

    return modeList
}
|
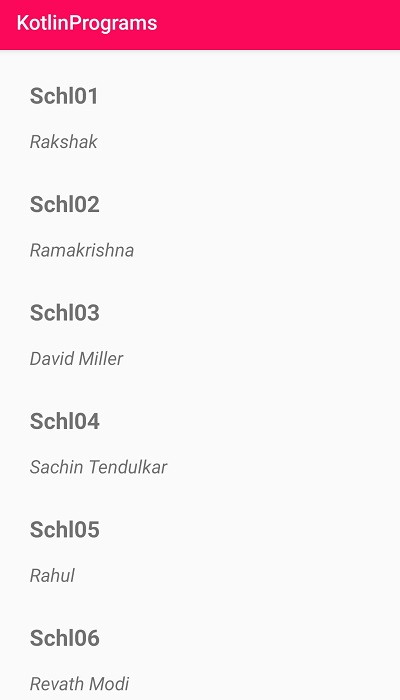
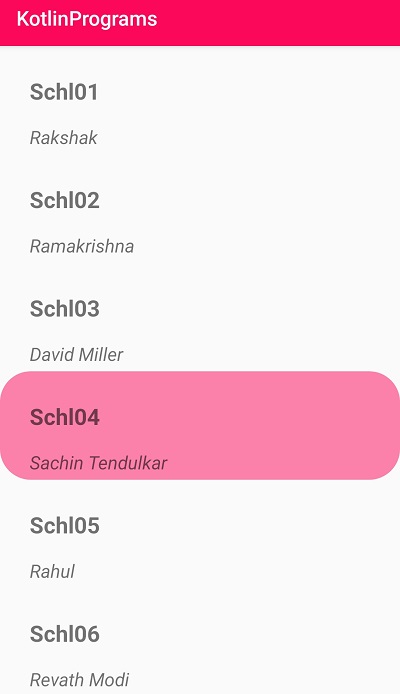
Step 7: Now Run application and tap on Recyclerview list items, you can see the ripple effect on each event
 |
Complete example code for Ripple Effect on Recyclerview item click
Activity code
package com.rrtutors.kotlinprograms.recyclerview

import android.graphics.ColorSpace
import androidx.appcompat.app.AppCompatActivity
import android.os.Bundle
import android.view.View
import android.widget.Toast
import androidx.recyclerview.widget.LinearLayoutManager
import androidx.recyclerview.widget.RecyclerView
import com.rrtutors.kotlinprograms.R
import org.json.JSONArray
import org.json.JSONObject
import java.util.ArrayList

class RecycleRippleEffect : AppCompatActivity() {
    lateinit var recyclerView: RecyclerView
    override fun onCreate(savedInstanceState: Bundle?) {
        super.onCreate(savedInstanceState)
        setContentView(R.layout.activity_recycle_ripple_effect)

        recyclerView=findViewById<RecyclerView>(R.id.recyclerView)
        val modelList = readFromAsset();

        val adapter = StudentAdapter(modelList as ArrayList<Student>)

        recyclerView.layoutManager = LinearLayoutManager(this, RecyclerView.VERTICAL, false)
        recyclerView.adapter = adapter;

        adapter.setOnItemClickListener(object : StudentAdapter.ClickListener {
            override fun onClick(pos: Int, aView: View) {
                Toast.makeText(this@RecycleRippleEffect, modelList.get(pos).name, Toast.LENGTH_SHORT).show()
            }
        })

    }

    private fun readFromAsset(): List<Student> {
        val modeList = mutableListOf<Student>()
        val bufferReader = application.assets.open("students.json").bufferedReader()
        val json_string = bufferReader.use {
            it.readText()
        }
        val jsonArray = JSONArray(json_string);

        for (i in 0..jsonArray.length() - 1) {
            val jsonObject: JSONObject = jsonArray.getJSONObject(i)
            val model =
                Student(jsonObject.getString("name"), jsonObject.getString("rollNo"))
            modeList.add(model)
        }

        return modeList
    }
}
|
How do we set Custom Ripple Effect color to the Recyclerview child itesm.
To add custom ripple color effect we need to create a xml file inside drawable and add below code
ripple.xml
<?xml version="1.0" encoding="utf-8"?>
<ripple xmlns:android="http://schemas.android.com/apk/res/android"
        xmlns:tools="http://schemas.android.com/tools"
        android:color="@color/colorPrimary"
        tools:targetApi="lollipop">
    <item android:id="@android:id/mask">
        <shape android:shape="rectangle">
            <solid android:color="@color/colorPrimary" />
            <corners android:radius="30dp" />
        </shape>
    </item>
</ripple>
|
Now set this drawable to the list item parent view
android:background="@drawable/ripple"
 |
Conclusion: In this Android Recyclerview example we covered how to create Custom ViewHolder to the Recyclerview with Ripple Effect and add Custom ripple color to the item click events