How do i add Cardview to RecyclerView android kotlin example
Learn how to add CardView inside RecyclerView items. Follow this step-by-step guide to create a structured UI with RecyclerView in Android on rrtutors.com.
We know how to user Recyclerview in android and we have created Recyclerview Item Click events in the previous post.
In this post we will learn add CardView to Recyclerview
What is CardView?
CardView is a Material Widget which acts ad Framelayout with adding extra features like background color, round the corners, elevation and shadow to the background.
Let create a simple Recyclerview example with CardView as child items with elevation
Step 1: Create Android application in Android studio
Step 2: Add Recyclerview inside xml file
<?xml version="1.0" encoding="utf-8"?>
<androidx.constraintlayout.widget.ConstraintLayout xmlns:android="http://schemas.android.com/apk/res/android"
        xmlns:tools="http://schemas.android.com/tools"
        xmlns:app="http://schemas.android.com/apk/res-auto"
        android:layout_width="match_parent"
        android:layout_height="match_parent"
        tools:context=".recyclerview.RecycleRippleEffect">

    <androidx.recyclerview.widget.RecyclerView
            android:layout_width="0dp"
            android:layout_height="0dp"
            android:id="@+id/recyclerView"
            app:layout_constraintEnd_toEndOf="parent"
            app:layout_constraintTop_toTopOf="parent"
            app:layout_constraintStart_toStartOf="parent"
            app:layout_constraintBottom_toBottomOf="parent" />

</androidx.constraintlayout.widget.ConstraintLayout>
|
Step 3: Create a model data class which represents the students list where we will read data from local json file from assets folder
package com.rrtutors.kotlinprograms.recyclerview data class Student(var name:String,var rollNo:String) { } |
Step 4: Let's create Recyclerview child layout by adding CardView as parent widget
<?xml version="1.0" encoding="utf-8"?>
<androidx.cardview.widget.CardView xmlns:android="http://schemas.android.com/apk/res/android"
        xmlns:app="http://schemas.android.com/apk/res-auto"
        xmlns:tools="http://schemas.android.com/tools"
        android:layout_width="match_parent"
        android:layout_margin="5dp"
        android:elevation="5dp"
        app:contentPadding="5dp"
        android:background="?android:attr/selectableItemBackground"
        android:layout_height="wrap_content">

<androidx.constraintlayout.widget.ConstraintLayout
        android:layout_width="match_parent"
        android:layout_height="wrap_content"
        >

    <ImageView
            android:id="@+id/img"
            android:layout_width="60dp"
            android:src="@mipmap/ic_launcher"
            app:layout_constraintStart_toStartOf="parent"
            android:layout_height="60dp"
            app:layout_constraintBottom_toBottomOf="parent"
            app:layout_constraintTop_toTopOf="parent" />

    <TextView
            android:id="@+id/st_name"
            android:textSize="22sp"
            android:text="Name"
            android:layout_width="0dp"
            android:layout_marginLeft="10dp"
            android:padding="5dp"
            android:layout_height="wrap_content"
            android:textStyle="bold"
            app:layout_constraintEnd_toEndOf="parent"
            app:layout_constraintTop_toTopOf="parent"
            app:layout_constraintStart_toEndOf="@+id/img" />

    <TextView
            android:id="@+id/st_number"
            android:textSize="18sp"
            android:text="No"
            android:padding="5dp"
            android:layout_width="0dp"
            android:layout_height="wrap_content"
            android:textStyle="italic"
            app:layout_constraintStart_toStartOf="@+id/st_name"
            app:layout_constraintEnd_toEndOf="parent"
            app:layout_constraintTop_toBottomOf="@id/st_name"
            android:layout_marginTop="8dp" />
</androidx.constraintlayout.widget.ConstraintLayout>

</androidx.cardview.widget.CardView>
|
Here we added Custom Ripple Effect to CardView as background.
Adapter class
package com.rrtutors.kotlinprograms.recyclerview

import android.graphics.ColorSpace
import android.view.LayoutInflater
import android.view.View
import android.view.ViewGroup
import android.widget.TextView
import androidx.recyclerview.widget.RecyclerView
import com.rrtutors.kotlinprograms.R
import java.util.ArrayList

class StudentAdapter(var list:ArrayList<Student>): RecyclerView.Adapter<StudentAdapter.ViewHolder>() {
    override fun onCreateViewHolder(parent: ViewGroup, viewType: Int): ViewHolder {
        val layoutInflater = LayoutInflater.from(parent.context)
        return ViewHolder(layoutInflater.inflate(R.layout.layout_ripple_child, parent, false))

    }

    override fun onBindViewHolder(holder: ViewHolder, position: Int) {
        (holder as ViewHolder).bind(list.get(position));
    }

    override fun getItemCount(): Int {
        return list.size
    }
    fun setOnItemClickListener(aClickListener: ClickListener) {
        mClickListener = aClickListener
    }


    lateinit var mClickListener: ClickListener
    interface ClickListener {
        fun onClick(pos: Int, aView: View)
    }

    inner class ViewHolder(itemView: View) : RecyclerView.ViewHolder(itemView), View.OnClickListener{

        init {
            itemView.setOnClickListener(this)
        }

        val st_name=itemView.findViewById<TextView>(R.id.st_name)
        val st_number=itemView.findViewById<TextView>(R.id.st_number)
        fun bind(model: Student): Unit {
            st_number.text = model.name
            st_name.text = model.rollNo
        }

        override fun onClick(v: View?) {
            mClickListener.onClick(adapterPosition, itemView)
        }
    }
}
|
Activity code will be like below, here we are reading the JSON file from assets folder and adding the students data to Adapter
package com.rrtutors.kotlinprograms.recyclerview

import android.graphics.ColorSpace
import androidx.appcompat.app.AppCompatActivity
import android.os.Bundle
import android.view.View
import android.widget.Toast
import androidx.recyclerview.widget.LinearLayoutManager
import androidx.recyclerview.widget.RecyclerView
import com.rrtutors.kotlinprograms.R
import org.json.JSONArray
import org.json.JSONObject
import java.util.ArrayList

class RecycleRippleEffect : AppCompatActivity() {
    lateinit var recyclerView: RecyclerView
    override fun onCreate(savedInstanceState: Bundle?) {
        super.onCreate(savedInstanceState)
        setContentView(R.layout.activity_recycle_ripple_effect)

        recyclerView=findViewById<RecyclerView>(R.id.recyclerView)
        val modelList = readFromAsset();

        val adapter = StudentAdapter(modelList as ArrayList<Student>)

        recyclerView.layoutManager = LinearLayoutManager(this, RecyclerView.VERTICAL, false)
        recyclerView.adapter = adapter;
        recyclerView.addItemDecoration(DividerItemDecoration(this))

        adapter.setOnItemClickListener(object : StudentAdapter.ClickListener {
            override fun onClick(pos: Int, aView: View) {
                Toast.makeText(this@RecycleRippleEffect, modelList.get(pos).name, Toast.LENGTH_SHORT).show()
            }
        })

    }

    private fun readFromAsset(): List<Student> {
        val modeList = mutableListOf<Student>()
        val bufferReader = application.assets.open("students.json").bufferedReader()
        val json_string = bufferReader.use {
            it.readText()
        }
        val jsonArray = JSONArray(json_string);

        for (i in 0..jsonArray.length() - 1) {
            val jsonObject: JSONObject = jsonArray.getJSONObject(i)
            val model =
                Student(jsonObject.getString("name"), jsonObject.getString("rollNo"))
            modeList.add(model)
        }

        return modeList
    }
}
|
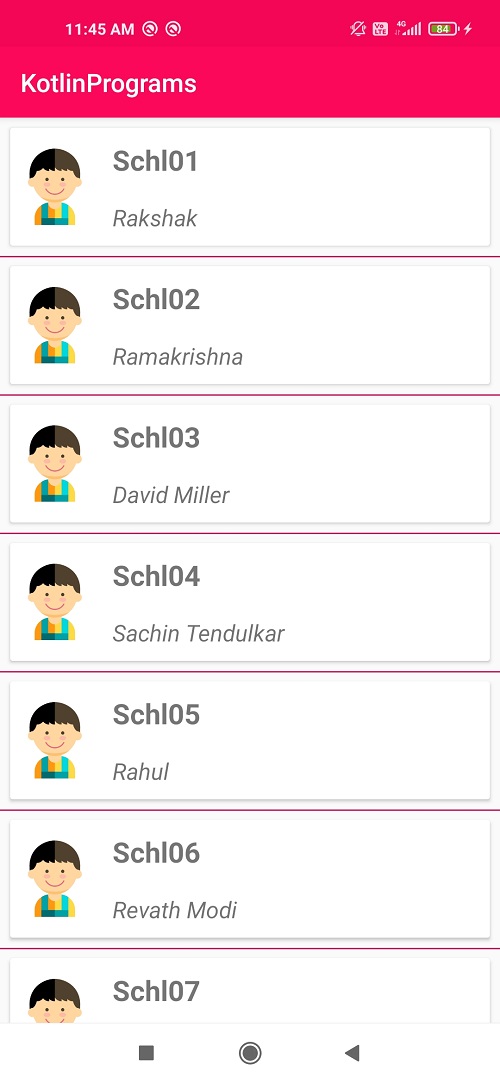
Let's run the application, you will see Recyclerview with CardView items.
 |
Conclusion: In this Android Recyclerview tutorial we covered how to add CardView to Recyclerview child items with Custom ripple effect