Flutter Pull To Refresh - How to refresh Listview data in flutter
Flutter pull to refresh indicator, refresh the listview data on swipe
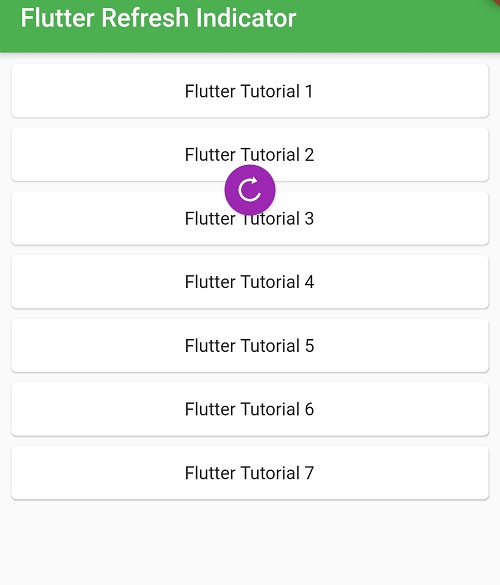
While using the mobile applications, user might wants to refresh the current screen data, to do this he has to go back and come to the screen. Instead of doing this we can make current screen data refresh by using the Refresh Indicator. Flutter provided a widget RefreshIndicator widget to make the list refresh functionality while pull the screen.
Flutter RefreshIndicator is material widget that supports swipe to refresh feature. When swipe the widget it will show a loading indicator at top. Mostly this widget we use to refresh the content of the Listview
This example will cover the Flutter refresh tags like Flutter Pull To Refresh, Refresh Indicator in Flutter, Pull To Refresh Flutter, Pull down to Refresh, Flutter Refresh, Swipe to refresh
Create Refresh Indicator
To create PullToRefresh indicator by adding the RefreshIndicator constructor to the widget. This RefreshIndicator has two required properties child & onRefresh Where child takes a scrollable widget and onRefresh is to handle callback to update the data
 |
Let's create a SwipToRefresh/PullToRefresh example
import 'dart:async';

import 'package:flutter/material.dart';

void main() {
  runApp(MyApp());
}

class MyApp extends StatelessWidget {
  @override
  Widget build(BuildContext context) {
    return MaterialApp(
        title: 'Flutter Tutorial',
        theme: ThemeData(
          primarySwatch: Colors.green,
        ),
        home: MyHomePage()
    );
  }
}

class MyHomePage extends StatefulWidget {
  MyHomePage({Key? key}) : super(key: key);
  @override
  _MyHomePageState createState() => _MyHomePageState();
}

class _MyHomePageState extends State {
  List data = [
    "Flutter Tutorial 1",
    "Flutter Tutorial 2",
    "Flutter Tutorial 3",
    "Flutter Tutorial 4",
    "Flutter Tutorial 5",

  ];
  @override
  Widget build(BuildContext context) {
    return Scaffold(
        appBar: AppBar(
          title: Text("Flutter Refresh Indicator"),
        ),
        body: RefreshIndicator(
          onRefresh: () async {
            await Future.delayed(Duration(seconds: 2));
            updateData();
          },
          child:ListView(
            children: List.generate(data.length, (index) =>
                Card(
                  child: Container(
                    alignment: Alignment.center,
                    child:Text(data[index]),
                  ),
                ),
            ),
            shrinkWrap: true,
            padding: EdgeInsets.all(5),
            scrollDirection: Axis.vertical,
            itemExtent: 50,
          ),
          color: Colors.white,
          backgroundColor: Colors.purple,
          triggerMode: RefreshIndicatorTriggerMode.anywhere,
        )
    );
  }
  void updateData(){

    new Timer.periodic(
        Duration(seconds: 1),
            (Timer timer){
              int i = data.length+1;
              data.add("Flutter Tutorial $i");
              timer.cancel();
          setState(() {

          });
        }
    );


  }
}
|
Conclusion: In this flutter tutorial example we covered how to refresh list data with RefreshIndicator widget.