Create Custom Text Widget in 2022 : Flutter
Creating the custom widget pattern is not only avoid the duplicate code/less code also help the other developers to understand the application in easy way
When we develop the application some times our code get messy. This is happened not because of wrong code, some times it happened with large code. While develop the application we may right duplicate code multiple times and multiple files will write the same code. To overcome this we need to write code as reusable pattern. In this flutter example we are going to create a single Custom Text widget which will be used in multiple files and avoid the duplicate code.
You may raise a question Why we need to create a Custom Text. Let see one example
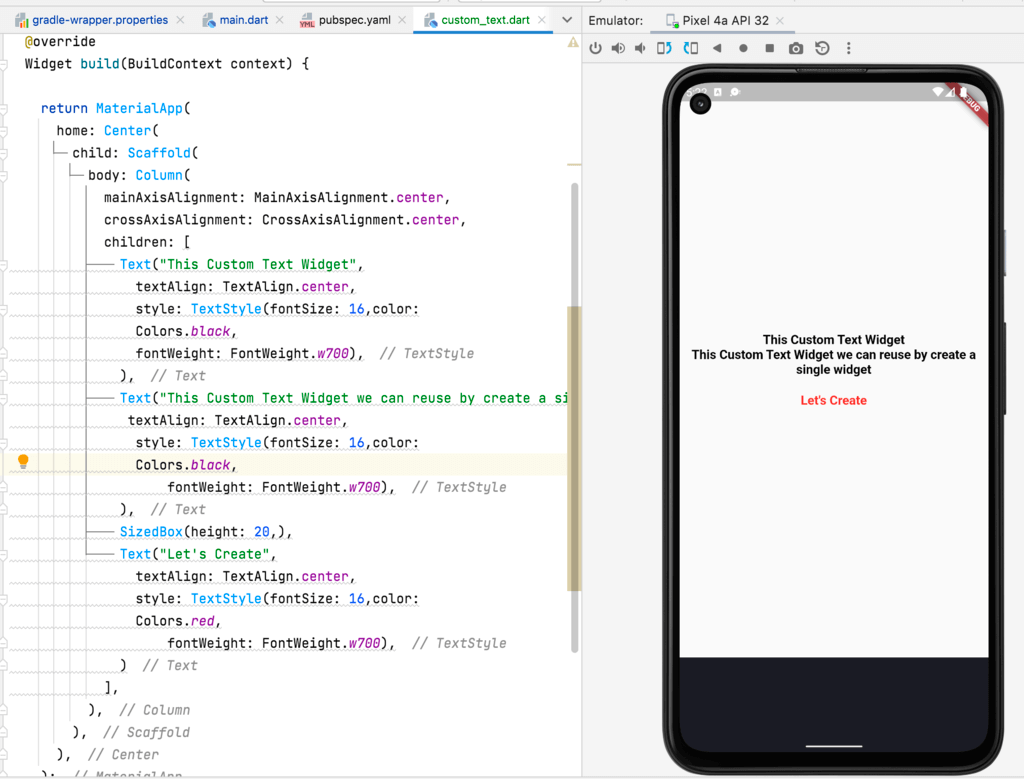
We have create a simple screen like below with duplicate code
 |
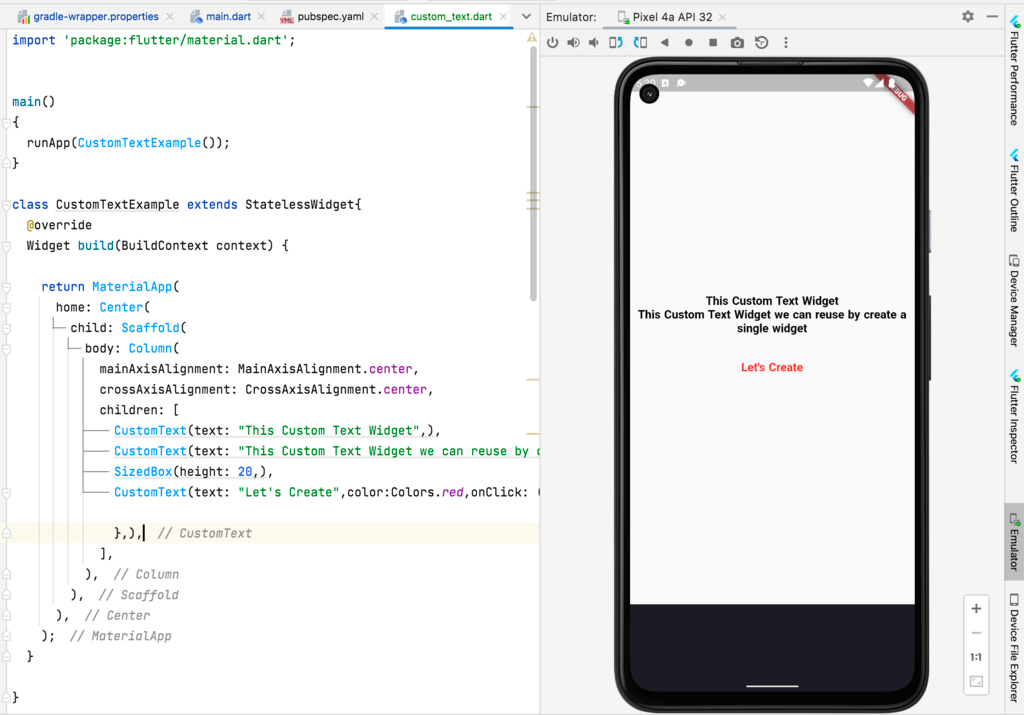
Now same output we can achieve by few lines of code
 |
Let's get started
Step 1: Create a simple flutter application in android studio
Step 2: Create a separate file to create custom text widget class
class CustomText extends StatelessWidget{
  final String text;
  final double size;
  final FontWeight fontWeight;
  final Color color;
  final double wordSpacing;
  final VoidCallback? onClick;
  final TextAlign textAlign;

  const CustomText({
    required this.text,
    this.size=16,
    this.fontWeight=FontWeight.w700,
    this.color=Colors.black,
    this.wordSpacing=1,
    this.onClick,
    this.textAlign: TextAlign.center,
  });

  @override
  Widget build(BuildContext context) {
    return Container(
      child: onClick == null
          ? Text(text,
          textAlign: textAlign,
          style: TextStyle(
          fontSize: size,
          fontWeight: fontWeight,
          color: color,
          wordSpacing: wordSpacing,

        ),)
          : TextButton(
        onPressed: () => onClick,
        child: Text(text,
          textAlign: textAlign,
          style: TextStyle(
            fontSize: size,
            fontWeight: fontWeight,
            color: color,
            wordSpacing: wordSpacing,
          ),),
      ),
    );
  }

}
|
Step 3: Now import that custom text widget class into main.dart file
Step 4: Use this custom widget in our actual code
main()
{
  runApp(CustomTextExample());
}

class CustomTextExample extends StatelessWidget{
  @override
  Widget build(BuildContext context) {

    return MaterialApp(
      home: Center(
        child: Scaffold(
          body: Column(
            mainAxisAlignment: MainAxisAlignment.center,
            crossAxisAlignment: CrossAxisAlignment.center,
            children: [
              CustomText(text: "This Custom Text Widget",),
              CustomText(text: "This Custom Text Widget we can reuse by create a single widget",),
              SizedBox(height: 20,),
              CustomText(text: "Let's Create",color:Colors.red,onClick: (){

              },),
            ],
          ),
        ),
      ),
    );
  }

}
|
Step 5: Now run application in real device or emulator/simulator
Conclusion: In this flutter example we covered how to create custom text widget. Creating the custom widget pattern is not only avoid the duplicate code/less code also help the other developers to understand the application in easy way.