Working with DefaultTabController in Flutter
Flutter Default TabController to show tabs
Before to know about default TabController, first we will see what is TabView generally. TabView is used to switch between multiple children, which means that we can handle different items on single view. Flutter framework provided DefaultTabController to switch multiple child widgets on single view. This DefaultTabController handles the Tab views.
const DefaultTabController({
  Key? key,
  required this.length,
  this.initialIndex = 0,
  required this.child,
})
|
To work with DefaultTabController we will add TabBar and TabBarview widgets to load multiple views.
TabBar
Contructor of TabBar is below
const TabBar({
  Key? key,
  required this.tabs,
  this.controller,
  this.isScrollable = false,
  this.padding,
  this.indicatorColor,
  this.automaticIndicatorColorAdjustment = true,
  this.indicatorWeight = 2.0,
  this.indicatorPadding = EdgeInsets.zero,
  this.indicator,
  this.indicatorSize,
  this.labelColor,
  this.labelStyle,
  this.labelPadding,
  this.unselectedLabelColor,
  this.unselectedLabelStyle,
  this.dragStartBehavior = DragStartBehavior.start,
  this.overlayColor,
  this.mouseCursor,
  this.enableFeedback,
  this.onTap,
  this.physics,
})
|
Here is contains controller property which will handle the TabViews. If TabController is not provided, then the value of DefaultTabController will be used.
tabs: This property we will pass the list of Tabs how many we need to display. The length of tabs list must equal to the controller's (TabController.length/DefaultTabController.length) and also TabView children length
We can customize TabIndicator with other properties
TabBarView
The Contructor of TabBarView is
const TabBarView({
  Key? key,
  required this.children,
  this.controller,
  this.physics,
  this.dragStartBehavior = DragStartBehavior.start,
})
|
children: Here we will pass the child views. The length of this children must be the equals to the length of the TabController
Let's create a simple example how to work with DefaultTabController.
Step 1: Create Flutter application
Step 2: Add DefaultTabController to the widget with length 2
MaterialApp(
  home: DefaultTabController(
    length: 2,
    // initialIndex: 0,
    child: Scaffold(
      appBar: AppBar(
) ) ) ) |
|
|
Step 3: Now create Tabs using TabBar
const TabBar( tabs: <Widget>[ Tab( icon: Icon( Icons.mail, ), text: 'Inbox', ), Tab( icon: Icon( Icons.favorite, ), text: 'Favorites', ), ], ), |
Add this TabBar to AppBar to the property bottom:
Step 4: Now create TabBarView with two child views
TabBarView( children: <Widget>[ InboxScreen(), MyFavoritesScreen(), ], ) |
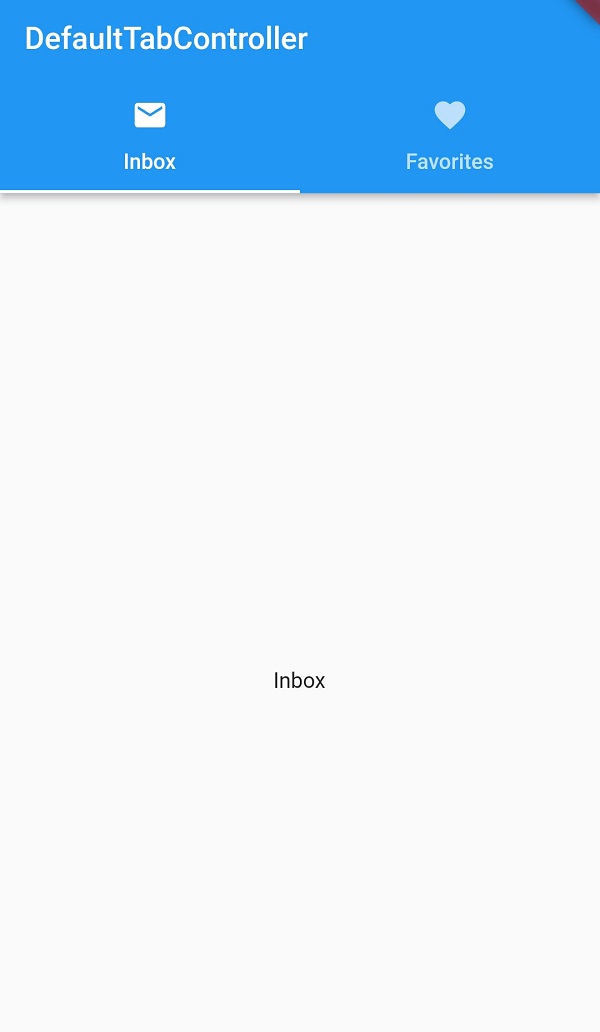
Output:
 |
Complete code for Flutter DefaultTabController
import 'package:flutter/material.dart';

main()  {
  runApp(
      TabsView()
  );

}

class TabsView extends StatefulWidget {
  const TabsView({Key? key}) : super(key: key);

  @override
  _TabsViewState createState() => _TabsViewState();
}

class _TabsViewState extends State<TabsView> {
  @override
  Widget build(BuildContext context) {
    return MaterialApp(
      home: DefaultTabController(
        length: 2,
        // initialIndex: 0,
        child: Scaffold(
          appBar: AppBar(
            title: const Text('DefaultTabController'),
            bottom: const TabBar(
              tabs: <Widget>[
                Tab(
                  icon: Icon(
                    Icons.mail,
                  ),
                  text: 'Inbox',
                ),
                Tab(
                  icon: Icon(
                    Icons.favorite,
                  ),
                  text: 'Favorites',
                ),
              ],
            ),
          ),
          body:  TabBarView(
            children: <Widget>[
              InboxScreen(),
              MyFavoritesScreen(),
            ],
          ),
        ),
      ),
    );
  }
}

class InboxScreen extends StatelessWidget{
  @override
  Widget build(BuildContext context) {

    return Scaffold(
      body: Container(
        child: Center(
          child: Text("Inbox"),
        ),
      ),
    );
  }

}

class MyFavoritesScreen extends StatelessWidget{
  @override
  Widget build(BuildContext context) {

    return Scaffold(
      body: Container(
        child: Center(
          child: Text("Favourite"),
        ),
      ),
    );
  }

}
|