How to get Rating Bar in Flutter
Build a Rating Bar in your Flutter app to collect product feedback or ratings. Follow this tutorial for an easy integration at rrtutors.com.
The most common thing when you are building an e-commerce app is having a rating bar it is useful to rate the products or can be used to get feedback in the app so, In this tutorial, we will see how you can get a rating bar in your flutter app.
Step 1: Create a new Flutter Application.
Step 2: Add a new dependency like this to your package's pubspec.yaml.
|
Step 3: Now that you have installed this package/plugin you can use a widget called RatingBar in Flutter with this you get various features such as
- Set minimum and maximum rating
- Any widgets can be used as rating bar/indicator items
- Different widgets can be used in the same rating bar as per position
- Supports vertical layout
- Glows on interaction
- Supports RTL mode
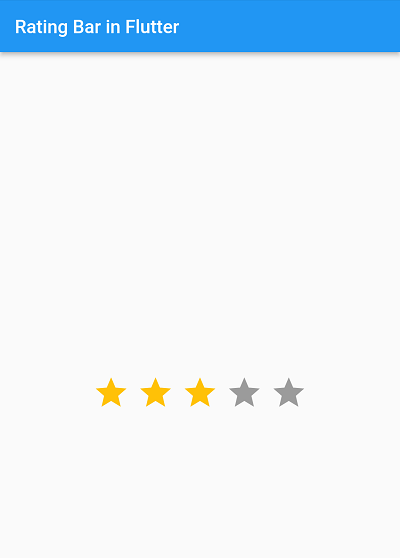
So for Example:
|
RatingBar.builder( initialRating: 3, minRating: 1, direction: Axis.horizontal, allowHalfRating: true, itemCount: 5, itemPadding: EdgeInsets.symmetric(horizontal: 4.0), itemBuilder: (context, _) => Icon( Icons.star, color: Colors.amber, ), onRatingUpdate: (rating) { print(rating); }, ), |
In the itemBuilder you can use any widget that you want as a Rating Bar for Example:
|
itemBuilder: (context, _) => Container( height: 30, width: 30, decoration: const BoxDecoration( shape: BoxShape.circle, gradient: LinearGradient( colors: [Colors.teal, Colors.tealAccent])), ), |
Complete Source Code to create Ratingbar like social rating in flutter
|
import 'package:flutter/material.dart'; import 'package:flutter_rating_bar/flutter_rating_bar.dart';
void main() => runApp(MyApp());
class MyApp extends StatelessWidget { const MyApp({Key? key}) : super(key: key);
@override Widget build(BuildContext context) { return MaterialApp( debugShowCheckedModeBanner: false, home: RatingAppDemo(), ); } }
class RatingAppDemo extends StatefulWidget { RatingAppDemo({Key? key}) : super(key: key);
@override _RatingAppDemoState createState() => _RatingAppDemoState(); }
class _RatingAppDemoState extends State { @override Widget build(BuildContext context) { return Scaffold( appBar: AppBar( title: Text('Rating Bar in Flutter'), ), body: Center( child: RatingBar.builder( initialRating: 3, minRating: 1, direction: Axis.horizontal, allowHalfRating: true, itemCount: 5, itemPadding: EdgeInsets.symmetric(horizontal: 4.0), itemBuilder: (context, _) => Icon( Icons.star, color: Colors.amber, ), onRatingUpdate: (rating) { print(rating); }, ), ), ); } }
|

Conclusion: So in this tutorial, we learned how you can get A simple yet fully customizable rating bar for Flutter