2 Beginner Flutter Project - Pong Game
Master SwiftUI with this tutorial. Learn how to create TextField, SecureField, TextEditor, and Button components for iOS app development on rrtutors.com.
Animations will play key role when developing the mobile applications. In this project we are going to create a Flutter game application which is a 2D game. While building this 2D game we will learn how animations will work inside flutter applications. We learn Flutter animations, animation controllers, Tween animations...
During this game development we will cover
Flutter stack and positioned widgets
Flutter Animation and Animation Controller to implement Tween Animation
Handle click events with GestureDetector widget
Let's get started
Step 1: Create new flutter application inside your favourite IDE, this app created under Android Studio
Step 2: Let's update default MyApp widgetto remove pre created code and add below code
void main() { runApp(MyApp()); } class MyApp extends StatelessWidget { // This widget is the root of your application. @override Widget build(BuildContext context) { return MaterialApp( title: 'Flutter Game', theme: ThemeData( primarySwatch: Colors.pink, ), home: Scaffold( appBar: AppBar( title: Text('Flutter Game'), ), body: Container() ); } } |
Now our game contains 3 major UI components Bat,Ball and Score on the screen, let's create three of them
Step 3: Create a new dart file for adding a Ball widget which is a StatelessWidget. This custom widget will contains a Container which decorate with BoxDecoration widget to make ball as a circle shape. By designing this Ball widget we cover how to create a Circle container flutter, if you want you can add borders to make circler container with border.
import 'package:flutter/material.dart'; class Pongball extends StatelessWidget{ double width; double height; Pongball(this.width,this.height); @override Widget build(BuildContext context) { return Container( width: width, height:height, decoration: BoxDecoration( color: Colors.white, shape: BoxShape.circle, ), ); } } |
Step 4: Now create other dart file for make PongBat which is a StatelessWidget.
import 'package:flutter/material.dart'; class PongBat extends StatelessWidget{ double width; double height; PongBat(this.width,this.height); @override Widget build(BuildContext context) { return Container( width: width, height: height, decoration: BoxDecoration( color: Colors.pink ), ); } } |
Step 5: Create Game Container, This Game container is Statefull widget which needs to handle the state of each movement of the bat and ball widgets.
class GameContainer extends StatefulWidget{ @override _GameContainerState createState() => _GameContainerState(); } class _GameContainerState extends State{ @override Widget build(BuildContext context) { return Container(); } } |
While Moving the ball we need to check how far the ball needs to move, ball should be inside our device width and height, then how can check the device width and height, to do this we will use LayoutBuilder widget. Let's replace Container with LayoutBuilder widget.
What is LayoutBuilder, a widget which needs to measure the layout width and height which returns space available in the current context including the parent Constraint. This LayoutBuilder widget requires a builder to construct the widgets.
return LayoutBuilder( builder: ( context, constraints) { return Stack(); }); |
Now let's add Creates Pong Bat and Ball widgets to Game container
LayoutBuilder(
        builder: (context,constraints){
          height = constraints.maxHeight;
          width = constraints.maxWidth;

          return Stack(
              children: [
                Positioned(child: Pongball(ballSize,ballSize),top: posY,
                  left: posX,
                ),
                Positioned(child: PongBat(batWidth,batHeight)),bottom: 0)
              ],
            );

        },
      )
|
Now our layout will be looks like below
 |
Step 6: Now to manage the bat and ball positions inside container let's add few fileds
double width; double height; double posX = 0; double posY = 0; double batWidth = 0; double batHeight = 0; double batPosition = 0; |
Update these values under Layoutbuilder
LayoutBuilder(
        builder: (context,constraints){
          height = constraints.maxHeight;
          width = constraints.maxWidth;
          batWidth = width / 5;
          batHeight = height / 20;
          return Stack(
children: [
 Positioned(child: Pongball(), top: 0),
 Positioned(
 bottom: 0,
 child: PongBat(batWidth, batHeight),
 )
 ],
)
          );
|
Step 7: Now We need to Create Animation to make ball and bat movement. So here we will use three animation classes called Animation, AnimationController and Tween which will be used to handle the positions of the bal and batt
let's initialize these under initState() method.
Animation<double> animation; AnimationController controller; @override void initState() { posX = 0; posY = 0; controller = AnimationController( duration: const Duration(seconds: 3), vsync: this, ); super.initState(); } |
here we added vsync property with this, so we need to add our Statefullwidget with SingleTickerProviderStateMixin. Mixin is a class which contains a methods used by other classes without extend the classes, so we will add this Mixin to the widget by with key word.
Ticker is a class that sends a signal at an almost regular interval, which, in Flutter, is about 60 times per second, or once every 16 milliseconds, if your device allows this frame rate
Now update our initState() to set the values for the posX and posY
animation = Tween<double>(begin: 0, end: 100).animate(controller);
animation.addListener(() {
 setState(() {
 posX++;
 posY++;
});
|
This posX and posY we will assign to out PonBall widget to change the position of the ball
To start animation we will use the controller object with forward() method
controller.forward(); |
Step 8: Now add game Logic to move the Ball and Bat
create a method checkBorder to handle the positions
void checkBorders() { double diameter = 30; if (posX <= 0 && hDir == Direction.left) { hDir = Direction.right; } if (posX >= width - diameter && hDir == Direction.right) { hDir = Direction.left; } if (posY >= height - diameter - batHeight && vDir == Direction.down) { //check if the bat is here, otherwise loose if (posX >= (batPosition - diameter) && posX <= (batPosition + batWidth + diameter)) { vDir = Direction.up; safeSetState(() { score++; }); } else { controller.stop(); showMessage(context); } } if (posY <= 0 && vDir == Direction.up) { vDir = Direction.down; } } |
Now to handle the Bat movements we will add PongBat inside GestureDetector widget
: GestureDetector( onHorizontalDragUpdate: (DragUpdateDetails update) => moveBat(update), child: PongBat(batWidth, batHeight)) ), |
Now to displose all events override dispose method
@override
void dispose() {
 controller.dispose();
 super.dispose();
}
|
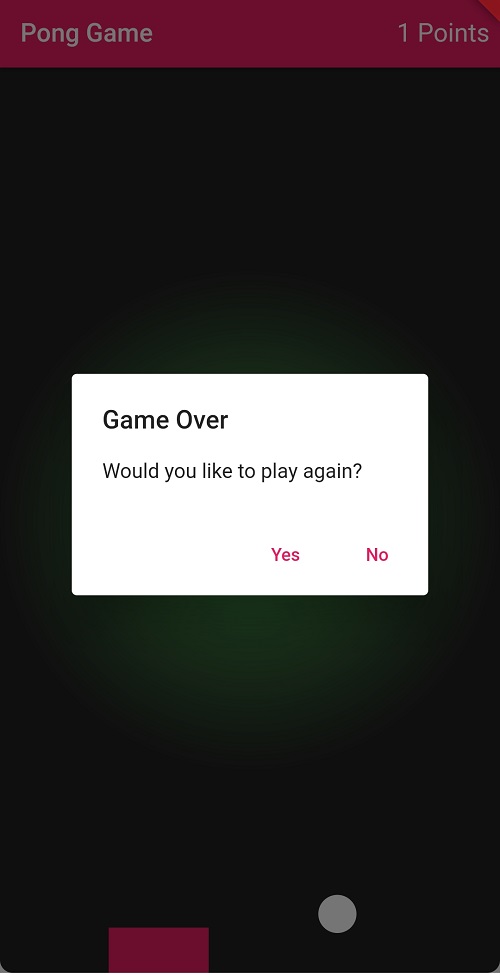
Step 9: Show Alert Message when game finished, so our AlertDialog will look like below
void showMessage(BuildContext context) { showDialog( context: context, builder: (BuildContext context) { return AlertDialog( title: Text('Game Over'), content: Text('Would you like to play again?'), actions: [ TextButton( child: Text('Yes'), onPressed: () { setState(() { posX = 0; posY = 0; score = 0; }); Navigator.of(context).pop(); controller.repeat(); }, ), TextButton( child: Text('No'), onPressed: () { Navigator.of(context).pop(); dispose(); }, ) ], ); }); } |
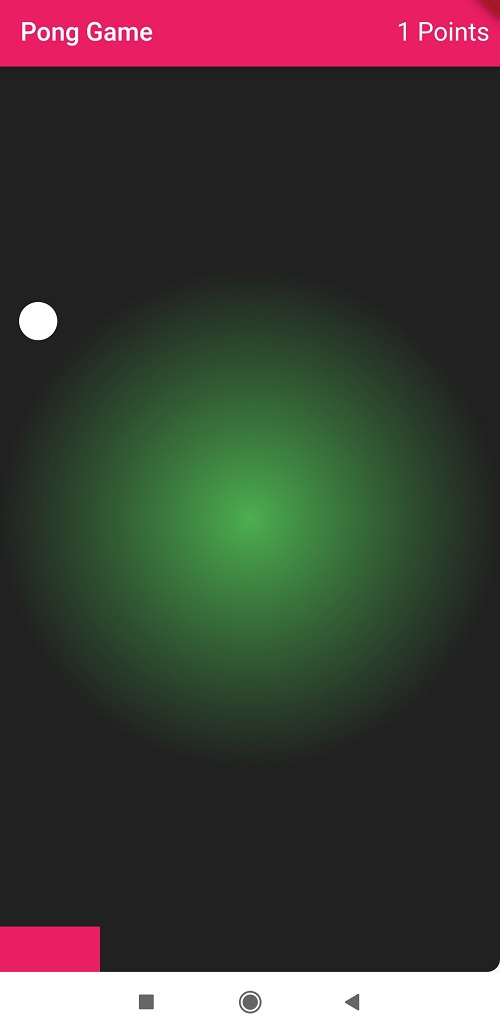
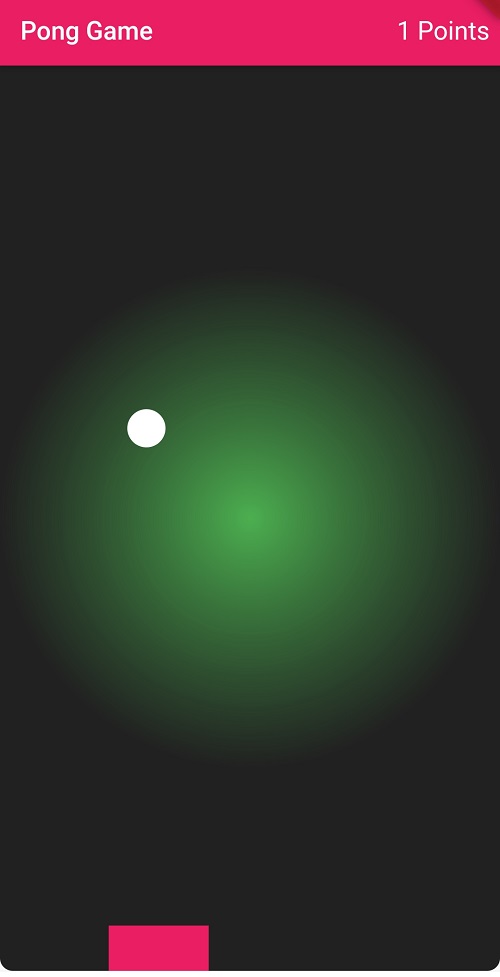
Now run the application, you can now play the Pong game with Bat and ball
 |
 |
Comple gameContainer code will be looks like below
import 'package:flutter/material.dart'; import 'package:flutter_pong_game/pongbat.dart'; import 'ball.dart'; class GameContainer extends StatefulWidget{ @override _GameContainerState createState() => _GameContainerState(); } class _GameContainerState extends State with SingleTickerProviderStateMixin { late double width; late double height; double posX = 0; double posY = 0; double batWidth = 0; double batHeight = 0; double batPosition = 0; late Animation<double> animation; late AnimationController controller; Direction vDir = Direction.down; Direction hDir = Direction.right; double ballSize=30; double increment = 5; int score = 0; @override void initState() { posX = 0; posY = 0; controller = AnimationController( duration: const Duration(minutes: 10000), vsync: this, ); animation = Tween<double>(begin: 0, end: 100).animate(controller); animation.addListener(() { safeSetState(() { (hDir == Direction.right)? posX += increment : posX -= increment; (vDir == Direction.down)? posY += increment : posY -= increment; }); checkBorders(); }); controller.forward(); super.initState(); } @override Widget build(BuildContext context) { return Scaffold( appBar: AppBar(title: Text("Pong Game"), actions: [ Padding( padding: const EdgeInsets.only(right:8.0), child: Center(child: Text("${score.toString()} Points" ,style: TextStyle(fontSize: 20),)), ) ],), body: LayoutBuilder( builder: (context,constraints){ height = constraints.maxHeight; width = constraints.maxWidth; batWidth = width / 5; batHeight = height / 20; return Container( decoration: BoxDecoration( gradient: RadialGradient( colors: [Colors.green,Colors.black87/* const Color(0xFF02BB9F)*/] ), borderRadius: BorderRadiusDirectional.only( bottomStart: Radius.circular(10),bottomEnd: Radius.circular(10))), child: Stack( children: [ Positioned(child: Pongball(ballSize,ballSize),top: posY, left: posX, ), Positioned(child: GestureDetector( onHorizontalDragUpdate: (DragUpdateDetails update) => moveBat(update), child: PongBat(batWidth,batHeight)),bottom: 0,left:batPosition) ], ), ); }, ), ); } @override void dispose() { controller.dispose(); super.dispose(); } void moveBat(DragUpdateDetails update) { safeSetState(() { batPosition += update.delta.dx; }); } void checkBorders() { double diameter = 30; if (posX <= 0 && hDir == Direction.left) { hDir = Direction.right; } if (posX >= width - diameter && hDir == Direction.right) { hDir = Direction.left; } if (posY >= height - diameter - batHeight && vDir == Direction.down) { //check if the bat is here, otherwise loose if (posX >= (batPosition - diameter) && posX <= (batPosition + batWidth + diameter)) { vDir = Direction.up; safeSetState(() { score++; }); } else { controller.stop(); showMessage(context); } } if (posY <= 0 && vDir == Direction.up) { vDir = Direction.down; } } void safeSetState(Function function) { if (mounted && controller.isAnimating) { setState(() { function(); }); } } void showMessage(BuildContext context) { showDialog( context: context, builder: (BuildContext context) { return AlertDialog( title: Text('Game Over'), content: Text('Would you like to play again?'), actions: [ TextButton( child: Text('Yes'), onPressed: () { setState(() { posX = 0; posY = 0; score = 0; }); Navigator.of(context).pop(); controller.repeat(); }, ), TextButton( child: Text('No'), onPressed: () { Navigator.of(context).pop(); dispose(); }, ) ], ); }); } } enum Direction { up, down, left, right } |
Conclusion: In this Flutter game application we covered how to create 2D game with flutter and how to use Animation , animation controllers with in flutter application.