Flutter GraphQl - How do i Integrate GrapQL Apis in Flutter
Flutter GraphQL API integration. Learn GraphQL queries, mutations, and integration in Flutter with tutorials on rrtutors.com. Start building now!
In this Flutter tutorial example we will cover What is GraphQL and how to integrate GraphQL Apis in flutter application.
What is GraphQL?
GraphQL is an open source technology which will be used at server side to create optimized APIs to replace REST apis. This GraphQL is developed by Facebook.
REST API contains multiple end points, where as GraphQL is single end point and Rest API will have the over fetching response which some of the response data not be used inside application, where as with GraphQL will fetch only required response.
When we are having more end points to work REST API might be difficulty to work, in that case GraphQL APIs will be more easy to implement. We can't decide which APIs we need to implements.
But in this example we are learning how to implement GraphQL APIs in flutter application.
Let's get started
Step 1: Create Flutter application in your IDE
Step 2: Add GraphQL plugin in pubspec.yaml file
graphql_flutter: ^5.0.0
|
Step 3: Let's discuss about what we are getting from GraphQL API.
We are fetching the API data from GraphQL Explorer. There we will find different types of data we can fetch/update/post GraphQL.
GraphQL mainly two types of operations will be there
- Query
- Mutation
Query: This GraphQL operation will be used to Read/Fetch data from the End point
Syntax:
query query_name{ Fields }
|
Mutation: This GraphQL operation will be used to write/post data to the End point.
mutation{
   editOperation(dataField:"valueOfField"):returnType
}
|
In this example we are implementing bot query and mutation operations. From the above GraphQL we are fetching the Users data and delete the existing users inside our application.
Step 4:
So let's create a User Model class
class User{ String id; String name; String? rocket; String? twitter; String? timestamp; User({required this.id,required this.name,required this.rocket,required this.twitter,required this.timestamp}); factory User.fromJson(Map<String,dynamic>json) { return User( id: json['id'], name: json['name'], rocket: json['rocket'], twitter: json['twitter'], timestamp: json['timestamp'], ); } } class Result{ List<User>userslist; Result({required this.userslist}); factory Result.fromJson(Map<String,dynamic>?json) { var userslists=List<User>.empty(growable: true); if(json!.containsKey("users")) { json["users"].forEach(( value) { userslists.add(User.fromJson(value)); }); } return Result(userslist:userslists); } } |
Step 5:
Create GraphQLClient Instance
To work with GraphQL we need to create GraphQL client object. This GraphQLClient will takes two parameters link and cache, where link is our api end point and cache will be the GraphQLCache.
GraphQLClient(link: httplink, cache: GraphQLCache()) |
We are created a dart class GraphQLConfiguration to create this instance
import 'package:graphql_flutter/graphql_flutter.dart'; class GQlConfiguration{ static HttpLink httplink=HttpLink("http://api.spacex.land/graphql"); GraphQLClient myQlClient(){ return GraphQLClient(link: httplink, cache: GraphQLCache()); } } |
Step 6:
Create Query class
To make GraphQL operations we are creating separate class called Query and adding our operations there
class Queries{ user(){ return ''' { users { id name rocket twitter timestamp } } '''; } delete() { return '''mutation { delete_users(where: {id: {_eq: \$id}}) { returning { id } } } '''; } } |
Here we added two operations one is for fetch users(query) and other is for delete user(mutation).
Now to call these operation we need to create GraphQLClient and call these operations respectively.
Queries _queries=Queries(); GQlConfiguration _graphql=GQlConfiguration(); |
GraphQLClient _client=_graphql.myQlClient(); QueryResult result=await _client.query(QueryOptions(document: gql(_queries.user()))); if(result.hasException) print("Result Exception ${result.exception}"); else { print("Result Data ${result.data}"); }
|
Step 7:
Implement UI with GraphQL
import 'package:flutter/cupertino.dart'; import 'package:flutter/material.dart'; import 'package:flutter_interactiview_viewer/quries.dart'; import 'package:flutter_interactiview_viewer/user_model.dart'; import 'package:graphql_flutter/graphql_flutter.dart'; import 'gql_client.dart'; class UsersScreens extends StatefulWidget{ @override _UsersScreensState createState() => _UsersScreensState(); } class _UsersScreensState extends State<UsersScreens> { Queries _queries=Queries(); GQlConfiguration _graphql=GQlConfiguration(); @override Widget build(BuildContext context) { return Scaffold( appBar: AppBar(backgroundColor: Colors.green,title: Text("GraphQL API"),), body: FutureBuilder(builder: (context,snapshot){ if(snapshot!=null&&snapshot.hasData) { var list=snapshot.data as Result; return ListView.builder( itemCount: list.userslist.length, itemBuilder: (ctx,index){ return Card( child: ListTile( leading: Icon(Icons.account_circle_rounded,color: Colors.green,size: 40,), title: Text(list.userslist[index].name,style: TextStyle(fontSize: 22),), trailing: InkWell(child: Icon(Icons.delete,color: Colors.red),onTap: ()async{ var result= await deleteUser(list.userslist[index].id); if(result) { setState(() { list.userslist.remove(index); }); } },),), ); }); } return Center(child: CircularProgressIndicator()); }, future: fetchUsers(), ), ); } Future fetchUsers() async{ GraphQLClient _client=_graphql.myQlClient(); QueryResult result=await _client.query(QueryOptions(document: gql(_queries.user()))); if(result.hasException) return null; else { //print("Result Data ${result.data!['users']}"); //Result.fromJson(result.data); return Result.fromJson(result.data); } } Future deleteUser(id) async { Map<String,dynamic>hm=Map(); hm['id']=id; GraphQLClient _client=_graphql.myQlClient(); QueryResult result=await _client.mutate(MutationOptions(document: gql(_queries.delete(id)),variables: hm)); if(result.hasException) return false; else { return true; } } } |
Step 8:
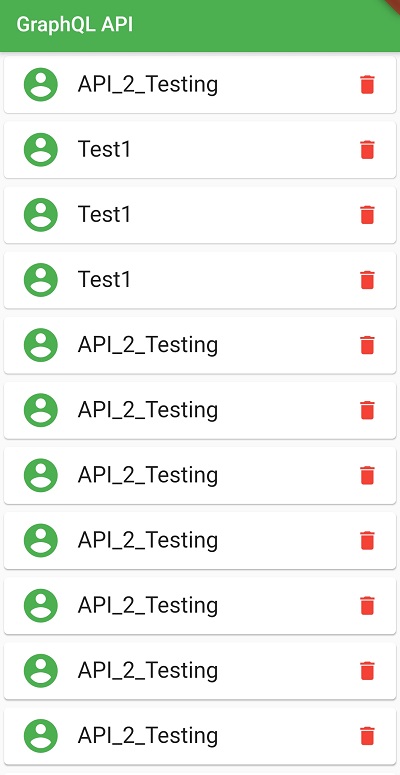
Let's run the application, you can see the list of users from the GraphQL API using query and you can also delete the user by using delete_user mutation operation
 |
Conclusion: In this flutter application we covered what is GraphQL and how to implement GraphQL apis inside flutter application with query and mutation operations.