Flutter Create Sticky Note UI
Create a sticky note UI in Flutter. Explore step-by-step guidance for building a customizable sticky note UI using Flutter at RRTutors. Check it out today!
Flutter is an open-source UI software development kit created by Google, so, In today's tutorial we will see how you can create a sticky note UI in Flutter
Let's start
Step 1: Create a new Flutter Application
Step 2: We will use a widget called CustomPaint that can be used to create a custom shape in Flutter and this widget has properties such as
|
CustomPaint CustomPaint({ |
where we will use a painter to create a sticky note UI and the child can be used to insert any widget or text on our sticky note.
Now for the painter, we can create a custom class that extends CustomPainter, where we will use the following functions
|
@override void paint(Canvas canvas, Size size) { } |
add
|
@override bool shouldRepaint(CustomPainter oldDelegate) { return oldDelegate != this; } |
inside your custom painter class.
Step 3: Now for drawing lines we can use path from Path as path.lineTo which can be used to create a line and as one of the corner on a sticky note has a curve upwards we can use path.quadraticBezierTo
for example our sticky note shape
|
void _drawNote(Size size, Canvas canvas, Paint gradientPaint) { Path path = new Path(); path.moveTo(0, 0); path.lineTo(size.width, 0); path.lineTo(size.width, size.height);
double foldAmount = 0.12; path.lineTo(size.width * 3 / 4, size.height);
path.quadraticBezierTo(size.width * foldAmount * 2, size.height, size.width * foldAmount, size.height - (size.height * foldAmount)); path.quadraticBezierTo( 0, size.height - (size.height * foldAmount * 1.5), 0, size.height / 4); path.lineTo(0, 0); canvas.drawPath(path, gradientPaint); } |
for our sticky note UI its also has a Gradient Color on it so we can use
|
Paint _createGradientPaint(Size size) { Paint paint = new Paint();
Rect rect = Rect.fromLTWH(0, 0, size.width, size.height); RadialGradient gradient = new RadialGradient( colors: [brighten(color), color], radius: 1.0, stops: [0.5, 1.0], center: Alignment.bottomLeft); paint.shader = gradient.createShader(rect); return paint; } |
we can also create a shadow for our UI using Canvas where it has a property called canvas.drawShadow
for example
|
void _drawShadow(Size size, Canvas canvas) { Rect rect = Rect.fromLTWH(12, 12, size.width - 24, size.height - 24); Path path = new Path(); path.addRect(rect); canvas.drawShadow(path, Colors.black.withOpacity(0.7), 12.0, true); } |
Step 4: Now all these functions can be used inside our void paint() method inside our custom painter class as
|
@override void paint(Canvas canvas, Size size) { _drawShadow(size, canvas); Paint gradientPaint = _createGradientPaint(size); _drawNote(size, canvas, gradientPaint); } |
Now that we have created our custom class we can use it inside a container
for example
|
Container( color: Colors.white, child: Center( child: SizedBox( width: 300, height: 300, child: StickyNote( child: Text( 'This is a Sticky note', style: TextStyle(color: Colors.black, fontSize: 16), ), )))); |
Complete example code for flutter sticky note ui
|
import 'dart:math'; import 'package:flutter/material.dart'; void main() { runApp(MyApp()); }
class MyApp extends StatelessWidget { @override Widget build(BuildContext context) { return MaterialApp( home: StickyNoteContainer(), ); } }
class StickyNoteContainer extends StatelessWidget { @override Widget build(BuildContext context) { return Container( color: Colors.white, child: Center( child: SizedBox( width: 300, height: 300, child: StickyNote( child: Text( 'This is a Sticky note', style: TextStyle(color: Colors.black, fontSize: 16), ), )))); } }
class StickyNote extends StatelessWidget { StickyNote({this.child, this.color = const Color(0xffffff00)});
final Widget child; final Color color;
@override Widget build(BuildContext context) { return Transform.rotate( angle: 0.01 * pi, child: CustomPaint( painter: StickyNotePainter(color: color), child: Center(child: child)), ); } }
class StickyNotePainter extends CustomPainter { StickyNotePainter({this.color});
Color color;
@override void paint(Canvas canvas, Size size) { _drawShadow(size, canvas); Paint gradientPaint = _createGradientPaint(size); _drawNote(size, canvas, gradientPaint); }
void _drawNote(Size size, Canvas canvas, Paint gradientPaint) { Path path = new Path(); path.moveTo(0, 0); path.lineTo(size.width, 0); path.lineTo(size.width, size.height);
double foldAmount = 0.12; path.lineTo(size.width * 3 / 4, size.height);
path.quadraticBezierTo(size.width * foldAmount * 2, size.height, size.width * foldAmount, size.height - (size.height * foldAmount)); path.quadraticBezierTo( 0, size.height - (size.height * foldAmount * 1.5), 0, size.height / 4); path.lineTo(0, 0);
canvas.drawPath(path, gradientPaint); }
Paint _createGradientPaint(Size size) { Paint paint = new Paint();
Rect rect = Rect.fromLTWH(0, 0, size.width, size.height); RadialGradient gradient = new RadialGradient( colors: [brighten(color), color], radius: 1.0, stops: [0.5, 1.0], center: Alignment.bottomLeft); paint.shader = gradient.createShader(rect); return paint; }
void _drawShadow(Size size, Canvas canvas) { Rect rect = Rect.fromLTWH(12, 12, size.width - 24, size.height - 24); Path path = new Path(); path.addRect(rect); canvas.drawShadow(path, Colors.black.withOpacity(0.7), 12.0, true); }
@override bool shouldRepaint(CustomPainter oldDelegate) { return oldDelegate != this; } }
Color brighten(Color c, [int percent = 30]) { var p = percent / 100; return Color.fromARGB( c.alpha, c.red + ((255 - c.red) * p).round(), c.green + ((255 - c.green) * p).round(), c.blue + ((255 - c.blue) * p).round()); }
|
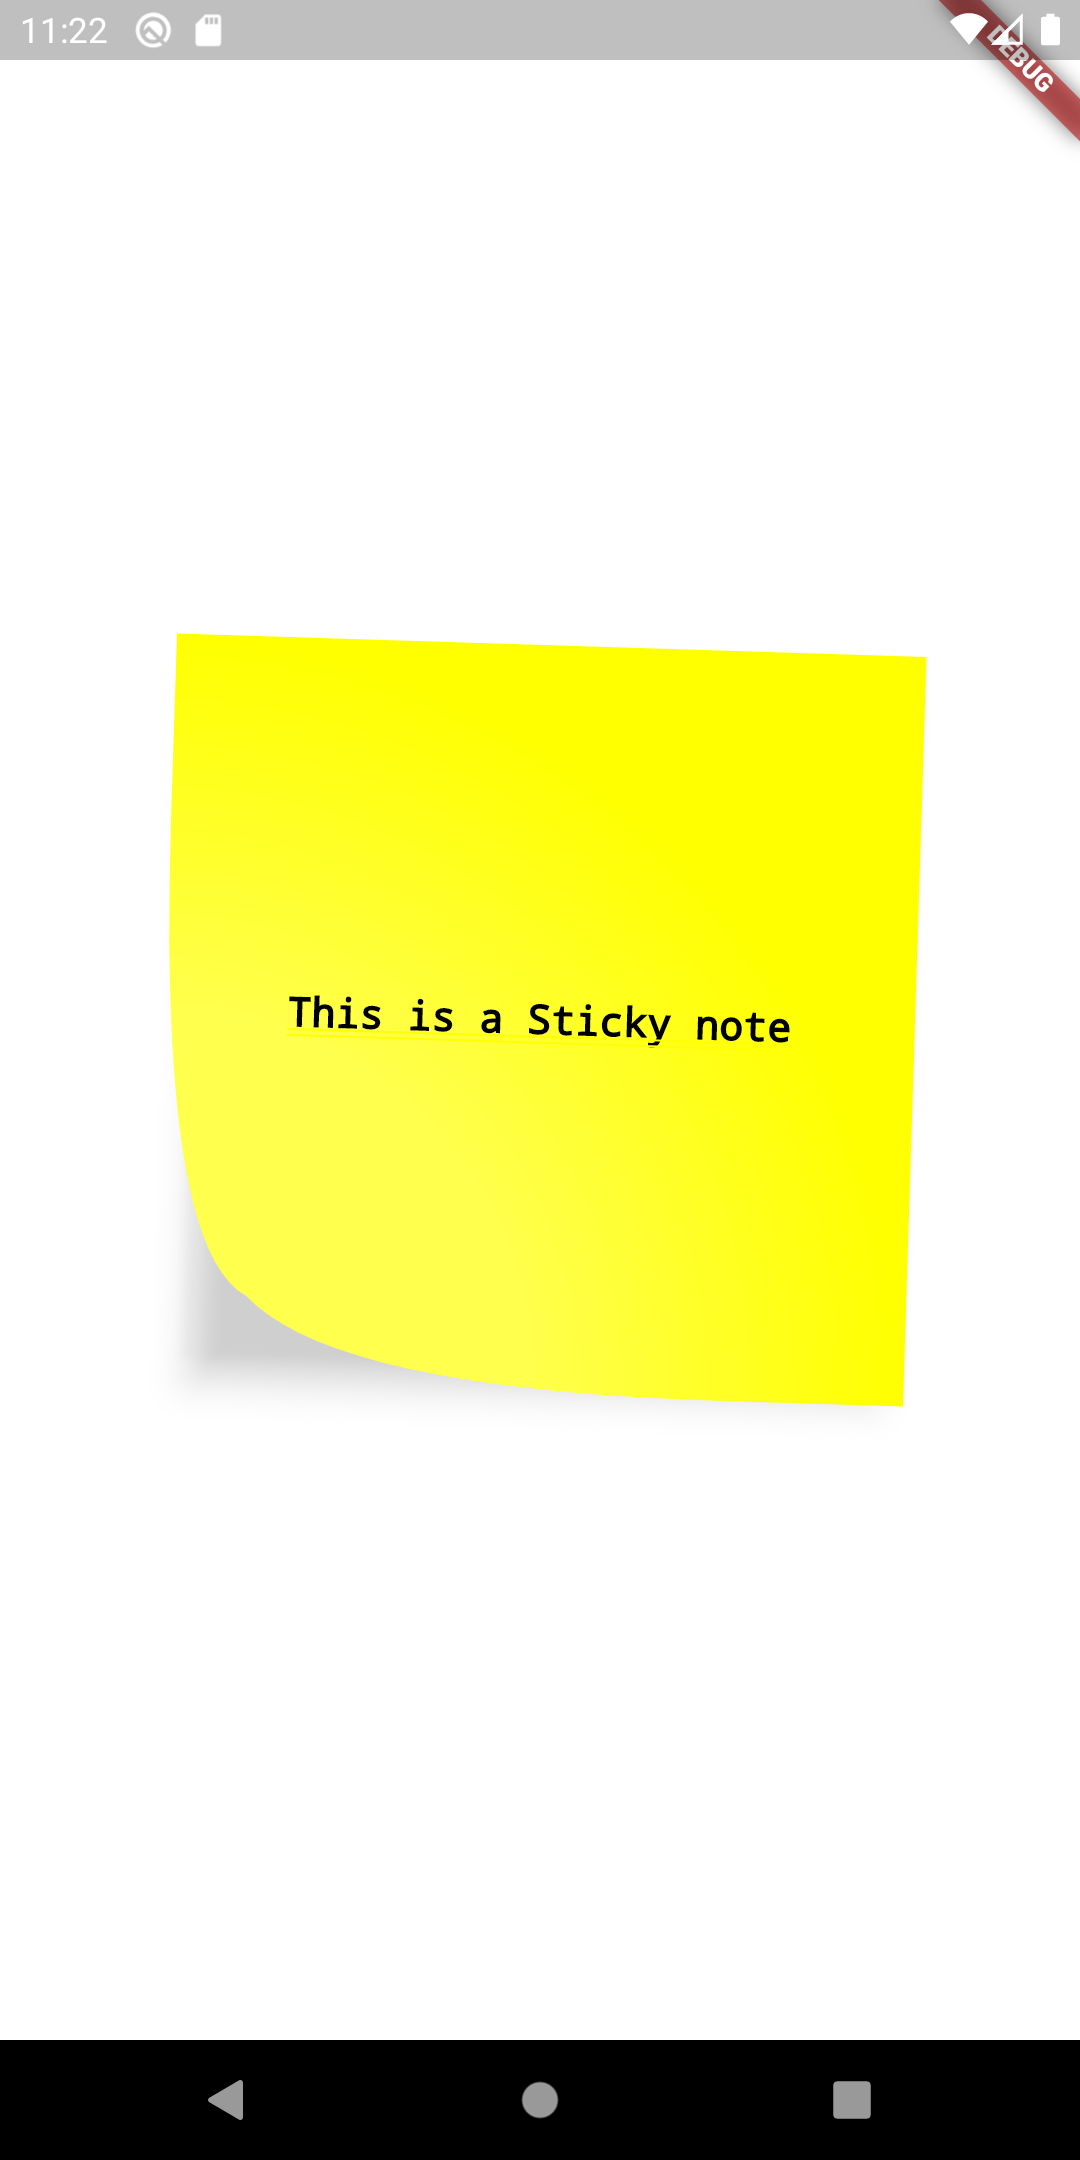
Output:
 |
 |
Conclusion: In this way, we have seen how you can use CustomPaint to create a Sticky Note UI in Flutter.