Flutter Payment gateway integration with Stripe
Integrate Stripe payment gateway in Flutter. Learn to process payments using cards and implement secure transactions. Check it out today! | RRTutors
In this flutter tutorial example we will cover how to integrate stripe payment method with flutter. Stripe is an online payment method which facilitates a payment processing.
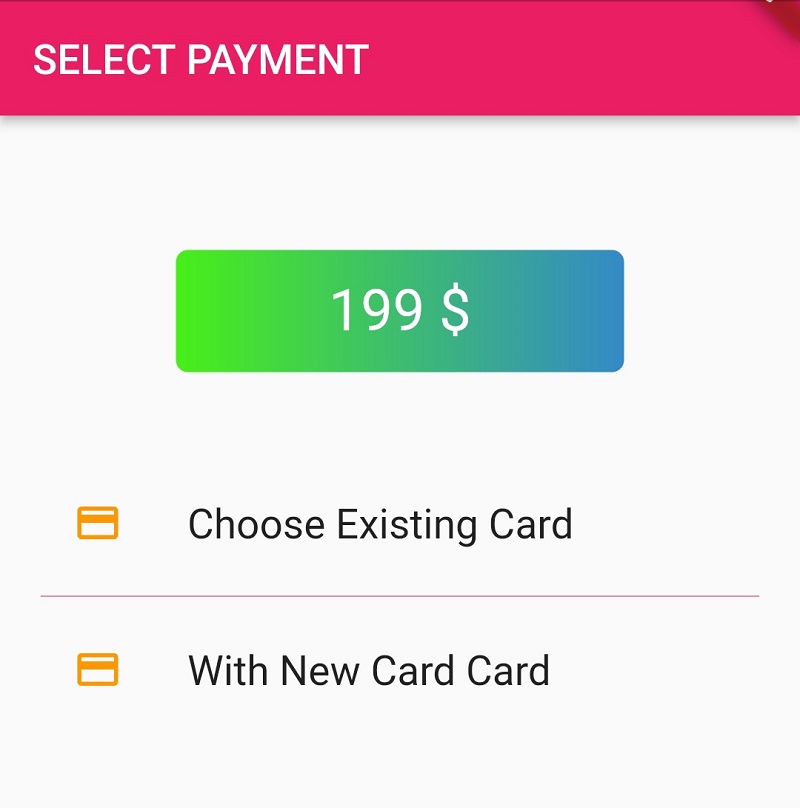
This example contains two methods one is user can pay amount by adding new card or pay by choosing an existing card.
Before start flutter application first we need to get Stripe payment keys which we can obtain from the Stripe dashboard, there we can find publishkey and secrete keys, copy these keys which we will use inside flutter application.
There you will find two modes, test and live, first check with test credentials.
Let's come to flutter part.
Step 1: Create Flutter application
Step 2: Add required dependencies in pubspec.yaml file
flutter: sdk: flutter flutter_credit_card: ^3.0.1 stripe_payment: ^1.1.4 http: ^0.13.4 |
Step 3: Add changes in android folder, go to build.gradle file under android->app directory and change minsdk version to 21
Step 4: Now create our UI for the home screen which will contains Amount to be paid and types of payment methods
 |
import 'package:flutter/material.dart'; import 'package:stripe_payment_gateway/payment.dart'; import 'dialog_button.dart'; class HomePage extends StatefulWidget { HomePage({Key? key}) : super(key: key); @override HomePageState createState() => HomePageState(); } class HomePageState extends State<HomePage> { List<String>card=List.empty(growable: true); bool isLoading=false; onItemPress(BuildContext context, int index) async { switch (index) { case 0: payViaNewCard(context); break; case 1: Navigator.pushNamed(context, '/existing-cards'); break; } } payViaNewCard(BuildContext context) async { //ProgressDialog dialog = new ProgressDialog(context); // dialog.style(message: 'Please wait...'); //await dialog.show(); setState(() { isLoading=true; }); var response = await StripeService.payWithNewCard(amount: '19900', currency: 'USD'); setState(() { isLoading=false; }); Scaffold.of(context).showSnackBar(SnackBar( content: Text(response.message), duration: Duration(milliseconds: 5000), )); } @override void initState() { super.initState(); StripeService.init(); card.add("With New Card Card"); card.add("Choose Existing Card"); } @override Widget build(BuildContext context) { ThemeData theme = Theme.of(context); return Scaffold( appBar: AppBar( title: Text('SELECT PAYMENT'), ), body: Container( padding: EdgeInsets.all(20), child: Stack( children: [ Column( children: [ SizedBox(height: 40,), DialogButton( width: 220, height: 60, child: Text( "${199} \$", style: TextStyle(color: Colors.white, fontSize: 28), ), onPressed: () { }, gradient: LinearGradient(colors: [ Color.fromRGBO(72, 239, 25, 1.0), Color.fromRGBO(52, 138, 199, 1.0) ]), ), SizedBox(height: 40,), ListView.separated( shrinkWrap: true, itemBuilder: (context, index) { Icon icon; Text text; switch (index) { case 0: icon = Icon(Icons.add_circle, color: theme.primaryColor); text = Text('Pay via new card'); break; case 1: icon = Icon(Icons.credit_card, color: theme.primaryColor); text = Text('Pay via existing card'); break; } return InkWell( onTap: () { onItemPress(context, index); }, child: ListTile( title: Text(card[index],style: TextStyle(fontSize: 20),), leading: Icon(Icons.credit_card_outlined,color: Colors.orange,), ), ); }, separatorBuilder: (context, index) => Divider( color: theme.primaryColor, ), itemCount: card.length), ], ), if(isLoading)Center(child: CircularProgressIndicator(),) ], ), ), ); } } |
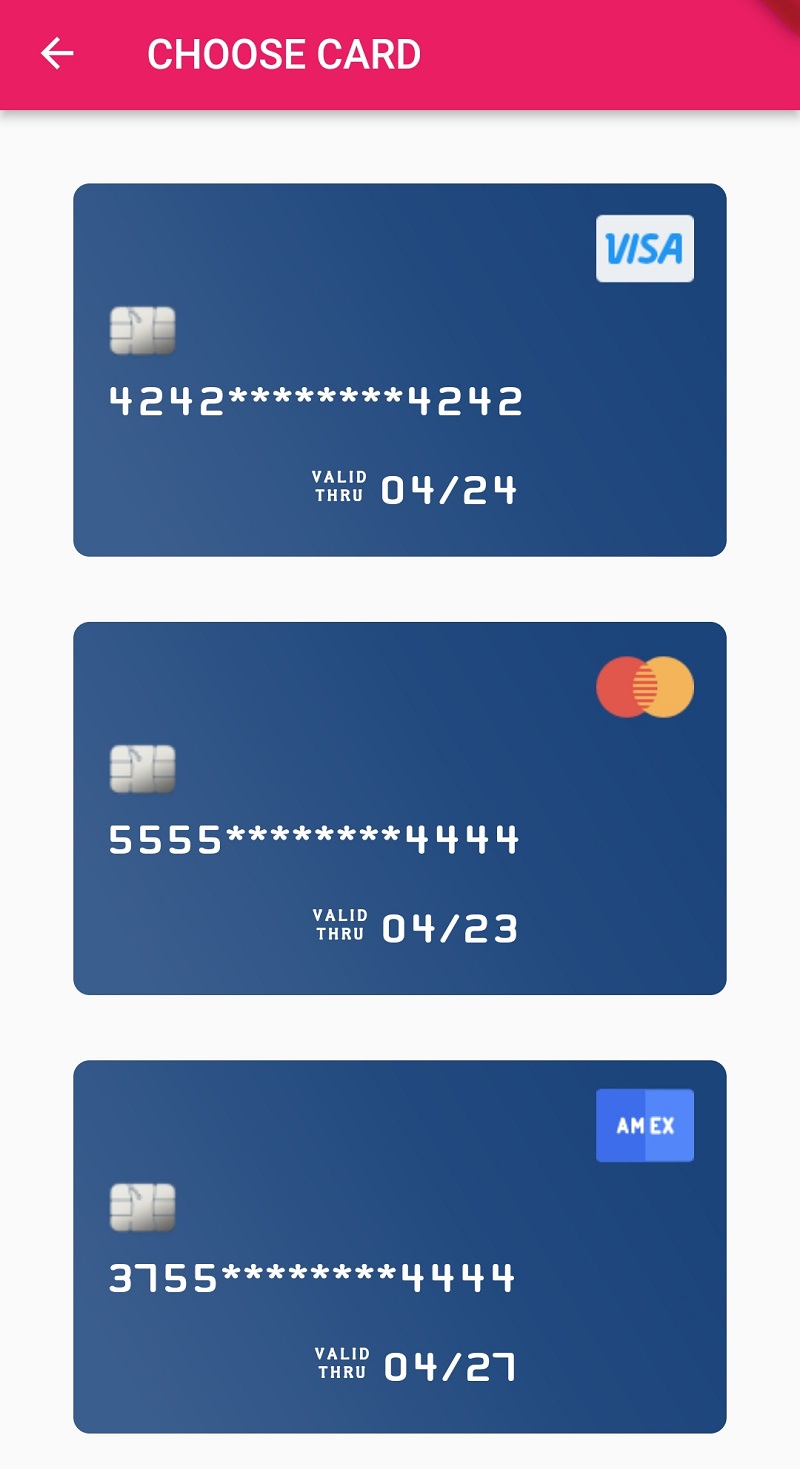
Step 5: Create Existing Cards UI
 |
import 'package:flutter/material.dart'; import 'package:flutter_credit_card/credit_card_widget.dart'; import 'package:stripe_payment/stripe_payment.dart'; import 'package:stripe_payment_gateway/payment.dart'; class ExistingCardsPage extends StatefulWidget { ExistingCardsPage({Key? key}) : super(key: key); @override ExistingCardsPageState createState() => ExistingCardsPageState(); } class ExistingCardsPageState extends State<ExistingCardsPage> { List cards = [ { 'cardNumber': '4242424242424242', 'expiryDate': '04/24', 'cardHolderName': 'John Doe', 'cvvCode': '424', 'showBackView': false, }, { 'cardNumber': '5555555566554444', 'expiryDate': '04/23', 'cardHolderName': 'Jerim Kaura', 'cvvCode': '123', 'showBackView': false, }, { 'cardNumber': '3755555566554444', 'expiryDate': '04/27', 'cardHolderName': 'Van Waler', 'cvvCode': '123', 'showBackView': false, } ]; payViaExistingCard(BuildContext context, card) async { // ProgressDialog dialog = new ProgressDialog(context); // dialog.style(message: 'Please wait...'); // await dialog.show(); var expiryArr = card['expiryDate'].split('/'); CreditCard stripeCard = CreditCard( number: card['cardNumber'], expMonth: int.parse(expiryArr[0]), expYear: int.parse(expiryArr[1]), ); var response = await StripeService.payViaExistingCard(amount: '2500', currency: 'USD', card: stripeCard); // await dialog.hide(); Scaffold.of(context) .showSnackBar(SnackBar( content: Text(response.message), duration: new Duration(milliseconds: 1200), )) .closed .then((_) { Navigator.pop(context); }); } @override Widget build(BuildContext context) { return Scaffold( appBar: AppBar( title: Text('CHOOSE CARD'), ), body: Container( padding: EdgeInsets.all(20), child: ListView.builder( itemCount: cards.length, itemBuilder: (BuildContext context, int index) { var card = cards[index]; return InkWell( onTap: () { payViaExistingCard(context, card); }, child: CreditCardWidget( cardNumber: card['cardNumber'], expiryDate: card['expiryDate'], cardHolderName: card['cardHolderName'], cvvCode: card['cvvCode'], showBackView: false, onCreditCardWidgetChange: (CreditCardBrand ) { }, ), ); }, ), ), ); } } |
Step 6: Create a Payment class which will handle all requires payment process.
import 'dart:convert'; import 'package:flutter/services.dart'; import 'package:http/http.dart' as http; import 'package:stripe_payment/stripe_payment.dart'; class StripeTransactionResponse { String message; bool success; StripeTransactionResponse({required this.message, required this.success}); } class StripeService { static String apiBase = 'https://api.stripe.com/v1'; static String paymentApiUrl = '${StripeService.apiBase}/payment_intents'; static String publishableKey="PUT_YOUR_PUBLISHBALE_KEY"; static String secret_key = 'PUT_YOUR_SECRET_KEY'; //your secret from stripe dashboard static Map<String, String> headers = { 'Authorization': 'Bearer ${secret_key}', 'Content-Type': 'application/x-www-form-urlencoded' }; static init() { StripePayment.setOptions(StripeOptions( publishableKey: publishableKey, merchantId: "Test", androidPayMode: 'test')); } static Future<StripeTransactionResponse> payViaExistingCard( {required String amount, required String currency, required CreditCard card}) async { try { var paymentMethod = await StripePayment.createPaymentMethod(PaymentMethodRequest(card: card)); var paymentIntent = await StripeService.createPaymentIntent(amount, currency); var response = await StripePayment.confirmPaymentIntent(PaymentIntent( clientSecret: paymentIntent!['client_secret'], paymentMethodId: paymentMethod.id)); if (response.status == 'succeeded') { return new StripeTransactionResponse(message: 'Transaction successful', success: true); } else { return new StripeTransactionResponse(message: 'Transaction failed', success: false); } } on PlatformException catch (err) { return StripeService.getPlatformExceptionErrorResult(err); } catch (err) { return new StripeTransactionResponse( message: 'Transaction failed: ${err.toString()}', success: false); } } static Future<StripeTransactionResponse> payWithNewCard({required String amount, required String currency}) async { try { var paymentMethod = await StripePayment.paymentRequestWithCardForm(CardFormPaymentRequest()); var paymentIntent = await StripeService.createPaymentIntent(amount, currency); var response = await StripePayment.confirmPaymentIntent(PaymentIntent( clientSecret: paymentIntent!['client_secret'], paymentMethodId: paymentMethod.id)); if (response.status == 'succeeded') { return new StripeTransactionResponse(message: 'Transaction successful', success: true); } else { return new StripeTransactionResponse(message: 'Transaction failed', success: false); } } on PlatformException catch (err) { return StripeService.getPlatformExceptionErrorResult(err); } catch (err) { return new StripeTransactionResponse( message: 'Transaction failed: ${err.toString()}', success: false); } } static getPlatformExceptionErrorResult(err) { String message = 'Something went wrong'; if (err.code == 'cancelled') { message = 'Transaction cancelled'; } return new StripeTransactionResponse(message: message, success: false); } static Future<Map<String, dynamic>?> createPaymentIntent(String amount, String currency) async { try { Map<String, dynamic> body = { 'amount': amount, 'currency': currency, 'payment_method_types[]': 'card' }; var response = await http.post(Uri.parse(StripeService.paymentApiUrl), body: body, headers: StripeService.headers); return jsonDecode(response.body); } catch (err) { print('err charging user: ${err.toString()}'); } return null; } } |
Step 7: Update main.dart file where we created route settings for the internal pages
import 'package:flutter/material.dart'; import 'package:stripe_payment_gateway/cards.dart'; import 'package:stripe_payment_gateway/dashboard.dart'; void main() => runApp(MyApp()); class MyApp extends StatelessWidget { @override Widget build(BuildContext context) { return MaterialApp( title: 'Flutter Demo', theme: ThemeData( primarySwatch: Colors.pink, ), initialRoute: '/home', routes: { '/home': (context) => HomePage(), '/existing-cards': (context) => ExistingCardsPage() }, ); } } |
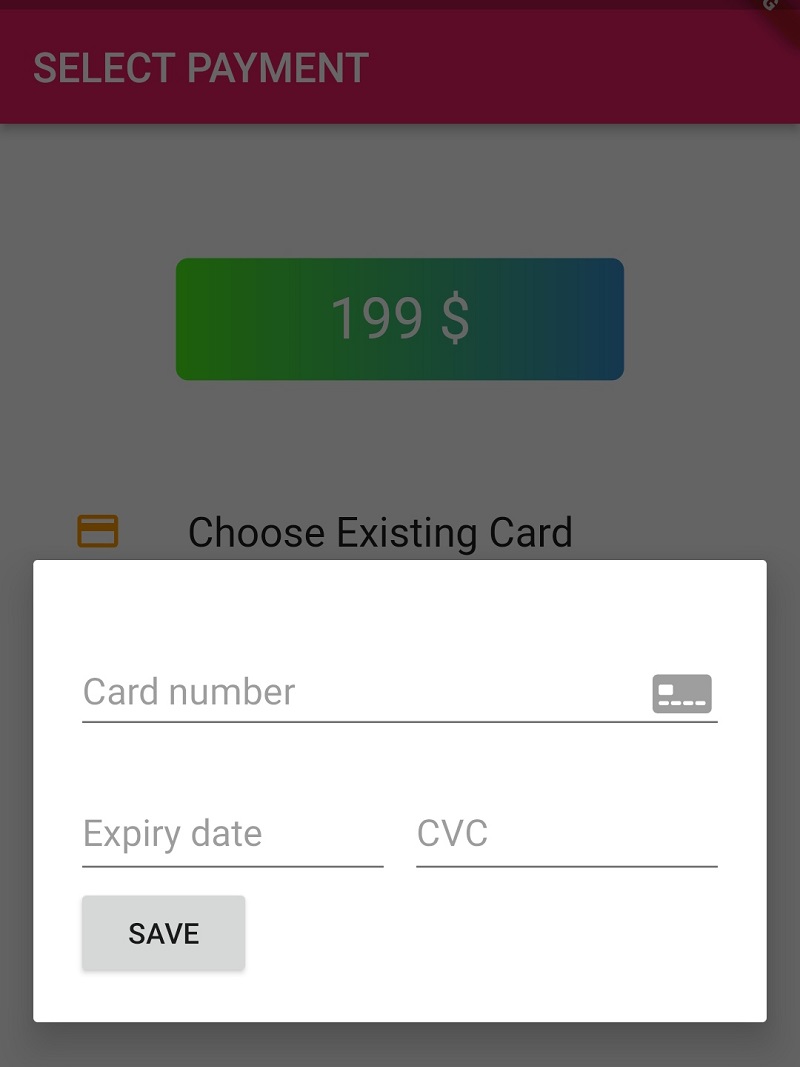
Step 8: Now run the application with you test keys. If you choose pay by new card then the screen will looks like below, you just add your card details and press save, then your payment process will done and return the result.
 |
On Each transaction of the payment status you can find in the Stripe Dashboard like below
Conclusion: In this flutter payment gateway integration we learned how to work with stripe payment gateway in flutter with test credentials, while you are working with production you might be add your keys at backend server and fetch them into mobile app and also integrate webhook at your backend to track the each transaction based on the Order ID in the server.
How do i integrate Razorpay Payment gateway in PHP Mysql website