FlutterHow do i create Elastic Drawer UI
Flutter create Elastic Animation drawer in a Flutter application. Learn to build animated drawers with tutorials on rrtutors.com. Start coding today!
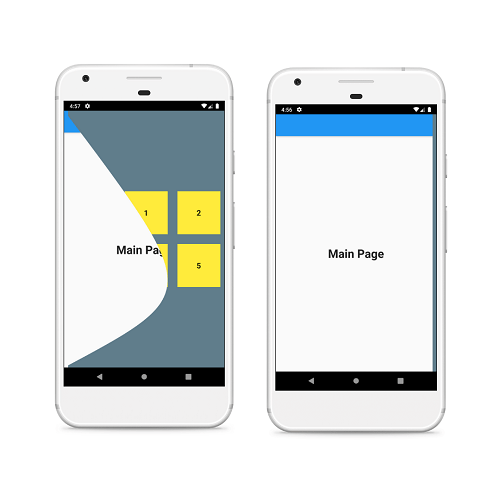
In this tutorial, we will see how you can get an Elastic panel that slides horizontally to show fully customized content in Flutter.
Let's Start
Step 1: Create a new Flutter Application.
Step 2: Add a line like this to your package's pubspec.yaml
|
Step 3: Now to have this Effect all you have to do is Wrap your Scaffold widget with a widget called ElasticDrawer.
for example:
|
child: ElasticDrawer( mainChild: Scaffold( appBar: AppBar(), ) ) |
Now as you see Elastic Drawer has two required parameters which are
- mainChild
- drawerChild
so, for main child you can add your widget that will be displayed first, and for drawer child can be any widget/screen that will be displayed when we drag it horizontally.
for example:
|
mainChild: Scaffold( appBar: AppBar(), body: const Center( child: Text( 'Main Page', style: TextStyle(fontWeight: FontWeight.bold, fontSize: 30.0), ), ), ), drawerChild: Column( mainAxisAlignment: MainAxisAlignment.center, children: [ GridView.count( crossAxisCount: 3, mainAxisSpacing: 5.0, crossAxisSpacing: 5.0, shrinkWrap: true, children: List.generate( 6, (index) { return Padding( padding: const EdgeInsets.all(10.0), child: Container( color: Colors.yellow, child: Center( child: Text( index.toString(), style: const TextStyle( fontSize: 20, fontWeight: FontWeight.bold), )), ), ); }, ), ) ], ) |
Complete Source Code to create Custom Elastic Drawer UI in flutter application
|
import 'package:flutter/material.dart'; import 'package:elastic_drawer/elastic_drawer.dart';
void main() => runApp(MyDrawer());
class MyDrawer extends StatelessWidget { @override Widget build(BuildContext context) { return MaterialApp( debugShowCheckedModeBanner: false, home: ElasticDemo(), ); } }
class ElasticDemo extends StatefulWidget { @override _ElasticDemoState createState() => _ElasticDemoState(); }
class _ElasticDemoState extends State { @override Widget build(BuildContext context) { return SafeArea( child: ElasticDrawer( mainColor: Colors.lightBlue, drawerColor: Colors.blueGrey, mainChild: Scaffold( appBar: AppBar(), body: const Center( child: Text( 'Main Page', style: TextStyle(fontWeight: FontWeight.bold, fontSize: 30.0), ), ), ), drawerChild: Column( mainAxisAlignment: MainAxisAlignment.center, children: [ GridView.count( crossAxisCount: 3, mainAxisSpacing: 5.0, crossAxisSpacing: 5.0, shrinkWrap: true, children: List.generate( 6, (index) { return Padding( padding: const EdgeInsets.all(10.0), child: Container( color: Colors.yellow, child: Center( child: Text( index.toString(), style: const TextStyle( fontSize: 20, fontWeight: FontWeight.bold), )), ), ); }, ), ) ], ))); } }
|
Output:
 |
Conclusion: In this way, we have learned how we can get elastic drawer effect in Flutter.