Flutter CSV 5.0.0 - Export List Data to CSV file
export List data to CSV file. To create CSV file we are going to use csv 5.0.0 package. To Export list data first we need to create a file in device storage then we need to pass list data to csv 5.0.0 library method
In this flutter example we are going to export List data to CSV file. To create CSV file we are going to use csv 5.0.0 package. To Export list data first we need to create a file in device storage then we need to pass list data to csv 5.0.0 library method
ListToCsvConverter().convert(employeeData). This will export data from list and convert it into csv file.
Let's get started
Step 1: Create Flutter application
Step 2: Add required dependencies in pubspec.yaml file
our final pubscpe.yaml file should be like this
name: flutter_csvfile description: A new Flutter application. # The following line prevents the package from being accidentally published to # pub.dev using `pub publish`. This is preferred for private packages. publish_to: 'none' # Remove this line if you wish to publish to pub.dev # The following defines the version and build number for your application. # A version number is three numbers separated by dots, like 1.2.43 # followed by an optional build number separated by a +. # Both the version and the builder number may be overridden in flutter # build by specifying --build-name and --build-number, respectively. # In Android, build-name is used as versionName while build-number used as versionCode. # Read more about Android versioning at https://developer.android.com/studio/publish/versioning # In iOS, build-name is used as CFBundleShortVersionString while build-number used as CFBundleVersion. # Read more about iOS versioning at # https://developer.apple.com/library/archive/documentation/General/Reference/InfoPlistKeyReference/Articles/CoreFoundationKeys.html version: 1.0.0+1 environment: sdk: ">=2.12.0 <3.0.0" dependencies: flutter: sdk: flutter csv: ^5.0.0 path_provider: ^2.0.2 permission_handler: ^7.1.0 # The following adds the Cupertino Icons font to your application. # Use with the CupertinoIcons class for iOS style icons. cupertino_icons: ^1.0.2 dev_dependencies: flutter_test: sdk: flutter |
Step 3: Add external storage permission in manifest file and check the file permission by
(await Permission.storage.request().isGranted) |
Step 4: Now create a file in storage directory to export list data to csv file
String dir = (await getExternalStorageDirectory())!.path + "/mycsv.csv"; String file = "$dir"; File f = new File(file); |
Step 4: Now its time to pass our list data object to ListToCsvConverter class by using convert() method.
Step 5: Run application
Complete main.dart file would be like below
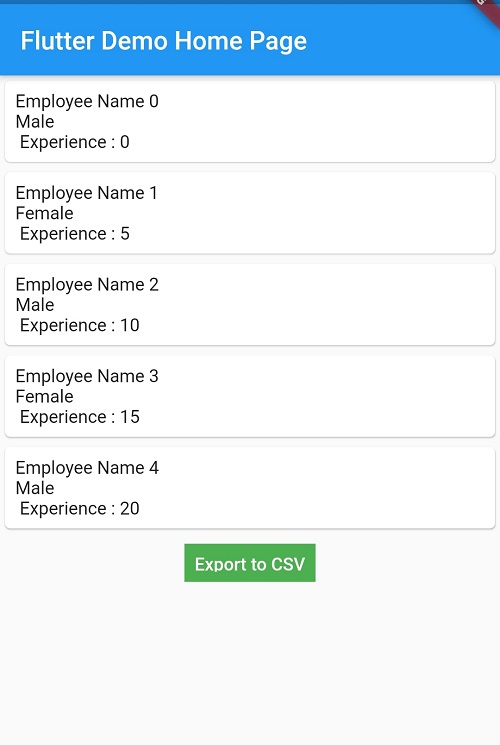
import 'dart:async'; import 'dart:convert'; import 'dart:io'; import 'package:csv/csv.dart'; import 'package:file_picker/file_picker.dart'; import 'package:flutter/material.dart'; import 'package:flutter/services.dart'; import 'package:path_provider/path_provider.dart'; import 'package:permission_handler/permission_handler.dart'; import 'csv_to_list.dart'; void main() { runApp(MyApp()); } class MyApp extends StatelessWidget { // This widget is the root of your application. @override Widget build(BuildContext context) { return MaterialApp( title: 'Flutter Demo', theme: ThemeData( primarySwatch: Colors.blue, ), home: MyHomePage(), ); } } class MyHomePage extends StatefulWidget { MyHomePage({Key? key}) : super(key: key); @override _MyHomePageState createState() => _MyHomePageState(); } class _MyHomePageState extends State<MyHomePage> { late List<List<dynamic>> employeeData; @override initState(){ //create an element rows of type list of list. All the above data set are stored in associate list //Let associate be a model class with attributes name,gender and age and associateList be a list of associate model class. employeeData = List<List<dynamic>>.empty(growable: true); for (int i = 0; i <5;i++) { //row refer to each column of a row in csv file and rows refer to each row in a file List<dynamic> row = List.empty(growable: true); row.add("Employee Name $i"); row.add((i%2==0)?"Male":"Female"); row.add(" Experience : ${i*5}"); employeeData.add(row); } } getCsv() async { if (await Permission.storage.request().isGranted) { //store file in documents folder String dir = (await getExternalStorageDirectory())!.path + "/mycsv.csv"; String file = "$dir"; File f = new File(file); // convert rows to String and write as csv file String csv = const ListToCsvConverter().convert(employeeData); f.writeAsString(csv); }else{ Map<Permission, PermissionStatus> statuses = await [ Permission.storage, ].request(); } } @override Widget build(BuildContext context) { return Scaffold( appBar: AppBar( // Here we take the value from the MyHomePage object that was created by // the App.build method, and use it to set our appbar title. title: Text("Flutter CSV Upload"), ), body: SingleChildScrollView( child: Column( mainAxisAlignment: MainAxisAlignment.spaceBetween, children: <Widget>[ ListView.builder( shrinkWrap: true, itemCount: employeeData.length, itemBuilder: (context,index){ return Card( child: Padding( padding: const EdgeInsets.all(8.0), child: Column( mainAxisAlignment: MainAxisAlignment.spaceBetween, crossAxisAlignment: CrossAxisAlignment.start, children: [ Text(employeeData[index][0]), Text(employeeData[index][1]), Text(employeeData[index][2]), ], ), ), ); }), Padding( padding: const EdgeInsets.all(8.0), child: Container( color: Colors.green, height: 30, child: TextButton( child: Text("Export to CSV",style: TextStyle(color: Colors.white),), onPressed: getCsv, ), ), ), ], ), ), // This trailing comma makes auto-formatting nicer for build methods. ); } } |
Conclusion: In this Post we cover how to create a file in device storage and export list data to CSV file with CSV5.0.0 package.