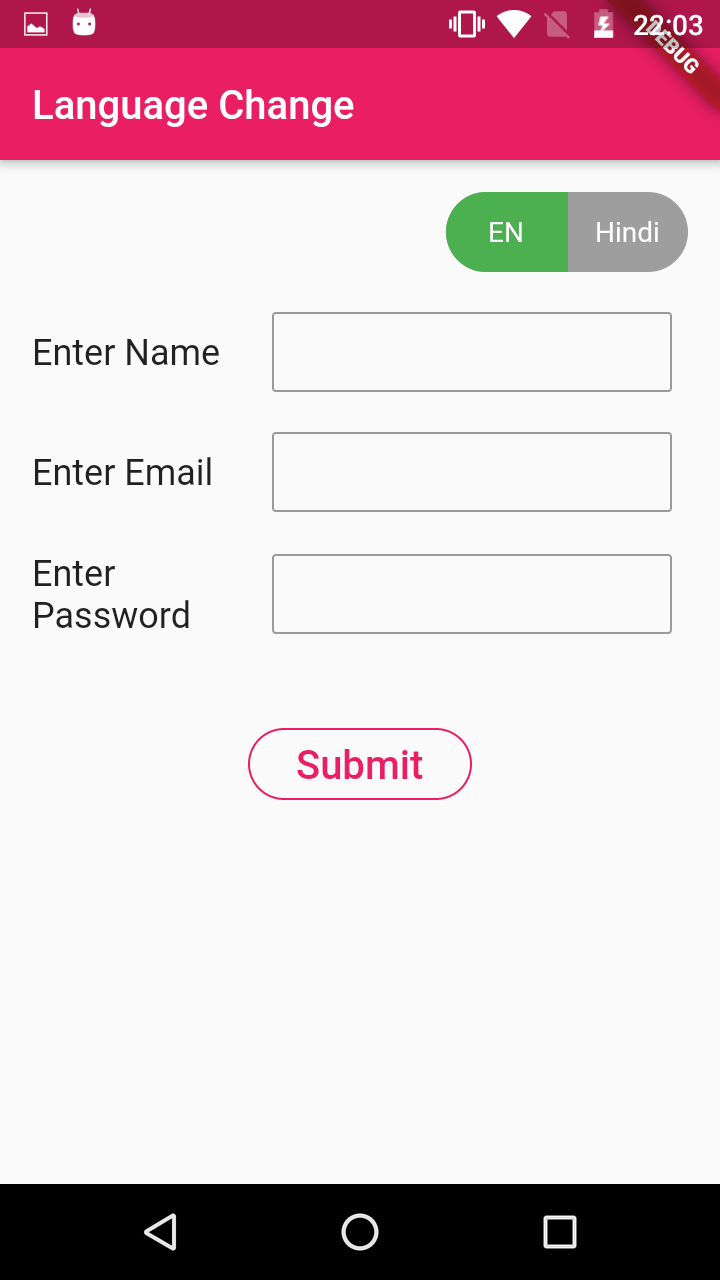
Localization Flutter - ChangeNotifier
Supporting multiple languages is the best practice. Let’s dive in detail to get your fullter app to support multiple languages
Supporting multiple languages is the best practice to connect with a large section of audiences
In this post we are going to learn how to change localization content with ChangeNotifier provider in flutter.
We are using the provider plugin to handle the selected language option.
Let’s take an example we will support two languages English and Hindi
Let's Start
Step 1: Create Flutter Application
Step 2: Add Dependencies
Add below dependencies in pubspec.yaml file
provider: 3.1.0+1
toggle_switch: "^0.1.4"
|
toggle_switch plugin in used for create custom toggle button.
Step 3: Create provider class
This class is use to handle the dynamic changes of the content
UpdateDataProvider.dart
import 'package:flutter/material.dart';

class UpdateDataProvider with ChangeNotifier{

  int lang_selected;
  UpdateDataProvider({this.lang_selected});
  set setLang(val)
  {
    lang_selected=val;
    notifyListeners();
  }

  get lang
  {
    return lang_selected;
  }
}
|
Step 4: Update main dart file
import 'package:flutter/material.dart';
import 'package:flutter_languagechange/updateData.dart';
import 'package:provider/provider.dart';
import 'package:toggle_switch/toggle_switch.dart';

void main() => runApp(
    ChangeNotifierProvider(builder: (_){
      return UpdateDataProvider(lang_selected: 0);
    },child: MyLangState(),)
);

/*class MyLang extends StatelWidget{
  @override
  State createState() {
    // TODO: implement createState
    return MyLangState();
  }


}*/

class MyLangState extends StatelessWidget
{
  @override
  Widget build(BuildContext context) {
    final dataProvider = Provider.of(context);
    return MaterialApp(
      home: Scaffold(
        appBar: AppBar(title: Text("Language Change"),backgroundColor: Colors.pink,),
        body: Container(
          margin: EdgeInsets.all(16),
          child: Column(
            children: [
              Row(
                mainAxisAlignment: MainAxisAlignment.end,

                children: [
                  ToggleSwitch(
                      minWidth: 60.0,
                      cornerRadius: 20,
                      activeBgColor: Colors.green,
                      activeTextColor: Colors.white,
                      inactiveBgColor: Colors.grey,
                      inactiveTextColor: Colors.white,
                      labels: ['EN', 'Hindi'],

                      onToggle: (index) {
                        dataProvider.setLang=index;
                      }),
                ],
              ),
              SizedBox(height: 20,),
          Row(

            mainAxisSize: MainAxisSize.max,
            children: [
              Container(width:100,child: Text((dataProvider.lang==0)?"Enter Name":"??? ????",style: TextStyle(fontSize: 18))),
            SizedBox(width: 20,),
            Container(
              width: 200,
                height: 40,
                child: TextField(decoration: InputDecoration(border: OutlineInputBorder(borderRadius:BorderRadius.circular(2))),))
            ],
          ),
              SizedBox(height: 20,),
              Row(

                mainAxisSize: MainAxisSize.max,
                children: [
                  Container(width:100,child: Text((dataProvider.lang==0)?"Enter Email":"???? ???? ????",style: TextStyle(fontSize: 18))),
                  SizedBox(width: 20,),
                  Container(
                      width: 200,
                      height: 40,
                      child: TextField(decoration: InputDecoration(border: OutlineInputBorder(borderRadius:BorderRadius.circular(2))),))
                ],
              ),
              SizedBox(height: 20,),
              Row(

                mainAxisSize: MainAxisSize.max,
                children: [
                  Container(width:100,child: Text((dataProvider.lang==0)?"Enter Password":"??? ???? ???? ????",style: TextStyle(fontSize: 18),)),
                  SizedBox(width: 20,),
                  Container(
                      width: 200,
                      height: 40,
                      child: TextField(decoration: InputDecoration(border: OutlineInputBorder(borderRadius:BorderRadius.circular(2))),))
                ],
              ),
              SizedBox(height: 40,),
              FlatButton(
                child: Container(width:80,child: Center(child: Text((dataProvider.lang==0)?"Submit":"????????",style: TextStyle(color: Colors.pink,fontSize: 20),))),
                shape: RoundedRectangleBorder(

                    borderRadius: BorderRadius.circular(18),side: BorderSide(color: Colors.pink)),
              )
            ],
          ),

        ),
      ),
    );
  }

}
|
Step 5: Run application