How do I Capture Video from Camera in Flutter and Play Video
Flutter capture video and play recorded video using videoplayer| Record and play videos in Flutter using the videoplayer plugin with guide on rrtutors.com.
In this flutter tutorial example we will create Capture Video from camera in Flutter application. To capture video we will use imagepicker library.
After video recorded from camera we are going to play the recorded video using Video Player library.
Let's get started
Step 1: Create flutter application
Step 2: Add required plugins to pubspec.yaml file
video_player: ^2.2.7 image_picker: ^0.8.4+4 |
Step 3: Create sample UI to open camera and play recorded vided
Scaffold( appBar: AppBar(title: Text("Flutter Video Capture"),), body: Column( children: [ IconButton( onPressed: () { }, icon: Icon(Icons.video_call_rounded,color: Colors.green,size:50), ), Text("Capture Video",style: TextStyle(color:AppColors.technoBlack),), Container( height: 200.h, child: _previewVideo()), (isCaptured)?DialogButton( width: 120, child: Text( "Submit Object", style: TextStyle(color: Colors.white, fontSize: 18), ), onPressed: () { Navigator.pop(context); } , color: Color.fromRGBO(0, 179, 134, 1.0), ):SizedBox.shrink(), ], ), ) |
Step 4: To capture video we will call below function to open camera and from there we can record video.
After record completed we will get back to the screen and will get the recorded video file
async{
  final XFile? file = await _picker.pickVideo(
      source: ImageSource.camera, );
  setState(() {
    isCaptured=true;
  });
  _playVideo(file);
  print("Video Path ${file!.path}");
}
|
We can also set the Time limit for record video by using below code
_picker.pickVideo(
    source: ImageSource.camera, maxDuration: const Duration(seconds: 10))
|
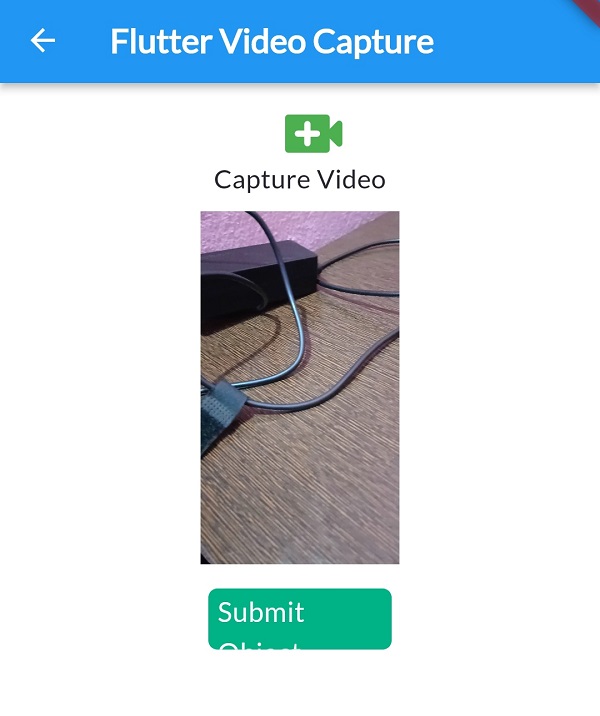
Step 5: Now let's run application and you can able to capture video and play the recorded video
 |
Complete example code to record video using camera in flutter application
class VideoCapture extends StatefulWidget{
  String id;
  VideoCapture( this.id);
  @override
  State<VideoCapture> createState() => _VideoCaptureState();
}

class _VideoCaptureState extends State<VideoCapture> {
  final ImagePicker _picker = ImagePicker();
  VideoPlayerController? _controller;
  bool isCaptured=false;
  @override
  Widget build(BuildContext context) {


    return Scaffold(

      appBar: AppBar(title: Text("Flutter Video Capture"),),
      body: Column(
        children: [
          IconButton(
            onPressed: () async{
              final XFile? file = await _picker.pickVideo(
                  source: ImageSource.camera, maxDuration: const Duration(seconds: 10));
              setState(() {
                isCaptured=true;
              });
              _playVideo(file);
              print("Video Path ${file!.path}");
            },
            icon: Icon(Icons.video_call_rounded,color: Colors.green,size:50),
          ),
          Text("Capture Video",style: TextStyle(color:AppColors.technoBlack),),
          Container(
              height: 200.h,
              child: _previewVideo()),
          (isCaptured)?DialogButton(
            width: 120,
            child: Text(
              "Submit Object",
              style: TextStyle(color: Colors.white, fontSize: 18),
            ),
            onPressed: () {
              Navigator.pop(context);

            } ,
            color: Color.fromRGBO(0, 179, 134, 1.0),
          ):SizedBox.shrink(),
        ],
      ),
    );
  }
  Widget _previewVideo() {

    if (_controller == null) {
      return const Text(
        'You have not yet picked a video',
        textAlign: TextAlign.center,
      );
    }
    return Padding(
      padding: const EdgeInsets.all(10.0),
      child: AspectRatioVideo(_controller),
    );
  }


  Future<void> _playVideo(XFile? file) async {
    if (file != null && mounted) {
      print("Loading Video");
      await _disposeVideoController();
      late VideoPlayerController controller;
      /*if (kIsWeb) {
        controller = VideoPlayerController.network(file.path);
      } else {*/
      controller = VideoPlayerController.file(File(file.path));
      //}
      _controller = controller;
      // In web, most browsers won't honor a programmatic call to .play
      // if the video has a sound track (and is not muted).
      // Mute the video so it auto-plays in web!
      // This is not needed if the call to .play is the result of user
      // interaction (clicking on a "play" button, for example).

      //await controller.setVolume(volume);
      await controller.initialize();
      await controller.setLooping(true);
      await controller.play();
      setState(() {});
    }
    else
    {
      print("Loading Video error");
    }
  }
  Future<void> _disposeVideoController() async {
    /*  if (_toBeDisposed != null) {
      await _toBeDisposed!.dispose();
    }
    _toBeDisposed = _controller;*/
    if (_controller != null) {
      await _controller!.dispose();
    }
    _controller = null;
  }
}


class AspectRatioVideo extends StatefulWidget {
  AspectRatioVideo(this.controller);

  final VideoPlayerController? controller;

  @override
  AspectRatioVideoState createState() => AspectRatioVideoState();
}

class AspectRatioVideoState extends State<AspectRatioVideo> {
  VideoPlayerController? get controller => widget.controller;
  bool initialized = false;

  void _onVideoControllerUpdate() {
    if (!mounted) {
      return;
    }
    if (initialized != controller!.value.isInitialized) {
      initialized = controller!.value.isInitialized;
      setState(() {});
    }
  }

  @override
  void initState() {
    super.initState();
    controller!.addListener(_onVideoControllerUpdate);
  }

  @override
  void dispose() {
    controller!.removeListener(_onVideoControllerUpdate);
    super.dispose();
  }

  @override
  Widget build(BuildContext context) {
    if (initialized) {
      return Center(
        child: AspectRatio(

          aspectRatio: controller!.value.aspectRatio,
          child: VideoPlayer(controller!),
        ),
      );
    } else {
      return Container();
    }
  }
}
|
Conclusion: In this Flutter tutorial example we covered capture video from camera and play recorded video using video player library.